Your jacket isn’t leaking; its complex moisture management system is being overwhelmed by a physical process you can learn to control.
- Your body produces far more moisture during heavy exertion (over 1 liter/hour) than any « breathable » fabric can possibly vent.
- When the outer fabric gets saturated (a state called ‘wet-out’), your jacket’s breathability drops to near zero, causing your sweat to condense on the cold inner surface.
Recommendation: True dryness isn’t about buying a better jacket, but mastering the physics. Prioritize mechanical venting (like pit zips) and meticulous DWR maintenance to actively manage your personal « moisture budget » and defeat condensation before it starts.
It’s a frustratingly common scenario for any hiker. Two hours into a downpour, you start to feel that dreaded clammy, damp sensation spreading across your shoulders and back. Your first thought is always the same: « My expensive waterproof jacket is leaking again. » You feel betrayed by the technology you paid a premium for. The common advice you hear is to wash it, re-apply a waterproofing spray, or maybe just buy a better one. These are part of the solution, but they miss the fundamental reason you feel wet.
The truth is, in most cases, your jacket isn’t leaking at all. The culprit is a far more subtle and powerful force: the physics of condensation. Your body is a high-output furnace, and when you’re working hard on the trail, you’re waging a war against your own humidity. The feeling of being soaked is not a failure of the jacket’s waterproofing, but a sign that its breathability—its moisture management system—has been completely overwhelmed. This is not a gear problem; it’s a systems management problem.
But what if you could take back control? What if, by understanding the interplay between your body, your jacket, and the environment, you could manage this system like an expert? This article will demystify the science behind why you feel wet in a « waterproof » jacket. We will move beyond the simplistic advice and equip you with the knowledge to manage your moisture budget, leverage your gear’s features effectively, and finally achieve a new level of comfort and dryness on the trail.
Contents: Why Your Waterproof Jacket Really Fails
- Why DWR failure makes you feel wet from sweat condensation?
- How to wash and heat-treat your jacket to restore beading?
- Gore-Tex vs PU coating: Which lasts longer under heavy backpack straps?
- Pit zips vs Front zipper: Which vents heat faster during climbs?
- When to choose a poncho: The airflow advantage everyone ignores
- How to waterproof your existing gear for under $20?
- When to rinse gear: The maintenance schedule to prevent corrosion
- Hiking Boots: How to Prevent Blisters on Day 1 of Your Trek?
Why DWR failure makes you feel wet from sweat condensation?
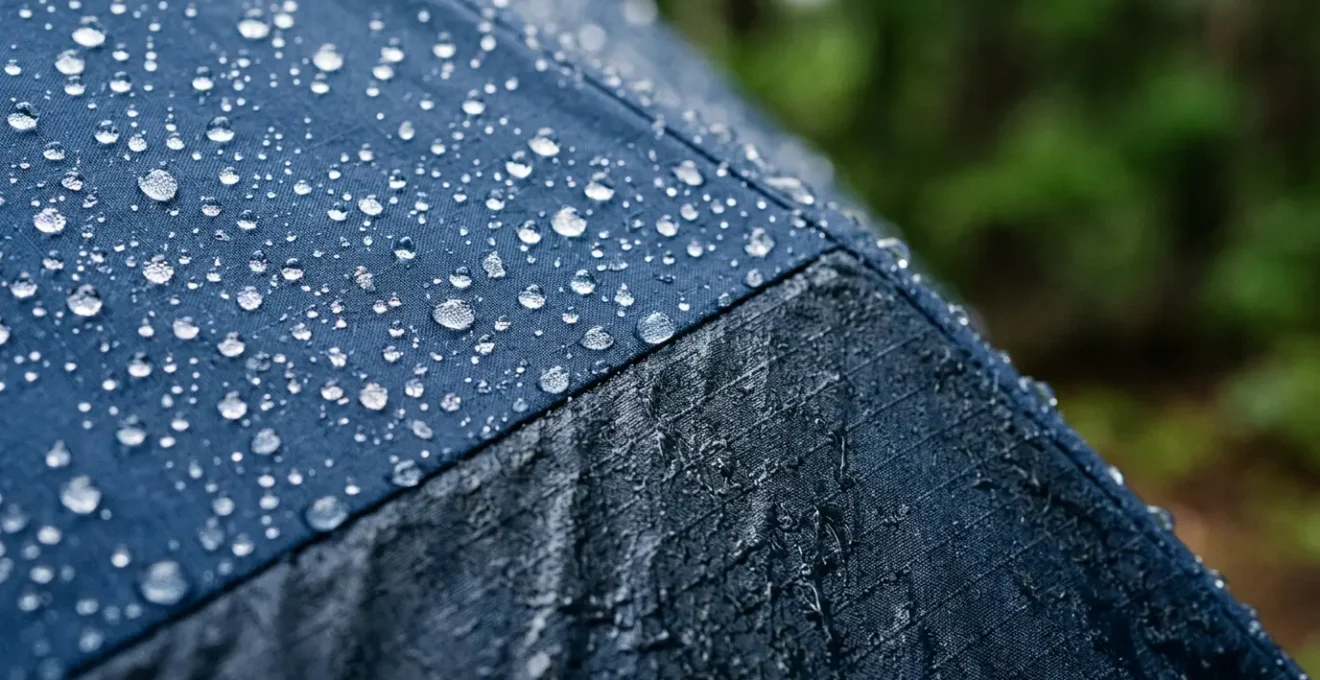
The initial sensation of wetness inside your jacket isn’t rain seeping through; it’s the internal climate of your jacket collapsing. This collapse begins with the failure of the Durable Water Repellent (DWR) finish. DWR is a chemical treatment on the outermost layer of your jacket designed to make water bead up and roll off. Its primary job is not waterproofing—that’s the membrane’s role—but to enable breathability. When DWR works, the face fabric stays dry, allowing water vapor (sweat) from your body to pass through the membrane. But when DWR fails due to dirt, oil, or wear, the outer fabric absorbs water and becomes saturated. This state is called « wet-out. »
A wetted-out jacket creates a « cold wall » effect. The saturated outer fabric, chilled by rain and wind, dramatically lowers the temperature of the jacket’s surface. Inside, your body is still generating immense heat and humidity. In fact, research shows that an active hiker can produce over 1 liter of sweat per hour, a volume of moisture far exceeding the maximum Moisture Vapor Transmission Rate (MVTR) of even the most advanced fabrics. This warm, moist air from your body hits the cold inner surface of the now non-breathable jacket and has nowhere to go. It instantly condenses from vapor into liquid water, just like your breath on a cold window.
This process is visualized below. The temperature difference between your warm body and the cold, wet exterior fabric creates the perfect conditions for condensation to form on the inside of the jacket, leaving you feeling just as soaked as if it had a hole in it.
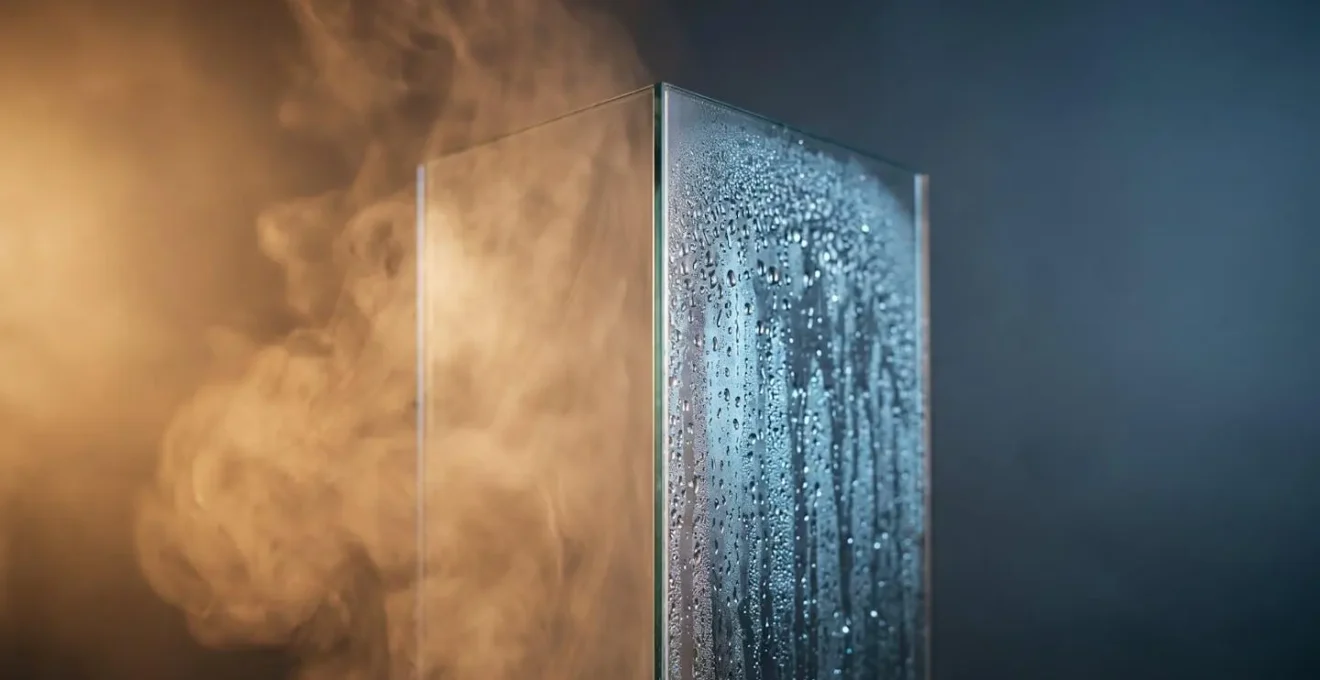
Suddenly, you’re not just fighting the rain outside, but also a self-generated downpour on the inside. This is why a jacket can feel completely waterproof when you’re standing still, but feel like a sieve the moment you start climbing a hill in the rain. It’s not a leak; it’s your own sweat condensing faster than the jacket’s overwhelmed system can manage.
How to wash and heat-treat your jacket to restore beading?
Restoring your jacket’s performance is a crucial maintenance task that revives the DWR and, by extension, its breathability. The process isn’t just about cleaning; it’s a specific technical procedure to remove contaminants and reactivate the water-repellent polymers. Regular laundry detergents are the enemy here. They contain hydrophilic (water-attracting) surfactants and plasticizers that leave a residue, effectively masking the DWR and encouraging the fabric to wet-out even faster. Instead, you must use a technical cleaner specifically designed for outdoor gear.
The restoration protocol involves three key phases: washing to clean, rinsing to purify, and heating to reactivate. The second rinse cycle is a commonly skipped but non-negotiable step. It ensures every trace of detergent is removed, leaving a clean slate for the DWR to perform. The final heat treatment is what realigns the DWR polymer chains, forcing them to stand up on end and effectively repel water molecules again. Without heat, even a clean jacket won’t bead water properly.
Be aware that not all DWR coatings are created equal. As industry testing standards reveal, superior DWR coatings can maintain high performance for 50-100 washes, whereas more basic versions may see a significant drop-off after only 10. This means jackets with less robust factory coatings require more frequent DWR maintenance to keep the system functioning optimally.
DWR Restoration Protocol: A Step-by-Step Guide
- Wash to Clean: Machine wash the garment on a gentle cycle using a technical cleaner, not standard detergent. This removes dirt, body oils, and sunscreen that inhibit DWR performance.
- Rinse to Purify: Run a mandatory second rinse cycle with only water. This critical step removes any lingering hydrophilic surfactants from the cleaner.
- Heat to Reactivate: Tumble dry the jacket on a low to medium heat setting for 20 minutes. The heat reactivates the DWR by realigning its polymer structure.
- Alternative Heat Method: If a dryer is unavailable, iron the garment on a low setting with no steam. Always place a towel between the iron and the jacket to prevent damage.
- Final Check: Before proceeding, always check the garment’s care label. Applying excessive heat can cause the waterproof membrane to delaminate, permanently ruining the jacket.
By following this procedure, you aren’t just « re-waterproofing » your jacket; you’re restoring the entire breathable system, allowing it to once again manage the massive amount of moisture your body produces during exertion.
Gore-Tex vs PU coating: Which lasts longer under heavy backpack straps?
When discussing long-term durability, especially under the high-stress, high-abrasion conditions of a heavy backpack, the type of waterproof membrane becomes critical. The two dominant technologies are Gore-Tex, which uses an expanded polytetrafluoroethylene (ePTFE) membrane, and more common Polyurethane (PU) coatings. While both can provide waterproofing, their construction and failure modes are vastly different. As experts from DroProof Technical Analysis note, the difference in longevity is stark.
PU coated fabrics provide a certain degree of waterproofing, but they deteriorate chemically quickly, even when not in use, due to moisture, temperature, and UV rays. In contrast, Gore-Tex membrane technology provides long-lasting waterproofness and breathability.
– DroProof Technical Analysis, The Science Behind Gore-Tex: Unraveling the Technology That Keeps You Dry
The primary aging process for a PU coating is hydrolysis, a chemical breakdown caused by a reaction with moisture in the air. Over time, this makes the coating sticky, flaky, and eventually causes it to peel away from the face fabric (delamination). This process is accelerated by heat and is particularly problematic under the pressure and friction of backpack straps. In contrast, an ePTFE membrane like Gore-Tex is chemically inert and does not degrade through hydrolysis. Its primary aging process is contamination, where body oils and dirt clog its microscopic pores, reducing breathability. This can be reversed with proper cleaning.
The following table breaks down the key differences in how these materials are constructed and how they fail under the sustained pressure and abrasion typical of backpacking.
| Characteristic | Gore-Tex (ePTFE) | PU Coating |
|---|---|---|
| Membrane Type | Expanded polytetrafluoroethylene with 9 billion pores/sq inch | Polyurethane microporous coating or laminate |
| Primary Aging Process | Contamination – body oils and dirt clog microscopic pores | Hydrolysis – chemical breakdown from moisture and heat over years |
| Failure Symptoms | Reduced breathability, maintains waterproofing until contaminated | Sticky texture, flaking, peeling, eventual delamination |
| Backpack Abrasion Resistance | 3-layer construction (Gore-Tex Pro) uses woven inner backer to resist shear force | 2.5-layer PU jackets more prone to pressure-induced delamination under straps |
| Durability Factor | Primary choice for long-term reliability and heavy use | Lighter, more affordable, but less durable under sustained abrasion |
For hikers who consistently carry heavy packs, a 3-layer Gore-Tex construction offers superior mechanical resistance. The inner woven backer protects the delicate membrane from the shear forces and abrasion caused by pack straps, making it the far more durable choice for long-term, rugged use.
Pit zips vs Front zipper: Which vents heat faster during climbs?
When your body’s moisture output overwhelms your jacket’s breathable membrane, you must turn to a far more powerful tool: mechanical venting. This is the act of physically opening up the jacket to dump heat and humid air. While unzipping the main front zipper is an option, it’s far less effective than using dedicated pit zips (zippers under the armpits). The reason lies in physics and anatomy.
The armpits are a major heat and sweat zone, and they are also perfectly positioned to create a « bellows effect » as you walk. With each arm swing, the opening of a pit zip actively pumps hot, moist air out of the jacket while drawing cooler, drier air in from below. This active air exchange is dramatically more efficient than the passive diffusion that occurs through a breathable membrane. In fact, recent outdoor gear testing demonstrates that when active, pit zips can reduce internal moisture by as much as 80%. This isn’t just a minor feature; it’s the single most effective tool for preventing internal condensation during high-exertion activity.
Using the front zipper, by contrast, exposes your core to rain and wind, can be awkward with a backpack hip belt, and doesn’t leverage the natural pumping motion of your arms. It’s a blunt instrument compared to the surgical precision of pit zips.
Case Study: Outdoor Research TorsoFlo™ Vents
The superiority of mechanical venting is so well-understood that some brands have engineered their entire designs around it. Outdoor Research, for instance, developed TorsoFlo™ vents, which are extra-long zippers extending from the elbow all the way to the waist. Opening these vents essentially transforms the jacket into a poncho, creating a massive area for airflow. The company includes this feature even on its top-of-the-line Gore-Tex Pro jackets, a clear acknowledgement that no matter how advanced the breathable membrane is, it can never compete with the raw venting power of a large physical opening. This design proves a core principle: active mechanical venting will always outperform passive membrane technology for managing moisture during strenuous climbs.
The key takeaway is to stop thinking of pit zips as an emergency backup and start seeing them as your primary tool for moisture management. Open them proactively, before you start to feel hot and clammy, to keep your internal climate balanced from the start.
When to choose a poncho: The airflow advantage everyone ignores
In the relentless pursuit of high-tech membranes and athletic fits, the hiking community has largely forgotten the oldest and, in some ways, most effective piece of rain gear: the simple poncho. Dismissed as low-tech or floppy, the poncho’s design offers one overwhelming advantage that no form-fitting jacket can ever match: massive, unimpeded airflow. This makes it the undisputed champion of ventilation and a surprisingly savvy choice for certain conditions, particularly in hot, humid climates where condensation is the primary enemy.
A jacket, no matter how breathable or well-vented, still traps a layer of air close to your body. A poncho, by contrast, drapes over you and your pack, creating a huge air gap. This open-bottom design allows air to circulate freely, driven by the natural convection of your body heat and the movement of your legs as you walk. It functions like a walking tent, providing complete rain protection while allowing for maximum evaporation of sweat. This is the ultimate expression of mechanical venting. The authentic experience of seasoned hikers often confirms this principle, valuing function over fashion.
This concept is perfectly captured in the user feedback found within dedicated gear communities:
A PU backed cape, that you wear over your backpack and it ties in front of you is the ultimate rain protection. Mine is an old austrian army cape, and it has hook and loop fasteners in front and arm slats so I can use my hiking poles and by far, that’s the most breathable rain gear I’ve used.
– Reddit outdoor gear community, r/gorpcore discussion
The poncho’s main drawbacks are its performance in high winds (where it can act like a sail) and navigating through thick brush (where it can snag). However, for trail hiking in forested, humid environments without high winds, a poncho can keep you far drier and more comfortable than a multi-hundred-dollar technical shell because it sidesteps the breathability problem entirely.

Choosing a poncho isn’t a step backward in technology; it’s a strategic decision to prioritize ventilation above all else. When the forecast calls for warm rain and high humidity, it’s often the smartest tool for the job.
How to waterproof your existing gear for under $20?
While high-end jackets rely on sophisticated membrane systems, you can achieve a high degree of water resistance for other gear—or breathe new life into an older jacket—on a tight budget. The key is a strategic, prioritized approach that focuses on the most common points of failure. Forget expensive all-in-one solutions; the biggest return on investment comes from targeted treatments.
The number one point of failure on any sewn piece of gear is not the fabric itself, but the thousands of tiny holes created by the sewing needle. Sealing these seams is the single most effective budget waterproofing task you can perform. A tube of seam sealant costs a few dollars and will do more to prevent leaks in a tent, backpack, or older jacket than any other treatment. Your second priority is choosing the right type of spray-on or wash-in DWR treatment for the specific material you’re treating. Using a silicone-based spray on a breathable garment, for example, can clog its pores permanently, destroying its performance. Always match the chemistry to the fabric.
However, the most effective budget waterproofing technique is often the simplest: redundancy. No matter how well you treat the outside of your pack, a heavy-duty contractor garbage bag used as an internal pack liner provides a 100% guaranteed waterproof barrier for your most critical items, like your sleeping bag and electronics. It is a fail-safe that costs less than a dollar. Finally, it’s important to have realistic expectations. As field testing data shows, aftermarket DWR treatments last approximately half the duration of factory-applied coatings, meaning you will need to re-apply them more frequently to maintain performance.
Here is a hierarchy for budget waterproofing that provides the maximum ROI for minimal cost:
- Priority 1 – Seam Sealing ($8-12): Use a product like Seam Grip on the interior seams of your tent, pack cover, or jacket. Stitching holes are the primary leak points, and sealing them provides the biggest waterproofing ROI.
- Priority 2 – DWR Spray Selection: Match the treatment to the material. Use silicone-based sprays for boots and packs, fluoropolymer sprays for technical breathable garments, and wax-based treatments for canvas or cotton gear.
- Priority 3 – Garbage Bag Pack Liner (under $1): A heavy-duty contractor bag inside your backpack is a foolproof way to ensure critical gear stays completely dry, regardless of your pack’s external condition.
- Warning: Always be cautious. Using the wrong type of DWR can permanently ruin a technical garment’s breathability. Match the treatment chemistry to the fabric type.
When to rinse gear: The maintenance schedule to prevent corrosion
The enemies of your outdoor gear aren’t just dirt and abrasion; they are invisible and corrosive. Salt from sweat, salt from coastal air, and the acids from body oils can slowly and silently degrade your equipment, causing zippers to seize, metal snaps to corrode, and fabric coatings to chemically break down. This is why a post-trip maintenance schedule that includes simple rinsing is critical for long-term gear longevity.
This isn’t about doing a full wash after every outing. It’s about a quick, targeted neutralization of corrosive agents. A simple hosing down with fresh water is often all that’s needed to remove salt deposits before they have time to cause damage. This is mandatory after any trip involving saltwater exposure and highly recommended after any multi-day trip with heavy exertion. Zippers are the most common point of mechanical failure on outdoor gear. After rinsing and drying, applying a zipper-specific lubricant not only makes them run smoother but also creates a protective barrier against future grime and corrosion.
Furthermore, how you store your gear matters. Studies, particularly from regions with harsh climates, show that gear stored in hot cars or cupboards suffers from accelerated aging due to UV exposure and high temperatures, which weaken adhesives and coatings even when the gear is not in use. A consistent maintenance routine protects your investment and ensures your gear is reliable when you need it most.
Your Post-Hike Gear Integrity Checklist
- Inspect Seams & Tapes: After rinsing and drying, turn your jacket inside out. Check all taped seams for signs of peeling, lifting, or bubbling. These are the first signs of delamination.
- Check DWR Beading: Sprinkle a few drops of water on the jacket’s shoulders and cuffs. Does the water bead up and roll off, or does it sink in and darken the fabric? This is your key indicator of breathability performance.
- Audit Zippers & Snaps: Operate all zippers, including pit zips and pocket zips. Do they move smoothly or feel gritty? Check all metal snaps and grommets for any signs of green or white corrosion.
- Identify Contamination Zones: Look for shiny or dark patches around the collar, cuffs, and back, where body oils and sunscreen accumulate. These areas need special attention during the next wash.
- Plan for Storage & Next Action: Based on your audit, decide if the gear needs a full technical wash, a simple DWR reactivation, or if it’s good to be stored in a cool, dry, dark place until the next adventure.
This simple act of rinsing and inspecting is one of the most effective things you can do to extend the life of your expensive outdoor equipment, preventing small issues from becoming trip-ending failures.
Key Takeaways
- The real challenge is not keeping rain out, but venting your own sweat; an active hiker’s moisture output will always exceed a fabric’s breathability.
- A DWR coating’s main purpose is to enable breathability by keeping the face fabric dry; its failure triggers the ‘wet-out’ state that leads to rapid condensation.
- Mechanical venting (pit zips, ponchos) is not an afterthought but the primary and most effective strategy for managing moisture, always outperforming passive membrane technology.
Hiking Boots: How to Prevent Blisters on Day 1 of Your Trek?
The final, and perhaps most painful, demonstration of the « overwhelmed moisture system » principle doesn’t happen in your jacket, but inside your boots. Blisters are the bane of every hiker, and while we often blame poorly fitting boots or friction, the true catalyst is the exact same villain we’ve been discussing: unmanaged moisture. Wet skin is soft, pliable, and incredibly susceptible to damage. Friction, which is unavoidable in a hiking boot, becomes exponentially more destructive when applied to moist skin.
The inside of your boot is a high-sweat environment, just like the inside of your rain jacket. As your feet sweat, the moisture is trapped, softening the skin. The heat generated by your feet is also trapped more efficiently by this moisture—in fact, trapped moisture transfers body heat 25 times faster than dry clothing, compounding the problem. This creates the perfect storm for blisters. The feeling of a « hot spot » on your heel is the first sign that friction and moisture are conspiring against you.
The solution, therefore, is not just about finding the right boot, but about implementing a dedicated moisture and friction management system for your feet. This is a proactive strategy, not a reactive one.
- The Two-Sock System: This is the cornerstone of foot moisture management. Wear a thin, snug, synthetic liner sock directly against your skin. Its job is to wick moisture away from your foot. Over this, wear a thicker wool or synthetic hiking sock. Its job is to provide cushioning and transport that moisture from the liner sock towards the breathable liner of your boot. This system creates a low-friction layer between the socks while actively moving sweat away from your skin.
- Pre-Taping Hotspots: Before you even put your socks on, identify your personal blister-prone areas (heels, sides of toes, ball of the foot). Apply a layer of athletic tape, moleskin, or kinesiology tape directly to the dry, clean skin in these areas. This creates an artificial, low-friction outer skin layer. The tape now takes the abrasive friction from the sock and boot, not your delicate skin tissue.
By adopting this system, you are applying the same principles we’ve discussed for jackets: actively manage moisture and create barriers to mitigate the negative effects. You are taking control of the system before it fails.
Ultimately, staying dry and comfortable in the outdoors is less about buying the most expensive gear and more about understanding the principles of how that gear works with your body. By thinking in terms of a complete moisture management system—from your skin to your outer shell—you can make smarter choices, use your gear more effectively, and transform your experience in wet weather. Apply this systems-thinking approach to all your gear choices and maintenance routines to truly master your comfort on the trail.