In summary:
- Your home kettle trips the campsite breaker because it demands over 2000 Watts, while a typical 6-Amp hook-up only supplies about 1380 Watts.
- The solution is to think of your power supply as a strict « power budget » and use low-wattage camping-specific appliances (under 1000W).
- Never use a coiled extension lead; it creates a dangerous fire hazard by trapping heat. Always uncoil it completely.
- Prioritize your appliances: use high-power « Worker » devices like kettles one at a time, and be aware of « Sleeper » devices like fridges that cycle on unexpectedly.
It’s a familiar and frustrating sound for many campers: the sudden, silent click that signals the power has gone out. You were just about to enjoy that first cup of morning coffee, and now the whole tent is dark. You reset the breaker, try again, and *click*—darkness returns. You’ve been told to « use fewer appliances » or « not to overload it, » but this advice feels vague and unhelpful when a single kettle seems to be the culprit.
The frustration stems from a simple misunderstanding between household power and campsite power. They are not the same. Your home is designed to handle multiple high-demand appliances running simultaneously, but a campsite hook-up operates on a much stricter, limited supply. Trying to run your home appliances here is like trying to drive a lorry down a bicycle path; it’s just not built for it.
But what if the key wasn’t just avoiding certain appliances, but truly understanding the simple maths that governs your pitch’s power? The secret isn’t magic; it’s about learning to manage your « power budget. » By understanding the relationship between Amps, Volts, and Watts, you can move from being a frustrated user to a savvy power manager, capable of predicting and preventing a trip before it ever happens.
This guide will walk you through the essential knowledge every camper needs. We’ll demystify the numbers on the hook-up post, show you how to choose the right gear, and reveal the common but dangerous mistakes that go beyond just tripping a breaker. Get ready to finally master your campsite electricity.
Summary: Campsite Electricity: Why Your Kettle Trips the Breaker Every Morning?
- Why 6 Amps isn’t enough for a 2000W hair dryer?
- How to choose low-wattage camping appliances specifically?
- The coiled cable mistake that creates a fire hazard
- CEE blue plug vs Domestic socket: Which do you really need in Europe?
- When to unplug: The hierarchy of devices to prevent overload
- Rechargeable vs Alkaline: Which is more reliable in cold weather?
- The heating mistake that makes canvas tents unbearable at night
- Night Vision: How to Choose a Headlamp That Won’t Blind Your Camp Mates?
Why 6 Amps isn’t enough for a 2000W hair dryer?
The core of the problem lies in a simple electrical formula: Watts = Volts × Amps. This isn’t just theory; it’s the fundamental law governing your campsite power. In Europe, the voltage is standardized at around 230V. The variable is the Amperage (Amps or ‘A’) supplied by the campsite’s hook-up post, which can range from a meagre 6A to a more generous 10A or 16A. This amperage defines your total « power budget. »
Let’s do the math. If your pitch has a 6A supply, your total available power is 230V × 6A = 1,380 Watts. For a 10A supply, it’s 230V × 10A = 2,300 Watts. Now, look at the label on your home kettle or hair dryer. It likely reads 2000W, 2200W, or even 3000W. When you plug that 2000W hair dryer into a 6A supply, you’re trying to draw nearly double the power the circuit is designed to provide. The breaker does its job and trips to prevent the wires from overheating.
Understanding this budget is everything. According to campsite electrical specifications, a 6A supply supports a maximum load of 1,380 watts, while a 10A supply allows for up to 2,300 watts. This isn’t a suggestion; it’s a hard limit. Exceeding it, even for a moment, will cause a trip. You must add up the wattage of everything you want to use simultaneously and ensure the total stays within your budget.
Action Plan: Calculating Your Campsite Power Budget
- Calculate total available watts using the formula: Amps × Volts = Watts (e.g., 6 amps × 230 volts = 1,380 watts).
- List all appliances you plan to run simultaneously with their individual wattage ratings (check the label on each device).
- Add up the wattage of all devices to ensure the total does not exceed your amp limit.
- Account for the startup surge from motor-driven appliances (like fridges or pumps), which can briefly be 2-3 times higher than their running wattage.
- Monitor which circuits your appliances are on to avoid overloading a single breaker, even if your total load seems acceptable.
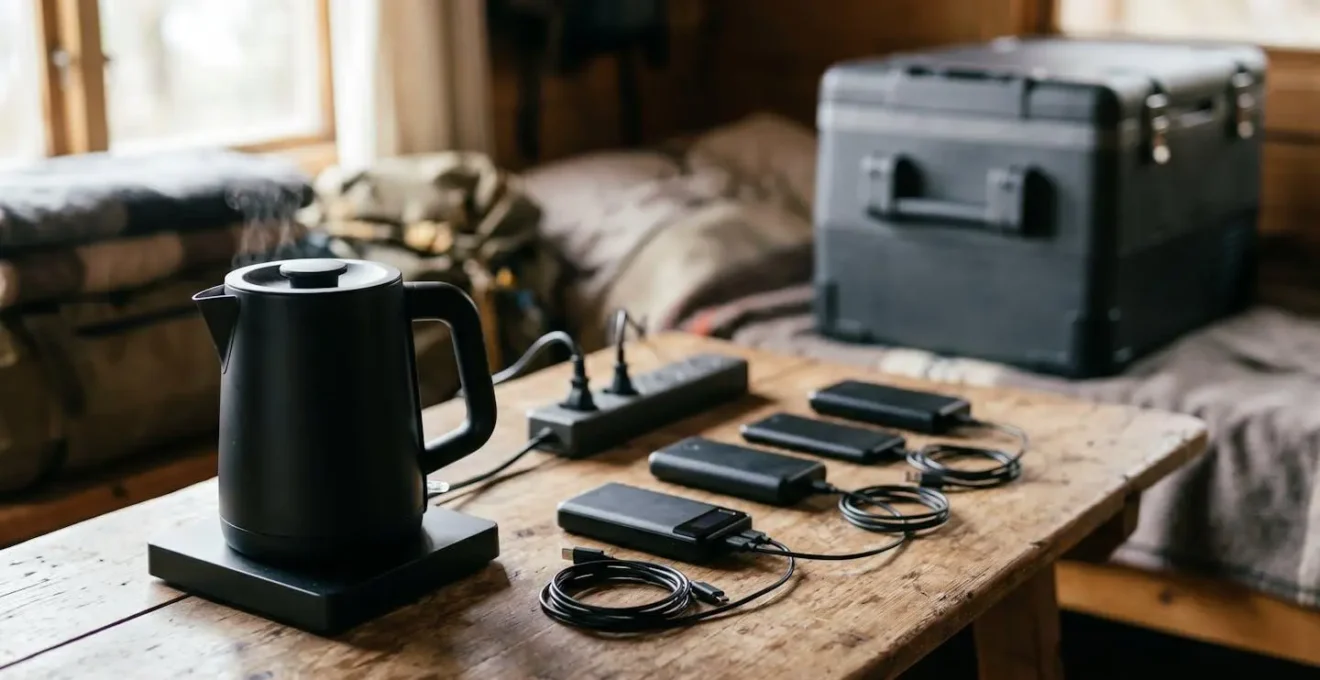
How to choose low-wattage camping appliances specifically?
Once you understand that you’re working with a strict power budget, the solution becomes clear: you need to choose appliances that fit within it. Attempting to use standard household items is a recipe for failure. Instead, you must proactively seek out appliances specifically designed for camping, caravans, and boats. The magic words you’re looking for are « low-wattage. »
A low-wattage camping kettle will typically be rated between 750W and 1000W, a stark contrast to a 3000W home model. This means it will boil water more slowly, but crucially, it will do so without tripping the breaker. The same principle applies to toasters, grills, and heaters. You can find the wattage of any appliance on a small label, usually on its base or near the power cord. Before buying or packing any electrical item, checking this number is non-negotiable.
Low voltage is needed as campsite electrics will not be able to support a 2 or 3 kilowatt kettle.
– World of Camping, Expert Advice – Kettles
To make the right choice, you need to balance power consumption with performance. A 780W kettle is great for a 6A pitch, but it might feel slow on a 16A pitch where you could have comfortably used a 1200W model. This table illustrates the trade-offs for one of the most common camping appliances.
| Kettle Type | Wattage | Capacity | Approximate Boiling Time (1L) | Best Use Case |
|---|---|---|---|---|
| Kampa Cascade Low-Wattage | 1000W | 1.0L | 6 min 30 sec | Standard camping on 16A pitch with other devices running |
| Quest Low-Wattage Plastic | 850W | 1.0L | ~7-8 min | Maximum power conservation on limited hookup |
| Thirlmere Cordless | 780-900W | 1.2L | 7-9 min | Portable use without tripping 6A-10A breakers |
| Standard Home Kettle | 2000-3000W | 1.7L | 3-4 min | NOT suitable for camping – will trip breaker |
The coiled cable mistake that creates a fire hazard
Beyond the inconvenience of a tripped breaker, there’s a far more serious electrical mistake many campers make: using an extension cable while it’s still coiled on its reel. This common practice doesn’t just look messy; it creates a genuine fire hazard through a process called inductive heating. When electricity flows through a coiled wire, it generates heat. If the cable is fully extended, this heat dissipates harmlessly into the air. But when it’s tightly wound, the heat becomes trapped within the coil.
The cable reel effectively becomes a large, inefficient electric heater. The insulation can melt, leading to a short circuit and, in the worst-case scenario, a fire. The more power you draw through the cable, the faster the heat builds up. An electrical engineering analysis demonstrates that a coiled cord can generate over 85 watts of heat when carrying a significant load, which is more than enough to start melting plastic. The visual below highlights the form that traps this dangerous heat.
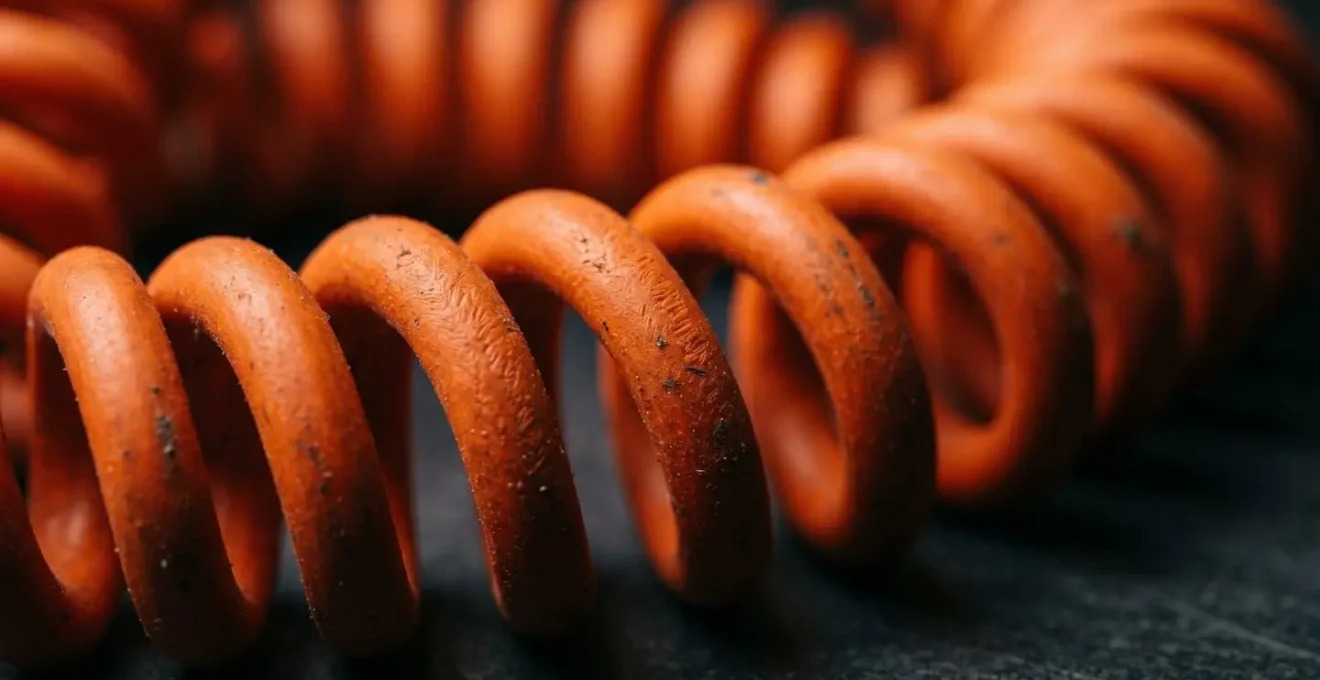
This is not a theoretical risk. Real-world incidents frequently prove the danger of this simple oversight. The rule is absolute: always completely unwind your extension lead before plugging anything into it, even if you only need a few metres of length. The unused portion should lie loosely on the ground, not in a tight coil.
Case Study: The Smoking Cord Reel
As documented by RV Travel, a real-world incident highlights this danger perfectly. At an event, a heavy-duty 100-foot cord reel began smoking. The reason? Only half the cord was unwound while it was under a significant electrical load from multiple appliances. The heat building up in the coiled portion became so intense that the insulation started to smoulder. This incident is a stark reminder from a real-world scenario of why electrical safety warnings demand that extension cords be fully unwound before use under any substantial load.
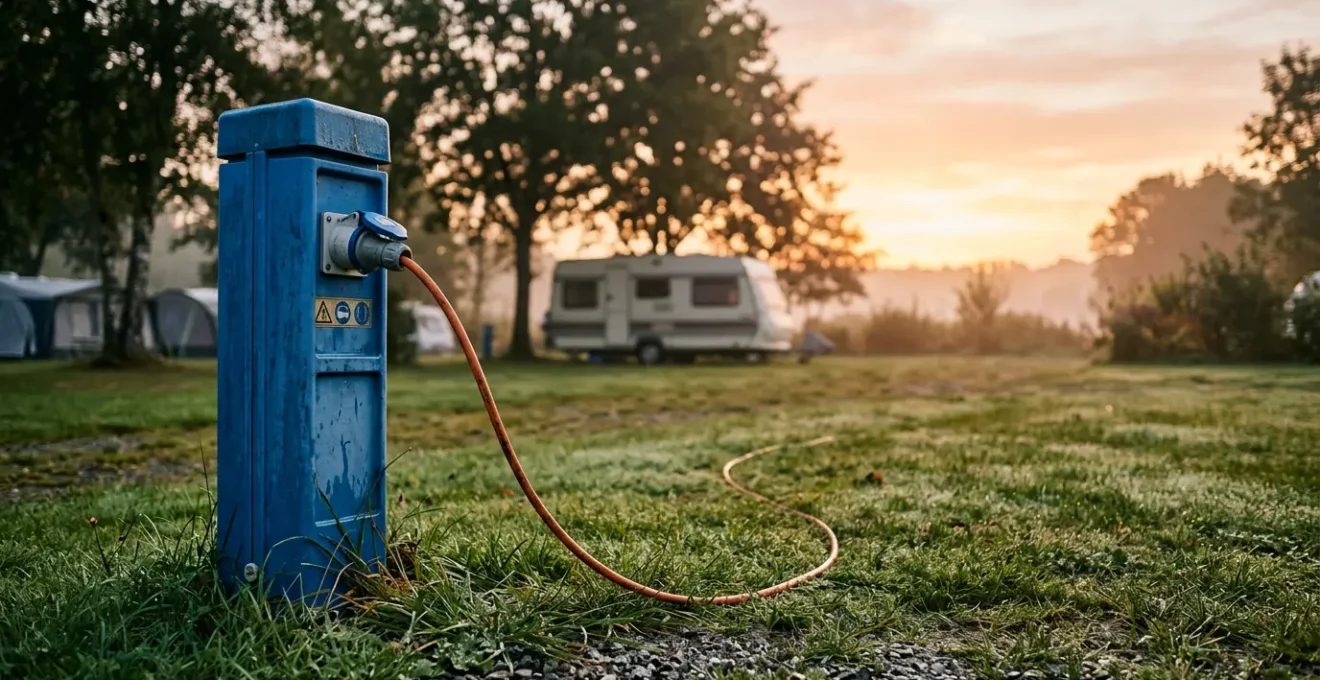
CEE blue plug vs Domestic socket: Which do you really need in Europe?
When you arrive at a European campsite, you’ll notice the hook-up posts feature a specific type of socket: a round, blue, three-pin connector. This is known as a CEE 17 or IEC 60309 plug. It is the universal, legally mandated standard for campsite power connections across the continent, and for good reason. Using an adapter to plug in a domestic extension lead is not only inconvenient but significantly less safe.
The blue CEE system is designed from the ground up for outdoor use. The pins are shrouded to prevent accidental contact, the connection is robust, and it’s built to be weather-resistant (rated to at least IP44, meaning it’s protected against splashing water). A standard domestic plug and socket has none of these protections. It’s designed for the dry, stable environment of a house, not a damp field where rain is always a possibility.
While it might be tempting to use a simple adapter, you are bypassing layers of safety. A proper, certified camping mains lead will have a blue CEE plug at one end to connect to the post and one or more CEE sockets at the other, often in a self-contained, weatherproof unit with its own mini circuit breaker. As Wikipedia contributors note in their entry on the IEC 60309 standard, this « Caravan Mains Socket » has become pan-European precisely because it is inherently safer than the multitude of different domestic plugs.
Investing in the correct lead is a one-time purchase that ensures you are connecting to the power supply safely and correctly, no matter which country you’re in. It removes any weak links in your electrical setup and gives you peace of mind that your connection is as secure as it can be. Don’t compromise on this fundamental piece of equipment.
When to unplug: The hierarchy of devices to prevent overload
Even with low-wattage appliances, you can still trip the breaker by running too many at once. The key to successful power management is to think about your devices not as a simple list, but as a hierarchy. I call it the « Workers, Sleepers, and Vampires » model. Understanding which category your devices fall into helps you decide what to run, when.
Workers are the high-draw appliances you use for short bursts. This includes your kettle, toaster, microwave, or hair dryer. They consume a huge chunk of your power budget, often 80-100% of it. The rule for Workers is simple: only ever use one at a time. Before you turn on the kettle, make sure the heater is off.
Sleepers are devices that cycle on and off automatically, like a portable camping fridge or a water heater. Their power draw is unpredictable. A fridge might be drawing minimal power for an hour, then its compressor kicks in, suddenly adding 500-700W to your load. This is often the « mystery trip » that happens when you think everything is fine. Be aware of your Sleepers and the extra load they might add at any moment.
Vampires are the low-draw devices that are always on: phone chargers, laptops on standby, LED lights, TV standby lights. Individually, they are insignificant, but together they can add up to a constant drain of 50-100W, eating into your budget. This organised layout gives a visual sense of this power priority.
This table, based on data from camping electrical guides like one from KOA on RV service amps, helps categorize common appliances so you can manage your power budget effectively.
| Appliance Category | Device Examples | Typical Amp Draw | Can Run Simultaneously? | Priority Level |
|---|---|---|---|---|
| Workers (High-draw) | Kettle, Hair Dryer, Microwave, Toaster | 8-13 amps each | ❌ Only ONE at a time | Active – requires attention |
| Sleepers (Intermittent) | Fridge Compressor, Water Heater, Air Conditioning | 5-13 amps when active | ⚠️ Unpredictable cycles | Background – monitor cycles |
| Vampires (Constant drain) | Phone Chargers, TV on Standby, LED Lights | 0.5-2 amps total | ✅ Can run together | Passive – always consuming |
Rechargeable vs Alkaline: Which is more reliable in cold weather?
Your power management strategy extends beyond the mains hook-up; it also includes your portable devices. When it comes to batteries for torches, headlamps, and radios, the choice between disposable alkaline and modern rechargeables becomes critical in cold weather. While alkalines are a familiar staple, their performance plummets as temperatures drop.
The reason is chemistry. The electrolyte inside an alkaline battery is a water-based paste. In the cold, this paste thickens, increasing internal resistance and dramatically slowing down the chemical reaction that produces electricity. Your brand-new alkaline batteries can seem half-dead on a frosty morning, delivering a weak, dim light just when you need them most.
Modern rechargeable batteries, particularly Nickel-Metal Hydride (NiMH) types like Panasonic’s Eneloop, or Lithium-ion (Li-ion), are built differently. Their non-aqueous electrolytes are far less susceptible to cold. As explained in analyses on battery chemistry for outdoor applications, they maintain a much more stable voltage and can deliver close to their full power even near freezing point. This makes them significantly more reliable for critical gear like headlamps during autumn and winter camping trips.
While they require an initial investment in a charger, the long-term reliability and performance of quality NiMH or Lithium rechargeables in all conditions make them the superior choice for any serious camper. They not only perform better in the cold but are also more economical and environmentally friendly over their lifespan.
The heating mistake that makes canvas tents unbearable at night
One of the most common power management mistakes involves electric heating. Campers, especially those in larger canvas or polycotton tents, often bring a small domestic fan heater to take the chill off. The problem is that even a « small » fan heater is a massive « Worker » device, typically drawing between 1500W and 2000W. On a 6A (1380W) hook-up, it won’t just trip the breaker; it’s a non-starter. Even on a 10A (2300W) hook-up, it consumes the entire power budget.
The result is a frustrating cycle. You turn the heater on, and the tent gets wonderfully warm. But the moment your fridge compressor (« Sleeper ») kicks in, or someone boils the low-wattage kettle, the combined load exceeds the limit, and the power trips. The tent then rapidly gets cold. You reset the breaker, and the cycle repeats, leading to an uncomfortable night of fluctuating temperatures.
Experts in RV electrical management note that running electric heaters and air conditioners together can easily exceed even 30A circuit limits, let alone the much lower limits found at most European campsites. A large heater effectively blocks you from using any other significant appliance. The solution is to opt for much lower-wattage heating options like a 500-700W oil-filled radiator, which provides a gentle, constant background heat without monopolizing your entire power budget. Or, better yet, rely on a good sleeping bag and insulation, using electricity for light and cooking only.
Key Takeaways
- The fundamental rule: Watts = Volts x Amps. Know your campsite’s Amp limit to calculate your total Wattage budget.
- Always choose low-wattage appliances (under 1000W) specifically designed for camping to stay within your power budget.
- Never use a coiled extension lead. Always uncoil it completely to prevent a serious fire hazard from trapped heat.
Night Vision: How to Choose a Headlamp That Won’t Blind Your Camp Mates?
Smart electricity use at the campsite isn’t just about preventing breaker trips; it’s also about courtesy. The biggest offender in this category is the modern, ultra-bright headlamp. While a 500-lumen beam is great for hiking a trail in the dark, it’s a social menace in a crowded campsite. Pointing that beam at a fellow camper, even accidentally, destroys their night vision for several minutes.
Preserving night vision is key to enjoying the ambience of a dark campsite. Your eyes take up to 30 minutes to fully adapt to the dark, but only a split second of bright white light to ruin it. This is why experienced campers prioritize headlamps with a dedicated red light mode. Red light has a longer wavelength that doesn’t trigger the eye’s « daylight » receptors, allowing you to see your immediate surroundings without resetting your or anyone else’s night vision.
Beyond the red light, campsite headlamp etiquette involves a few simple rules that can make a huge difference to everyone’s experience. It’s about choosing the right tool for the job and being mindful of those around you. For general camp tasks, a dim, wide beam is far more useful and considerate than a powerful, narrow spotlight.
Here are some key points of headlamp etiquette, based on advice from outdoor gear experts and seasoned campers:
- Use Red Light Mode: Always activate the red light when moving around the main camp area or talking to people after dark.
- The Neck Rule: When stopping to chat with someone face-to-face, take the headlamp off your head and hang it around your neck, so the beam points harmlessly at the ground.
- Choose Appropriate Lumens: For campsite use, a beam of 50-100 lumens is more than sufficient. Leave the high-power spotlights for night hiking.
- Aim Down: Be conscious of where your head is pointing. When walking past other pitches or people, tilt your head down to keep the beam out of their eyes.
With this understanding of power budgets, appliance hierarchies, and electrical safety, you are now fully equipped to leave campsite power frustrations behind. Your next step is to audit your own camping kit before you pack for your next trip, checking the wattage on every appliance and ensuring you have the correct, safe connection leads.