
Reducing pack weight isn’t about buying ultralight gear; it’s about eliminating system inefficiency and replacing physical items with knowledge.
- Excess weight (over 15kg) is a direct cause of debilitating knee injuries and trail-ending blisters, often appearing on day two.
- Skills like fabric maintenance, efficient food rehydration, and map-and-compass navigation provide massive weight savings for free.
Recommendation: Stop focusing on individual item weights and start auditing your entire gear system for redundancy, single-use items, and areas where a skill can replace a tool.
For most hikers, the equation seems simple: a lighter pack means a happier hiker. The common advice is a predictable litany of expensive solutions: buy a Dyneema pack, a sub-one-pound tent, a quilt instead of a sleeping bag. This approach frames weight reduction as a consumer problem, solved by spending more money. But this misses the point. The crippling weight in your pack isn’t just from a heavy tent; it’s a symptom of inefficiency, redundancy, and a lack of specific, critical knowledge. The true path to a lighter, safer pack experience has little to do with your credit card.
The real objective is to increase your system efficiency. This means viewing your gear not as a collection of individual objects, but as an interconnected system where every component must justify its existence. The weight of your pack is a direct reflection of the gaps in your skillset. A heavy first-aid kit reveals a lack of preventative care knowledge. A bulky GPS and three power banks signal a weakness in traditional navigation. Carrying excessive fuel points to inefficient cooking techniques. The most powerful tool for weight reduction is not a titanium spork; it is knowledge.
This guide will deconstruct the problem from a technical, efficiency-focused perspective. We will not create a shopping list. Instead, we will analyze the critical failure points—from biomechanical injury to gear degradation—that stem from a heavy and inefficient pack. By understanding the *why* behind these problems, you can implement skill-based solutions that permanently reduce your base weight while paradoxically making you safer and more resilient on the trail.
We will dissect the core issues that contribute to pack weight and trail failure, providing a systematic framework to audit your gear and skills. Follow along to transform your approach from simply carrying less to being more capable with what you have.
Summary: A Systematic Approach to Lighter and Safer Hiking
- Why carrying over 15kg leads to knee injury on day 2?
- How to waterproof your existing gear for under $20?
- Synthetic vs Down layers: Which saves more space in a 50L pack?
- The footwear mistake that causes 80% of trail evacuations
- When to replace technical fabrics: The peeling sign you ignore
- How to audit your gear weight before leaving the house?
- How to prevent « crunchy peas » in your camp stew?
- Navigating Unmarked Trails: How to Avoid Getting Lost without GPS?
Why carrying over 15kg leads to knee injury on day 2?
Carrying a pack over 15kg (approximately 33 lbs) exponentially increases the compressive and rotational forces on the knee joint, leading to micro-trauma that culminates in acute pain and inflammation, typically manifesting on the second day of a hike. Day one is often powered by adrenaline and fresh muscles, but by day two, muscle fatigue sets in. This forces ligaments and tendons around the knee to overcompensate for instability, especially during descents where forces can exceed 3-4 times your body weight. This predictable breakdown is a primary reason for trail failure.
The link between pack weight and injury is not anecdotal. In fact, a 2022 study in Wilderness & Environmental Medicine found that a greater backpack weight to body weight ratio was significantly associated with a higher incidence of hiking-related injuries. While knee issues are a major concern, an Appalachian Trail study further documented the cascading effects, noting that heavy packs led to ankle sprains, muscular fatigue, and soft tissue damage. The data is clear: the weight on your back is the single greatest determinant of your physical longevity on the trail. A heavy pack doesn’t just make you tired; it actively injures you.
The « Day 2 Knee » phenomenon is a classic failure point in a hiker’s system. It’s not just about the weight itself, but the duration over which that weight is carried. The goal, therefore, isn’t just to survive day one, but to choose a base weight that allows your musculoskeletal system to function sustainably for the entire duration of your trip. Reducing your pack weight below this 15kg performance threshold is the most effective preventative measure against joint injury, far more so than any brace or painkiller you could carry.
How to waterproof your existing gear for under $20?
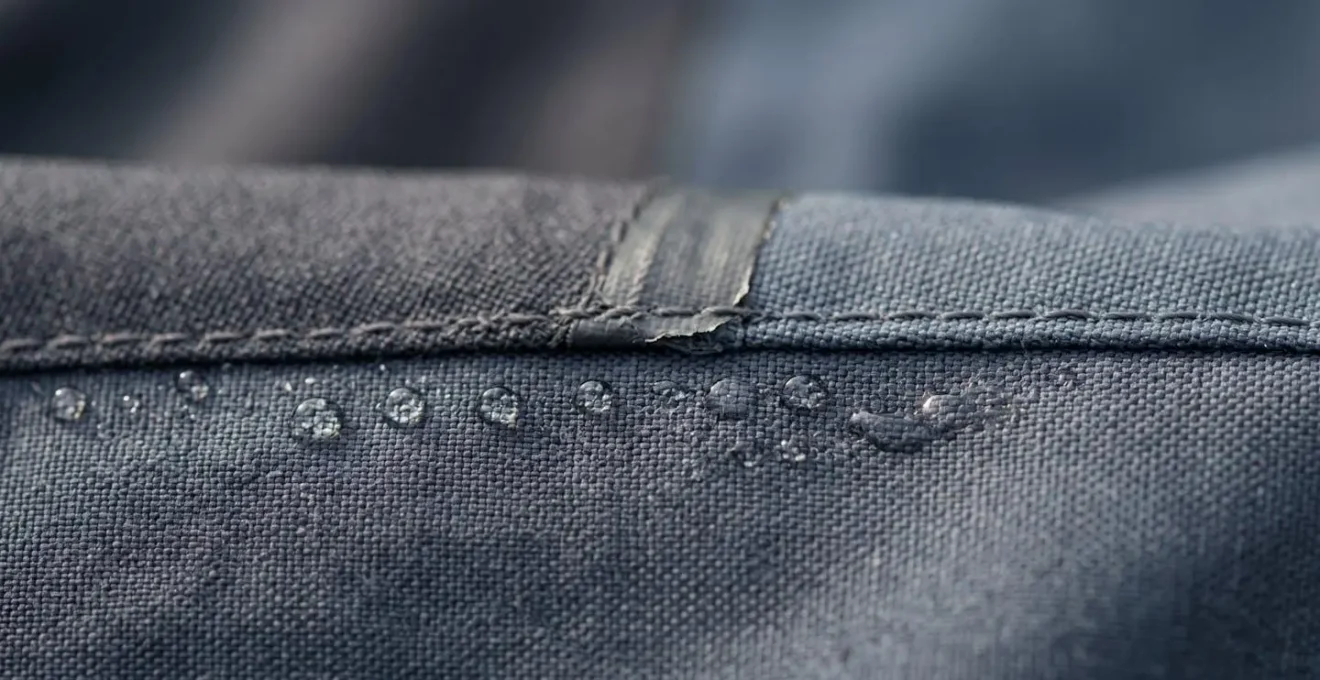
You can completely restore the waterproof performance of your existing jacket and gear for under $20 by focusing on the two main points of failure: the Durable Water Repellency (DWR) coating and the seam seals. You don’t need a new jacket; you need to service the one you have. This is a perfect example of how a simple skill—gear maintenance—replaces an expensive purchase and saves significant weight by ensuring you don’t carry waterlogged « waterproofs. »
First, address the DWR. This is the coating that makes water bead up and roll off the fabric’s surface. When it wears off, the fabric « wets out, » becoming saturated and heavy while losing all breathability. To restore it, first clean your garment with a technical wash designed for outdoor gear. Often, dirt and oils are the only problem. If water still doesn’t bead, apply a spray-on or wash-in DWR treatment. A bottle costs between $10-$15 and can treat multiple items. This simple step restores the fabric’s performance to near-factory levels.
The second and more critical failure point is the seam tape. This is the waterproof tape applied to the inside of your gear that covers the thousands of needle holes from stitching. Over time, it can peel, crack, or delaminate, creating a direct entry point for water.
To fix this, carefully peel off the old, failed tape. Clean the seam area with an alcohol wipe. Then, apply a thin, even layer of a liquid seam sealer like Seam Grip. A small tube costs under $10 and is enough to repair an entire jacket. Let it cure for 24 hours. You have now created a permanent, flexible, and completely waterproof seal that is often stronger than the original tape. This knowledge as gear is a weightless skill that keeps you dry and your pack light.
Synthetic vs Down layers: Which saves more space in a 50L pack?
For pure space-saving efficiency in a 50L pack, a high-quality down layer is unequivocally superior to a synthetic one. Down’s unique three-dimensional plume structure allows it to be compressed to a fraction of its lofted volume. This is its primary advantage in an ultralight system where space is as valuable as weight. A down jacket or quilt can be squeezed into the smallest corners of a pack, freeing up critical volume for consumables like food.
The difference is quantifiable. While synthetic insulation has made great strides, it is composed of solid polyester filaments that physically resist compression. In contrast, research shows that high-quality down (800+ fill power) achieves 60-70% volume reduction with proper compression. In a 50L pack, this can be the difference between a streamlined, well-balanced load and a bloated, overstuffed bag. A premium 850-fill power down jacket might compress to the size of a grapefruit, whereas a synthetic equivalent could be twice that size for the same warmth rating.
However, this system efficiency comes with a critical trade-off: down is useless when wet. Its plumes collapse, losing all insulating properties. Synthetic insulation, on the other hand, retains a significant amount of warmth even when damp. Therefore, the choice is not simply « down is better. » The efficient ultralight choice is a *system*: a highly compressible down layer protected by a meticulously maintained waterproof shell (as discussed in the previous section). Relying on down without a reliable shell is a critical safety failure. The space you save is only a true advantage if the system works as a whole.
The footwear mistake that causes 80% of trail evacuations
The single mistake that leads to the majority of trail evacuations is not choosing the wrong boot, but ignoring the initial « hotspot » that precedes a blister. A blister is not a minor inconvenience; it’s a critical gear failure and a medical emergency in the making. Allowing a hotspot to develop into an open wound invites infection, which can quickly escalate to a condition requiring evacuation. This is the most common, and most preventable, trail-ending incident.
The statistics are staggering: studies show that Blisters impact up to 95% of people on long treks and are the number one reason thru-hikers quit. The problem often peaks with alarming predictability. As with knee pain, The majority of blisters occur on day two of a hike, once initial swelling and friction have had 24 hours to work on softened skin. A hiker who powers through a hotspot on day one is setting themselves up for a painful and potentially dangerous day two.
Case Study: Blister to Evacuation in 48 Hours
A documented case from a multi-day trip illustrates the rapid escalation. A hiker ignored a hotspot on their heel on day one. By day two, a blister had formed, popped, and become contaminated. By the evening, red streaks—a sign of cellulitis (a bacterial skin infection)—were visible running up the ankle, accompanied by a low-grade fever. This was no longer a simple blister; it was a systemic infection requiring immediate medical attention, resulting in an unplanned evacuation from the backcountry.
The mistake is one of inaction. The moment you feel a slight rubbing or warmth—the hotspot—you must stop. Immediately. Take off your shoe and sock, and address the area. Apply a piece of athletic tape, moleskin, or a specialized blister patch over the spot. This action takes five minutes. Ignoring it can cost you your entire trip. Your footwear system isn’t just your shoes; it includes your socks, your foot care, and most importantly, your willingness to stop and perform preventative maintenance before a minor issue becomes a critical failure.
When to replace technical fabrics: The peeling sign you ignore
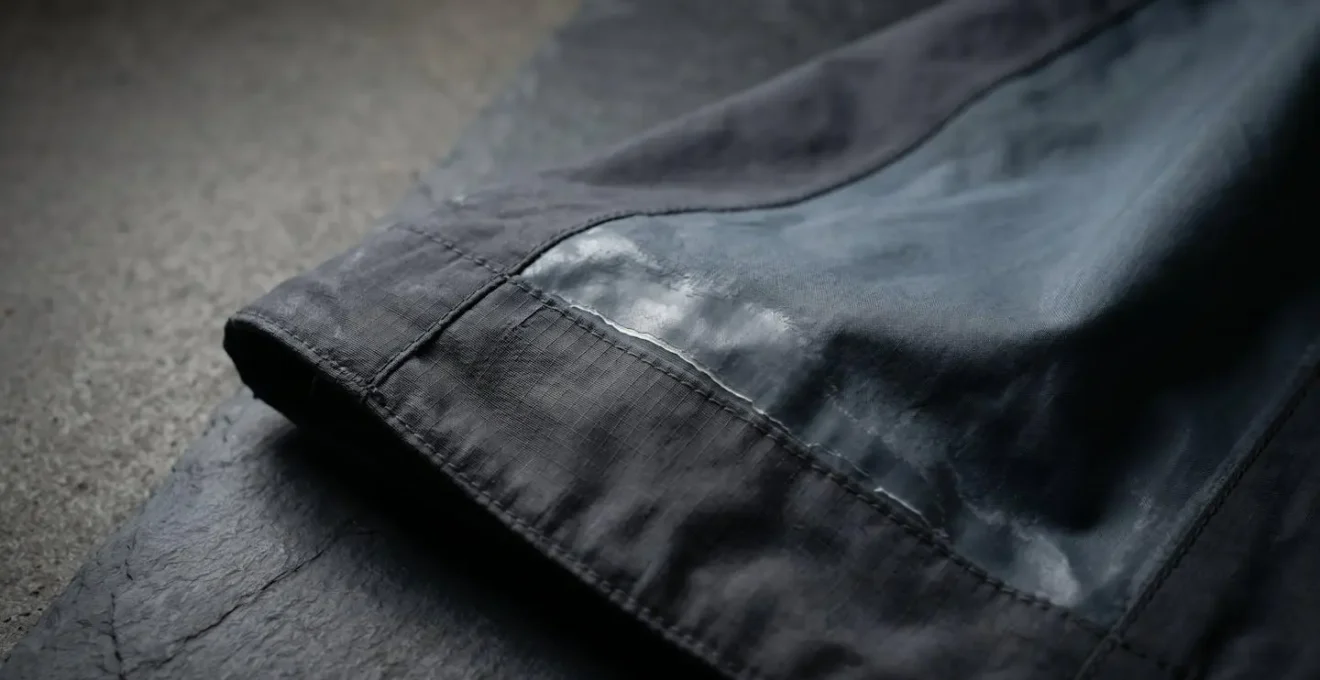
You must replace your technical waterproof fabrics at the first sign of interior delamination or « peeling, » not when the gear starts to leak. This peeling is the visible sign that the waterproof membrane is detaching from the outer fabric. Once this process begins, the fabric’s failure is irreversible and imminent. Ignoring this sign means you are carrying gear that will fail under pressure, leading to a high risk of hypothermia.
This peeling, often seen as a flaky or bubbly texture on the inside of a jacket, is the most overlooked yet critical failure point of waterproof-breathable gear. It typically starts in high-stress areas like the shoulders (from pack straps), neck, and cuffs. The DWR coating can be reapplied, but delamination is a structural failure of the laminate itself. The fabric is no longer a single, integrated system; it is two separate layers with no waterproof integrity. This not only allows water in but also traps body vapor, accelerating heat loss.
Proactively inspecting your gear is a skill. Before every major trip, you should conduct a failure assessment. Don’t wait for a downpour to discover your shell is compromised. A systematic check ensures your primary safety layer is functional.
- Water Bead Test: Sprinkle water on the outer fabric. If it soaks in and creates dark patches (« wetting out ») instead of beading up, the DWR has failed. This is your first warning.
- Interior Seam Tape Inspection: Turn the gear inside out. Check all seams for tape that is brittle, cracked, or lifting at the edges. This is a primary entry point for water.
- High-Stress Area Examination: Look closely at the fabric around shoulder straps, hip belts, and the collar. Look for micro-tears, fabric brittleness, or the tell-tale signs of the inner membrane peeling away.
- Breathability Compromise: If the fabric « wets out » on the exterior, its ability to breathe is gone. This traps sweat, making you wet from the inside and drastically increasing hypothermia risk, even if the jacket isn’t leaking from the outside yet.
How to audit your gear weight before leaving the house?
The most effective way to audit your gear weight is to conduct a systematic « shakedown » where every single item is weighed, scrutinized, and justified before it goes into your pack. This process moves you from guessing your weight to knowing it precisely. It is the practical application of an ultralight philosophy and the single most impactful action you can take to reduce pack weight. This audit is not about having the lightest gear; it’s about building the most efficient system.
The process is methodical. You need a simple kitchen or luggage scale and a spreadsheet (or a notebook). The goal is to create a master list that gives you a verifiable, data-driven overview of your entire system. This allows you to make informed decisions based on numbers, not feelings. Lay everything out on the floor, grouping items by function (shelter, cooking, clothing, etc.). This visual layout immediately reveals redundancies—like carrying two knives or three sources of fire.
Once you have the raw data, the real audit begins. Challenge every item. Is it essential? Does it have more than one use? Is there a lighter skill that could replace this physical object? This process is about ruthless optimization, and a structured approach ensures nothing is overlooked. The following checklist provides a framework for a complete and effective pre-hike audit.
Action Plan: Your Pack Weight System Audit
- Identify Key Interfaces: List all gear that directly interacts with your body (pack, clothes, shoes) and the environment (shelter, trekking poles). These are your primary points of friction and weight.
- Full System Inventory: Weigh every single item using a kitchen scale—down to the last stuff sack. Record everything in a spreadsheet to create a verifiable master list.
- Mission Coherence Check: For each item, ask: « Is this strictly necessary for *this specific trip’s* weather, duration, and risks? » Eliminate anything based on « what if » scenarios that are not probable.
- Function vs. Luxury Analysis: Categorize each non-essential item as either « multi-use functional » or « single-use luxury » (e.g., camp chair, book). Justify the weight of every luxury item.
- Optimization & Integration Plan: Identify the top 3 heaviest, non-critical items. Formulate a plan to replace them with lighter alternatives, multi-use items, or a skill you can learn.
How to prevent « crunchy peas » in your camp stew?
Preventing « crunchy peas » and under-rehydrated camp meals is a matter of technique, not just boiling time, and mastering it directly reduces pack weight by saving significant fuel. The core issue is that many dehydrated foods need time, not just intense heat, to fully absorb water. By using smarter rehydration methods, you can cook a meal perfectly with minimal fuel burn, allowing you to carry a smaller, lighter fuel canister.
The most effective method is cold-soaking *before* you cook. An hour or two before you plan to stop for the night, place your dinner (e.g., dehydrated beans, rice, pasta) in a leak-proof container like an old peanut butter jar with cold water. As you hike, the food will slowly rehydrate. When you make camp, it will only require a brief heating to be ready, instead of a long, fuel-intensive simmer. This is a classic example of system efficiency: using hiking time to accomplish a task that would otherwise consume a valuable resource.
Another critical technique is maximizing heat retention. Don’t let your pot sit in the cold wind, bleeding heat and wasting fuel. After bringing your meal to a boil for just a minute or two, turn off the stove. Immediately insulate your pot in a « pot cozy »—either a dedicated insulated sleeve or simply by wrapping it in your fleece hat or spare clothing. The retained heat will continue to cook the food for another 10-15 minutes without using any additional fuel. These techniques are key to a lighter pack:
- Pre-Soak Method: Use a leak-proof container to start rehydrating dinner with cold water 1-2 hours before stopping to hike.
- Pot Cozy Technique: After a brief boil, insulate the pot to let food cook using retained heat, saving precious fuel.
- Choose the Right Foods: Understand the difference between dehydrated foods (which need time and heat) and more expensive freeze-dried foods (which only need water) to plan your fuel needs accurately.
- Water Management: Hydrate fully at water sources (« camel up ») and carry only what you absolutely need to reach the next source. Water is one of the heaviest items in your pack, weighing 1kg (2.2 lbs) per liter.
Key Takeaways
- Pack weight directly impacts injury risk; aim for a total pack weight under 20% of your body weight, with a base weight as low as possible.
- Skills are weightless. Learning to maintain gear, navigate, and cook efficiently saves more weight and money than expensive purchases.
- The biggest safety threats (blisters, fabric failure, hypothermia) are preventable through proactive inspection and care, not by carrying a heavier, more reactive first-aid kit.
Navigating Unmarked Trails: How to Avoid Getting Lost without GPS?
The most effective way to avoid getting lost without a GPS is to master traditional map and compass skills, treating them not as a backup but as your primary navigation system. This knowledge as gear is the ultimate expression of ultralight philosophy: it replaces heavy, failure-prone electronics and their requisite power banks with a near-weightless skill set. A map and compass are reliable, waterproof, and never run out of batteries, making them inherently safer.
The foundation of this skill is « dead reckoning »—a method of calculating your position by using a known starting point and advancing it based on estimated speed, time, and compass bearing. It requires you to be constantly engaged with your surroundings, which also increases your overall situational awareness. This contrasts sharply with the passive, screen-focused nature of GPS navigation, where it’s easy to walk for miles without noticing key landscape features. While the general backpacking guideline recommends carrying no more than 20-25% of your body weight, much of that excess often comes from redundant or heavy electronics that a skilled navigator can leave at home.
Adopting a traditional navigation mindset involves using the landscape itself as a tool. The following techniques form a robust, non-digital system for staying found:
- Dead Reckoning Method: Master pace counting (knowing how many steps you take to cover 100 meters) and combine it with your compass and watch to track distance and direction travelled from your last known point.
- « Handrails » Strategy: Use obvious, linear landscape features like rivers, ridgelines, or even roads as navigational corridors. As long as you keep the feature to your left or right, you know you are moving in the correct general direction.
- « Catching Features » Technique: When your target is small (like a spring or campsite), identify a large, unmissable landmark on the map *beyond* it. If you reach this « catching feature » (e.g., a major river or a peak), you know you’ve gone too far.
- Natural Navigation Backup: As a final layer, learn to use the sun’s path, prevailing winds, and even vegetation patterns as a biological compass for rough orientation when all else fails.
By shifting your focus from acquiring lighter gear to acquiring essential skills, you fundamentally change the equation. The weight savings are a byproduct of a more efficient, resilient, and safer system. This mindset—where knowledge is your lightest and most valuable piece of gear—is the true essence of ultralight backpacking. It is a continuous process of auditing, refining, and learning. Start not by opening your wallet, but by opening a map.