
True wilderness navigation isn’t about which gadget to trust, but about building a personal system of ‘preventative awareness’ that makes getting dangerously lost almost impossible.
- Digital tools like smartphones are inherently unreliable due to accuracy limitations, battery life, and signal dependency.
- Mastering analog skills (map reading) and understanding psychological traps (like the temptation of a shortcut) are the core of real safety.
Recommendation: Shift your focus from reactive emergency tools to proactive navigation habits; your brain is your primary GPS.
For the modern hiker, the allure of the unmarked trail is a powerful call to adventure. It promises solitude, discovery, and a deeper connection to nature. Yet, this freedom is often shadowed by a significant fear: getting lost. In an era dominated by technology, the default solution seems simple: just use your phone’s GPS. We are conditioned to trust the glowing dot on the screen. However, this reliance is a fragile one, and in the deep wilderness, it can be a catastrophic single point of failure. While many articles focus on the basics of using a compass or downloading offline maps, they often miss the fundamental issue.
The conversation needs to move beyond a simple debate of analog versus digital. The key to safely navigating off-piste territory is not about replacing one tool with another, but about changing your entire mindset. It’s about developing a robust, multi-layered system of what can be called preventative awareness. This system integrates skills, tools, and decision-making protocols to ensure you are constantly oriented, making it incredibly difficult to become lost in the first place. It reframes navigation from a reactive task (« Where am I? ») to a proactive, continuous process (« Where am I going, and what confirms my position? »).
This guide will deconstruct the components of that system. We will explore the real-world failure points of technology, dive into the critical skill of reading a topographical map, analyze the dangerous psychology behind common hiking mistakes, and provide a clear framework for choosing your tools and packing your gear. The goal is to empower you with the rigorous, systematic approach of a professional, transforming fear into confident competence.
To guide you through this comprehensive approach, this article is structured to build your knowledge layer by layer. The following summary outlines the key stages of developing your personal navigation system, from understanding the risks to mastering the essential skills and gear.
Summary: A Systematic Guide to Off-Trail Navigation
- Why relying solely on smartphones is dangerous in deep wilderness?
- How to read a topographical map to find water sources?
- The « shortcut » mistake that leads to dangerous terrain traps
- Paper map vs Satellite beacon: Which is the ultimate safety net?
- When to turn back: The turnaround time rule for day hikes
- How to share your location without draining your battery?
- In what order to pack supplies: The ABC priority rule
- Building a Kit: Why Store-Bought First Aid Packs Fail in Real Emergencies?
Why relying solely on smartphones is dangerous in deep wilderness?
The idea that your smartphone is a reliable wilderness lifeline is the most dangerous misconception in modern hiking. While services like Google Maps are brilliant for urban navigation, their technology has critical failure points in remote environments. The first issue is battery life, which plummets in cold weather or when the device is constantly searching for a signal. The second is fragility; a single drop or water exposure can render it useless. But the most insidious problem is the illusion of precision. Even when functioning, consumer-grade GPS units are only accurate to within 10 feet about 95% of the time, with the remaining 5% potentially placing you hundreds of feet off course. In dense forest or a deep canyon, that 5% margin of error can be the difference between being on a faint trail and being hopelessly lost in a ravine.
This over-reliance creates a passive navigation mindset. You stop observing the terrain around you—the shape of the ridgeline, the direction of the sun, the sound of a distant stream—because you trust the screen to do the work. When the screen inevitably goes dark, you are left with no skills and no situational awareness. You haven’t been building a mental map of your journey; you’ve simply been following a dot. This is a classic failure point in any system, where the failure of a single component leads to total system collapse.
The tragic, and ultimately successful, search for Amanda Eller in Hawaii serves as a stark reminder. After wandering off-trail on a short hike without any backup navigation, she spent 17 days lost. This demonstrates how quickly a casual hike can turn into a life-threatening ordeal when technology is absent and fundamental skills are lacking. The wilderness does not forgive this kind of dependency. True safety comes from assuming technology will fail and having the skills to proceed without it.
How to read a topographical map to find water sources?
A topographical map is the cornerstone of preventative awareness. Unlike a digital screen that gives you a single point, a « topo » map provides a comprehensive understanding of the three-dimensional landscape. Its most powerful feature is the use of contour lines, which represent elevation. Learning to read these lines allows you to visualize the terrain, identify hazards like cliffs, and, crucially, predict the location of water—the most critical resource for survival.
Water follows gravity, flowing from high to low ground through the path of least resistance. On a map, this creates distinct patterns in the contour lines. The primary indicator is the « V » shape. When contour lines cross a stream or drainage, they form a « V » that always points uphill, or upstream. By identifying these V’s, you can trace the path of a gully or creek even if it’s not marked with a blue line. Tightly packed U-shaped contours on a hillside often indicate a spring or seep, another potential source.

As you can see, these patterns are not just abstract lines; they are a language describing the shape of the land. It’s also vital to distinguish between perennial and intermittent sources. A solid blue line indicates a river or stream that flows year-round. A dashed blue line signifies an intermittent stream that may be dry depending on the season. Always cross-reference your map with recent weather conditions and the time of year. A reliable water source in the spring might be a dry bed by late summer. This skill transforms the map from a simple chart into a predictive tool for survival.
The « shortcut » mistake that leads to dangerous terrain traps
One of the most common and fatal errors in wilderness navigation stems from a simple psychological flaw: the allure of the shortcut. After a long ascent, the desire to take a more direct route down can be overwhelming. Hikers often abandon the winding, established trail in favor of a « straight shot » down a slope, assuming it will save time and energy. This is a cognitive bias known as ‘summit fever’ or goal fixation, where the desire to finish quickly overrides rational judgment. This decision frequently leads directly into what seasoned mountaineers call terrain traps.
A terrain trap is a feature of the landscape that is easy to enter but difficult or impossible to exit. The « shortcut » down a steep, wooded hillside may quickly devolve into an impassable thicket of vegetation, a hidden cliff band, or a slippery scree field. What looked like an easy descent from above becomes a perilous problem from within. Reversing course and climbing back up is often physically exhausting and demoralizing, leading to further poor decisions. It is no coincidence that a staggering 75% of hiking fall accidents occur during the descent, a period when fatigue is high and the temptation to cut corners is strongest.
Avoiding this mistake is a core tenet of preventative awareness. It requires discipline and a fundamental respect for the trail. The designated path was created for a reason: it navigates the terrain safely and efficiently. The belief that you can outsmart the collective wisdom of trail builders is an act of hubris the wilderness often punishes. The rule is simple and absolute: stick to the planned route. Any deviation must be a calculated, conscious decision made to avoid a known hazard, not a spontaneous choice driven by impatience.
Paper map vs Satellite beacon: Which is the ultimate safety net?
In building a navigation system, hikers often question which tool provides the ultimate safety net: the traditional paper map and compass or the modern satellite beacon (like a Personal Locator Beacon, or PLB). This is a false dichotomy. These tools are not interchangeable; they serve two completely different functions in your safety system. The map and compass are for prevention, while the beacon is for a last-resort cure. A robust system requires both.
The map and compass are proactive tools. They demand your active engagement, forcing you to maintain situational awareness, read the terrain, and constantly confirm your position. Their reliability is absolute: they have no batteries to die, require no satellite signal, and function in any weather. They empower you to navigate yourself out of trouble and, more importantly, to avoid getting into trouble in the first place. A satellite beacon, on the other hand, is a purely reactive tool. Its sole purpose is to send a distress signal *after* an emergency has already occurred. It is an admission that prevention has failed and self-rescue is no longer an option.
This table from a recent comparative analysis of navigation tools clarifies their distinct roles. Relying solely on a beacon for safety is like driving a car without brakes, assuming your airbag will save you in a crash. It’s a fundamentally flawed approach to risk management.
| Navigation Tool | Primary Function | Reliability Factors | Limitations | Best Use Case |
|---|---|---|---|---|
| Paper Map & Compass | Prevention – Avoid getting lost through active navigation | No batteries, no signal required, works in all weather, indestructible when protected | Requires skill and practice, slower than GPS, affected by magnetic declination | Primary navigation tool for proactive route-finding and situational awareness |
| Satellite Beacon/PLB | Cure – Emergency SOS after incident occurs | Global satellite coverage, dedicated distress signal, registered with rescue coordination | Rescue can be delayed hours/days by weather, terrain, or SAR availability; one-way communication only | Last-resort emergency backup when prevention has failed and self-rescue is impossible |
| Satellite Messenger (e.g., Garmin inReach) | Hybrid – Communication + limited navigation | Two-way messaging, location tracking, weather updates, SOS capability | Requires subscription, battery-dependent, functions as beacon not map/compass replacement | Maintaining contact with outside world and backup emergency communication |
The ultimate safety net is not a single device, but a layered system. Your primary navigation should always be map and compass, supported by a GPS for quick reference if you choose. A satellite messenger or PLB is the final layer, a critical piece of emergency equipment for a worst-case scenario. One does not replace the other.
When to turn back: The turnaround time rule for day hikes
One of the hardest but most important decisions in the wilderness is when to abandon your goal and turn back. Ego, pride, and the « commitment trap »—the feeling that you’ve invested too much to quit—can push hikers past their limits and into dangerous situations. To combat this, you must establish a hard, non-negotiable rule before you even begin your hike: the designated turnaround time. This simple protocol is a powerful tool for disciplined decision-making.
The rule is straightforward: determine the total time you have for the hike and divide it by two. If you have eight hours of daylight, your absolute latest turnaround time is four hours after you start, regardless of whether you’ve reached your destination. This ensures you have a sufficient buffer of time and energy to make the return journey safely. Hiking in the dark on an unfamiliar trail dramatically increases the risk of trips, falls, and navigation errors. In fact, wilderness safety data from 2025 shows that 70% of hiking accidents occur in the afternoon and evening, between 12 PM and 6 PM, as fatigue sets in and daylight wanes.
A documented scenario from outdoor accident investigator Jed Williamson perfectly illustrates the commitment trap. A hiker, determined to reach a scenic ridge, started late. Despite passing a sheltered campsite as conditions worsened, he pressed on, committed to his original goal. Exhausted and caught in the rain on slick terrain with nowhere to camp, he found himself in a life-or-death situation. The more you commit to a flawed plan, the harder it becomes to turn back. Your turnaround time is your objective circuit breaker. When that time arrives, the decision is already made. You turn around. No debate, no exceptions.
How to share your location without draining your battery?
Even within a system that prioritizes analog skills, technology has a role to play, particularly in communication. Sharing your location with a trusted contact or leaving a digital breadcrumb trail can be a valuable safety layer. However, this must be managed strategically to avoid the primary pitfall of smartphone use: battery drain. Continuous GPS tracking on a phone can deplete a full battery in a matter of hours. The key is to use periodic, low-energy methods rather than constant live tracking.
The most effective strategy is to keep your phone in airplane mode as the default setting. This stops the device from constantly searching for a cellular signal, which is one of the biggest power consumers in the backcountry. From there, you can employ several battery-efficient tactics:
- Periodic GPS Check-ins: Once an hour, or at pre-defined waypoints like trail junctions or summits, briefly toggle airplane mode off. Allow your phone 60 seconds to acquire a GPS signal and update its location history (e.g., Google Timeline). Then, immediately return to airplane mode. This creates a track that Search and Rescue (SAR) could potentially access without killing your battery.
- Pre-written Messages on Satellite Devices: If using a satellite messenger like an inReach or Zoleo, use pre-written « I am OK » messages sent at specific intervals instead of continuous tracking. This uses significantly less power and still provides peace of mind to your contacts.
- The Zero-Battery Backup: The ultimate battery-saving technique is analog. Leave a detailed, written trip plan with a reliable person. This plan is your most critical piece of communication. It should include your exact route, potential bailout points, your non-negotiable turnaround time, and the contact information for the local SAR team or land manager.
This approach embodies the principle of system redundancy. You have a digital method (periodic check-ins), a satellite method (if carried), and a foolproof analog method (the trip plan). As Outdoor Tech Lab’s JC Courtland notes after extensive wilderness testing, « Triple redundancy keeps you safe when Murphy’s Law strikes—because in wilderness, it always does eventually. »
In what order to pack supplies: The ABC priority rule
How you pack your backpack is a direct reflection of your wilderness mindset. A poorly packed bag, where essential safety items are buried at the bottom, can turn a minor incident into a serious emergency. A well-organized pack is not about neatness; it’s about immediate access to critical gear. To achieve this, you can follow a simple system: the ABC Priority Rule.
The ABC rule stands for Accessibility, Balance, and Core Compression. It dictates where items should be placed based on their likelihood of being needed and their weight.
- A – Accessibility: The top compartment (the « brain ») of your pack and easily accessible outer pockets are reserved for items you may need quickly or frequently. This includes your map, compass, GPS, headlamp, first-aid kit, water filter, rain gear, and snacks. You should be able to grab your rain jacket without unpacking your entire bag when a storm rolls in.
- B – Balance: The heaviest items in your pack should be placed in the middle, close to your spine and between your shoulder blades. This includes your food supply, bear canister, and cooking equipment. Placing heavy items here creates a stable center of gravity, making the load feel lighter and preventing the pack from pulling you backward.
- C – Core Compression: The bottom of your pack is for lighter, compressible items that you won’t need until you make camp. This is the perfect place for your sleeping bag, sleeping pad, and camp clothes, all stored in waterproof compression sacks. They form a stable base for the heavier items above them.
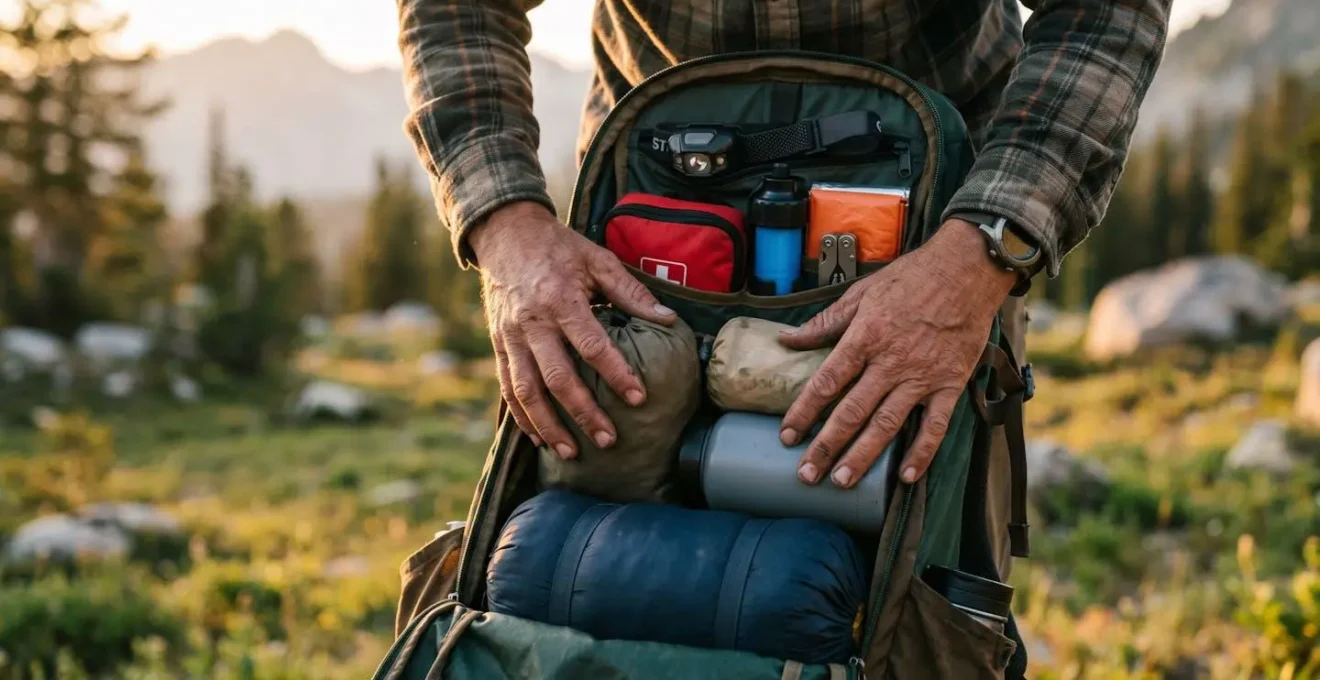
This systematic approach ensures that your pack is both comfortable to carry and functional in an emergency. When you suddenly need your first-aid kit or headlamp, it won’t be buried under your tent and sleeping bag. Practicing this discipline every time you pack reinforces the preventative awareness mindset, forcing you to think critically about what you might need and when.
Key Takeaways
- True wilderness safety is a mindset of ‘preventative awareness,’ not a reliance on any single tool or technology.
- Your navigation system must be redundant, combining the proactive skill of map-and-compass with the reactive safety of a beacon.
- A real first-aid kit is customized for trauma and backed by training; store-bought kits are dangerously inadequate for serious emergencies.
Building a Kit: Why Store-Bought First Aid Packs Fail in Real Emergencies?
The final layer of your safety system is your first-aid kit. Yet, this is an area where many well-intentioned hikers make a critical mistake. They purchase a pre-packaged, store-bought kit, toss it in their bag, and assume they are prepared. This is a dangerous illusion. Commercial kits are designed to treat minor scrapes and blisters, not the serious trauma that can occur in the wilderness. According to 2025 hiking preparedness surveys, a shocking only 23% of hikers carry a first aid kit at all, and of those who do, most carry ones that are inadequate for a real emergency.
A true wilderness first-aid kit is not bought; it is built and customized. It must be designed to address the most likely and most severe injuries you could face: major bleeding, fractures, and severe allergic reactions. A kit full of tiny bandages is useless when faced with an arterial bleed from a deep laceration. Your focus must shift from minor inconveniences to life-saving interventions. Building your own kit forces you to understand the purpose of each item and to gain the training necessary to use it under extreme pressure.
The single most important item in any first-aid system is not a physical object, but knowledge. A Wilderness First Aid (WFA) or Wilderness First Responder (WFR) certification is non-negotiable. Without training, the best kit in the world is just dead weight. To transform your kit from a box of band-aids into a genuine life-support tool, you must audit it with a critical eye.
Your 5-Point First-Aid Kit Audit
- Potential Injuries: Identify the most common major injuries (severe bleeding, sprains, fractures). Does your kit have the tools to manage them (e.g., pressure dressings, tourniquet, splinting materials)?
- Skill Inventory: Honestly assess your training. Do you know how to use every item in your kit under stress? If not, inventory the gaps and book a WFA course.
- System Coherence: Confront your kit with a « worst-case scenario » mindset. Add multi-use workhorses like duct tape (for blisters, splinting, gear repair) that commercial kits omit for liability reasons.
- Critical Components: Assess your medications. Does your kit contain essentials for managing pain and inflammation (like high-dose Ibuprofen) and severe allergic reactions (antihistamines)? These are often excluded from pre-made kits.
- Integration Plan: Based on the audit, create a specific shopping list for missing trauma supplies and life-saving medications. Systematically replace or add these items to build a kit you can truly trust.
Start building your preventative awareness system today. Practice these skills, audit your gear with a rigorous eye, and transform your relationship with the wilderness from one of fear to one of deep, respectful competence.