Your commercial first-aid kit is not designed to save your life; it’s designed to treat minor inconveniences and be sold at a profit.
- Most kits critically lack tools to stop massive, life-threatening bleeding—the number one preventable cause of death in the wild.
- Their contents, especially medications, often become useless due to temperature degradation long before their printed expiration date.
- They are not organized for rapid access under duress, making them a frustrating liability when seconds count.
Recommendation: Ditch the pre-packaged mindset. Audit your gear based on lethal threats, not a generic checklist, and build a prioritized system of interventions you are trained to use.
You bought the top-rated first-aid kit on the market. It’s compact, filled with neatly organized pouches, and has a hundred-item checklist that gives you a profound sense of security. You are prepared. The truth? You’re carrying a box of plasters to a gunfight. In a real wilderness emergency, that kit is more likely to be a source of fatal delay than a life-saving tool. As a wilderness medicine nurse, I’ve seen the devastating aftermath of this false security. The standard advice to simply « buy a kit and add a few personal items » is dangerously negligent.
These kits are built on a fundamental, market-driven lie: that all potential injuries are created equal. They allocate as much space to a dozen assorted band-aids and an antiseptic wipe as they do to tools that could stop a catastrophic hemorrhage. This isn’t a safety tool; it’s a product designed for broad consumer appeal, targeting minor cuts and scrapes. It completely ignores the brutal reality of what actually kills people in the backcountry: massive bleeding, airway obstruction, and environmental emergencies. The illusion of preparedness is more dangerous than no preparation at all because it prevents you from asking the right questions.
This is not another checklist article. This is a critical deconstruction of why your kit will fail and a complete philosophical shift in how you should approach emergency preparedness. We are moving away from a ‘collection of items’ and towards an ‘intervention-based system’. We will analyze the specific failure points of commercial kits—from inadequate tools and degraded medications to poor accessibility under stress. We will rebuild your approach from the ground up, prioritizing the gear and skills that address lethal threats first. It’s time to build a kit that might actually save your life, or the life of someone you care about.
This guide will walk you through the critical flaws in standard kits and provide the expert-backed framework for building a truly effective wilderness medical system. Prepare to re-evaluate everything you thought you knew about being prepared.
Summary: Rethinking Your Wilderness First Aid System
- Why 90% of commercial kits lack adequate bleeding control tools?
- How to modify your kit for snake bite zones specifically?
- The expiration oversight that makes your allergy meds useless
- Hard case vs Dry bag: Which allows faster access under stress?
- In what order to pack supplies: The ABC priority rule
- Paper map vs Satellite beacon: Which is the ultimate safety net?
- The equipment sizing error that restricts movement in an emergency
- Solo Female Camping: How to Feel Safe and Empowered in the Wilderness?
Why 90% of commercial kits lack adequate bleeding control tools?
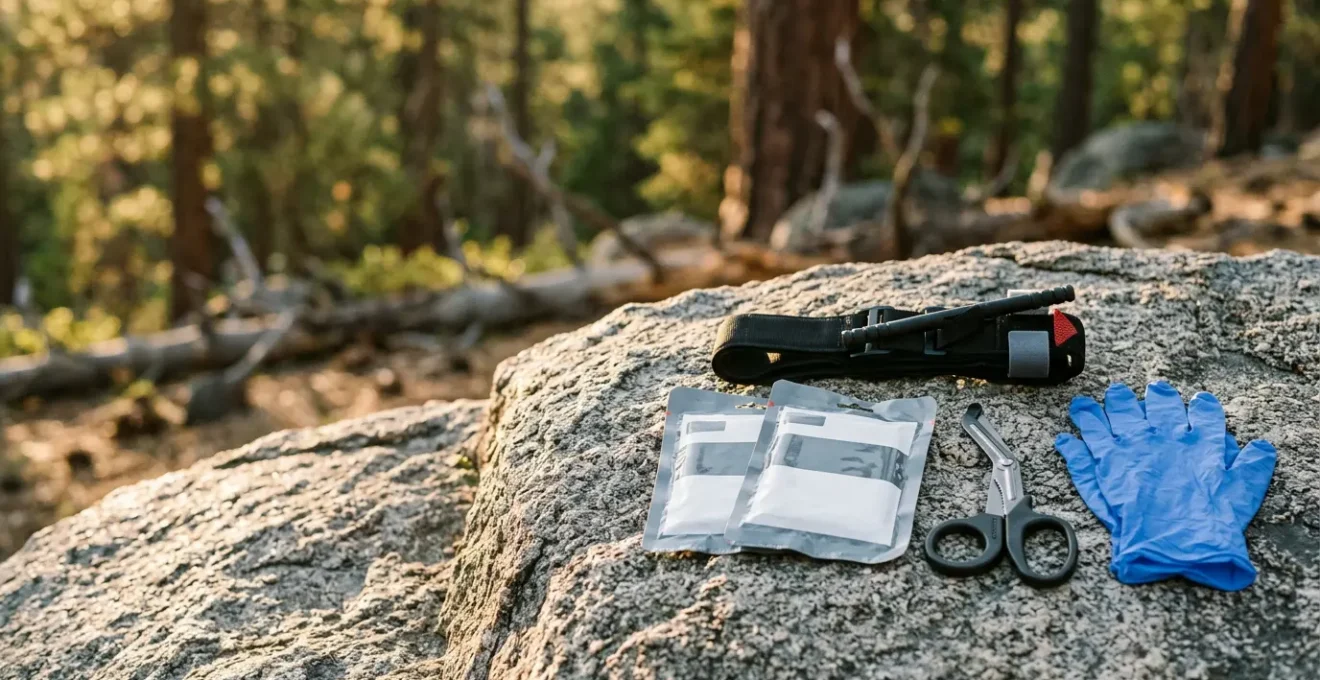
Look inside your commercial first-aid kit. You’ll find a plethora of small adhesive bandages, sterile gauze pads, and maybe a roll of medical tape. Now, imagine a deep laceration from a fall onto a sharp rock or a severe leg injury from a tool mishap. The reality is stark: nothing in that kit is designed to stop catastrophic bleeding. This isn’t a minor oversight; it’s the single most critical failure of 99% of pre-packaged kits. Uncontrolled traumatic bleeding is the leading cause of preventable death in these scenarios. In fact, over 60,000 people die annually from traumatic bleeding before even reaching a hospital.
Commercial kits are designed to treat abrasions, not arterial bleeds. The small gauze pads they provide are woefully inadequate for applying the immense, direct pressure needed to control a major hemorrhage. The real tools for this job are a commercial tourniquet (like a CAT or SOFTT-W) and hemostatic gauze (impregnated with an agent that accelerates clotting). These items are standard issue for military and EMS professionals for one reason: they work. A tourniquet is not a « last resort » as old myths suggested; it is the first and best response for life-threatening limb hemorrhage. Yet, you will almost never find one in a kit sold at a general outdoor retailer because they require training and are seen as « too extreme » for the average consumer.
This highlights the dangerous disconnect between what is sold and what is needed. The industry prioritizes low-cost, low-liability items over genuinely life-saving equipment. As the Stop the Bleed Coalition emphasizes, the gear itself is only one part of the equation. Their key message goes beyond items:
The most critical missing component is a recommendation for hands-on training (e.g., a ‘Stop the Bleed’ course), framing the gear as useless without the knowledge to deploy it.
– Stop the Bleed Coalition, Stop the Bleed Training Program
Your kit must contain, at a minimum, a modern tourniquet and a package of hemostatic dressing. If it doesn’t, it is not a serious emergency kit; it is a boo-boo box.
How to modify your kit for snake bite zones specifically?
If your adventure takes you into snake country, simply carrying a generic first-aid kit is an act of negligence. This is a perfect example of where a « one-size-fits-all » approach fails catastrophically. The specific environmental threat of a venomous snakebite requires specialized knowledge and, more importantly, the discipline to avoid doing the wrong thing. First, it’s crucial to manage panic with facts; wilderness medicine data shows that 30-50% of reported snake bites are ‘dry’ bites where no venom is injected. The immediate response should be calm assessment, not frantic, Hollywood-inspired interventions.
The most dangerous items related to snakebites are the commercial « snakebite kits » themselves. These suction devices have been proven to be useless, removing less than 2% of venom while causing significant tissue damage. Throw them away. Your modification for a snakebite zone isn’t about adding complicated gear, but about adding a permanent marker and an elastic wrap bandage (like an ACE bandage). The marker is used to circle the bite area and mark the leading edge of swelling every 15-30 minutes, noting the time. This provides critical diagnostic information for emergency physicians. The elastic wrap is for the pressure-immobilization technique, used for elapid snakes (like corals), where the limb is wrapped to slow the spread of neurotoxic venom through the lymphatic system.
The primary intervention is immobilizing the affected limb and evacuating the patient to definitive medical care immediately. This simple, effective technique is what truly saves lives, not the dramatic and harmful methods often depicted.
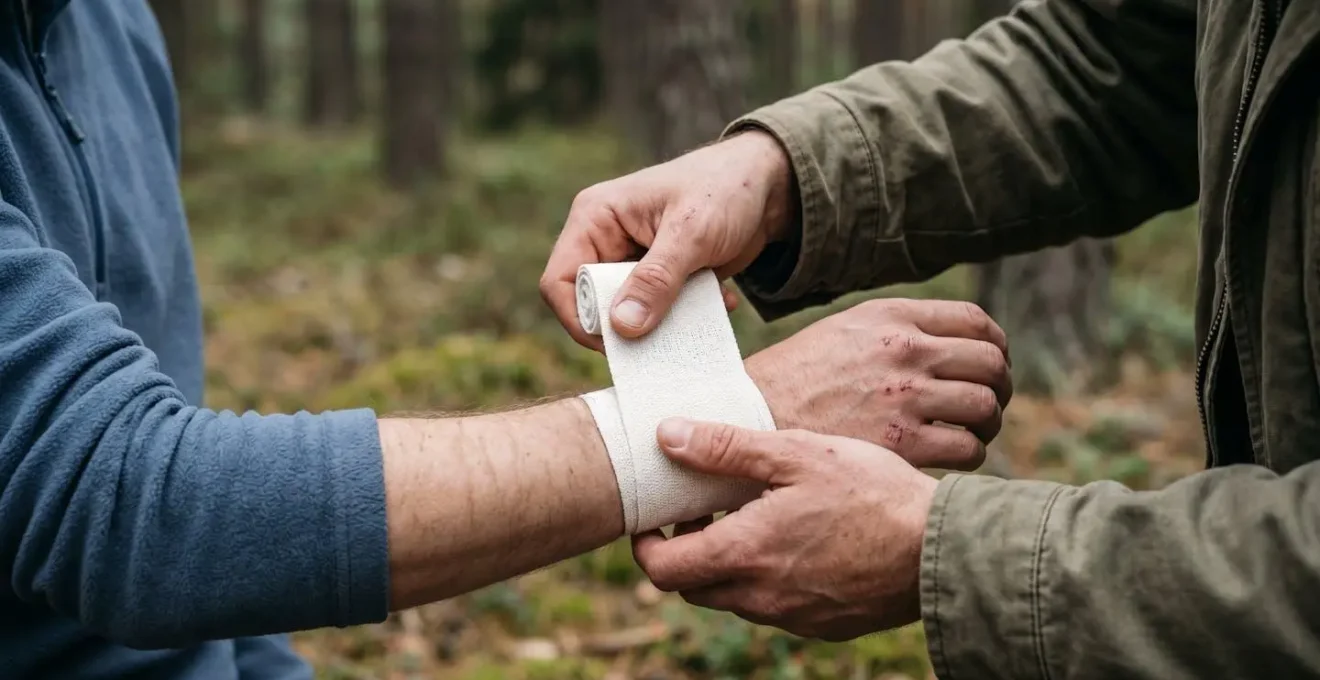
As shown, the goal is gentle immobilization, not cutting off circulation. A proper wrap should be snug but not tight. Below is a list of critical « do nots »—the actions you must avoid that are often incorrectly portrayed as helpful.
- DO NOT apply a tourniquet – this concentrates venom and can cause additional cellular damage to the extremity.
- DO NOT use commercial suction devices or ‘snake bite kits’ – studies show they remove less than 2% of venom.
- DO NOT cut and suck the wound, apply ice, or use electrical shock.
- DO mark the leading edge of swelling with a permanent marker and note the time of bite.
- DO keep the victim calm and the bitten limb immobilized at or below heart level.
- DO clean the wound with soap and water, then evacuate to medical care immediately.
The expiration oversight that makes your allergy meds useless
Every responsible adventurer knows to check the expiration dates on their medications. But what almost no one understands is that the date printed on the box is a useless fantasy. That date is only valid under ideal storage conditions—typically room temperature, protected from light. Your first-aid kit, whether left in a car, a backpack, or a boat, is subjected to a brutal cycle of temperature extremes that can render life-saving drugs like epinephrine (EpiPen) or diphenhydramine (Benadryl) impotent long before their official expiry. This is the expiration oversight that can turn a treatable allergic reaction into a fatal case of anaphylaxis.
The science is clear: heat and cold cycles rapidly degrade the chemical structure of medications. In fact, pharmaceutical storage studies found that 52% of medication storage areas exceeded 25°C (77°F), a temperature that triggers accelerated degradation in many common drugs. A vehicle’s interior can reach over 60°C (140°F) on a sunny day, effectively ‘cooking’ your medications and destroying their potency. Even a backpack left in the sun can reach these damaging temperatures. What you think is a life-saving dose of Benadryl might just be a chalky, ineffective placebo when you actually need it.
This isn’t theoretical. The real-world impact of these temperature excursions has been studied extensively, providing a stark warning for anyone who stores medical supplies in uncontrolled environments.
Case Study: The Reality of Vehicle Medication Storage
A pivotal study of EMS helicopter medication storage provides a shocking look at real-world conditions. Researchers found that temperatures inside protective drug bags fell outside the manufacturer-recommended range (15-30°C) during 49% of winter days and a staggering 56% of summer days. The conclusion was undeniable: medications stored in vehicles, even inside professional-grade bags, are exposed to temperature extremes that can significantly degrade their effectiveness. This applies directly to any kit stored in a car, boat, or RV.
The only solution is a ruthless replacement schedule. For critical medications like an EpiPen or other allergy relievers stored in a pack or vehicle, you must assume their potency is compromised. A conservative rule is to replace them at least annually, or after any known period of extreme temperature exposure (e.g., a multi-day trip in the desert sun or a winter trip where the pack froze overnight), regardless of the printed date. Your life may depend on a fully potent dose, not a degraded chemical.
Hard case vs Dry bag: Which allows faster access under stress?
The container of your first-aid kit is not just a bag; it’s the interface to your entire emergency system. In a high-stress situation—with shaking hands, fading light, and a patient in distress—the difference between a well-designed container and a poor one is measured in critical seconds. The debate between a rigid hard case (like a Pelican) and a soft dry bag often centers on waterproofness or durability. This is the wrong debate. The most important metric is accessibility under duress. A kit you can’t open or find things in quickly is a failure.
Hard cases offer superior crush protection and organization, often with dividers that keep items in place. However, their latches can be difficult to operate with cold, numb fingers or while wearing gloves. They are also bulky and heavy. Soft bags, like dry bags or zippered pouches, are lightweight and flexible. But they often become a « black hole » where supplies are jumbled together, forcing you to dump everything on the ground to find what you need—a disastrous scenario in rain or snow. The ideal solution often involves a hybrid approach: a brightly colored, wide-mouth zippered bag with internal, clearly-labeled modular pouches (e.g., a « Bleeding » pouch, a « Meds » pouch).
Ultimately, your choice must be validated not by its features on a website, but by a physical stress test. Your ability to access life-saving equipment must rely on gross motor skills, not fine, delicate movements that disappear when adrenaline floods your system. Before committing to any container, you must be able to pass the following test.
Your Action Plan: The Gross Motor Skills Accessibility Test
- Can you open the container with one hand only while wearing the gloves you’d use in an emergency?
- Can you open it with your eyes closed, simulating low-light or high-stress, disorienting conditions?
- Can you identify and extract a critical item (e.g., a tourniquet) within 10 seconds of opening the kit?
- Is the container brightly colored (red, orange) for quick identification if dropped or inside a larger pack?
- Could a panicked companion, unfamiliar with your kit, access life-saving items without instruction?
If the answer to any of these questions is « no, » your container is a liability. It’s actively working against you. The goal is a system so intuitive and simple that it remains functional when you are at your absolute worst.
In what order to pack supplies: The ABC priority rule
The way you pack your first-aid kit is a direct reflection of your medical priorities. A randomly stuffed bag is a recipe for fatal fumbling. A properly organized kit is a life-saving system where the most critical items are the most accessible. Forget the common advice to organize by « category » (e.g., all bandages together). You must organize by immediacy of threat. In wilderness and tactical medicine, we use a system like the M.A.R.C.H. algorithm to prioritize interventions, and your kit’s layout should mirror this.
The core principle is simple: items that treat the problems that will kill you in the next 60 seconds must be accessible in under 10. This means gear for Massive Hemorrhage (the « M » in M.A.R.C.H.) must be at the very top or in an external, instantly accessible pocket. This is your « Now » layer. Digging for a tourniquet under a pile of blister pads while someone is bleeding out is a complete system failure. Your gloves must also be in this layer, as they are the very first thing you should put on.
Below the « Now » layer is your « Soon » layer, for problems that will kill or severely harm someone in the next several minutes to an hour. This includes supplies for wound cleaning and dressing (after bleeding is controlled), splinting, and basic medications. The final, deepest layer is the « Later » layer. This contains comfort and convenience items: blister care, spare batteries, athletic tape, and anything else you would only address once the patient is stabilized and the immediate life threats have been managed. This layered approach turns your kit from a chaotic collection into a logical workflow.
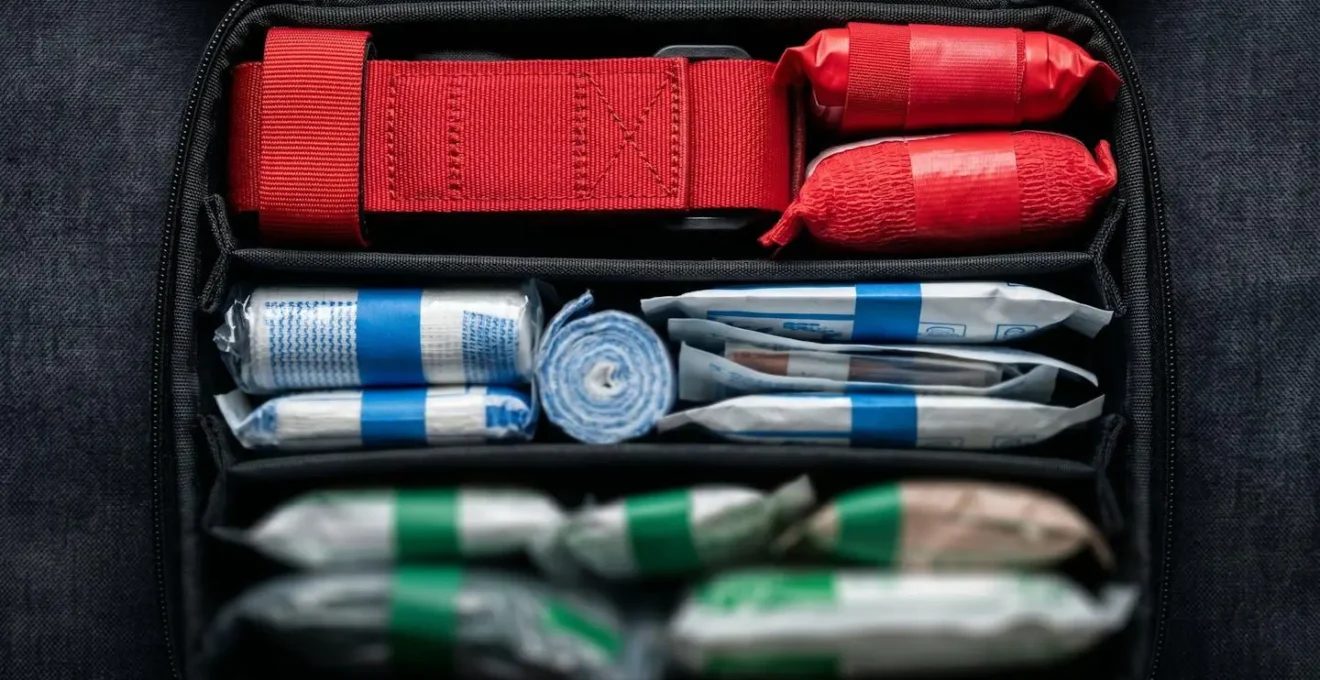
This organizational philosophy is non-negotiable for a serious wilderness medical kit. It ensures that your actions are guided by a proven life-saving protocol, not by random chance. A practical application of this system would be to use separate, color-coded pouches within your main kit.
- Layer 1 (The ‘Now’ Layer – Most Accessible): Nitrile gloves (must be first item touched), tourniquet, hemostatic gauze, pressure dressing for massive hemorrhage control. Airway/Respiration supplies like a CPR barrier device.
- Layer 2 (The ‘Soon’ Layer – Middle Access): Wound cleaning supplies, various bandages, basic medications, SAM splint, triangle bandages.
- Layer 3 (The ‘Later’ Layer – Deepest): Blister care, spare batteries, athletic tape, safety pins, notepad and pen for documentation.
Paper map vs Satellite beacon: Which is the ultimate safety net?
The modern adventurer’s debate often pits old-school reliability against new-school technology: is a laminated paper map and a compass a better safety net, or is a satellite messenger/Personal Locator Beacon (PLB) the ultimate fail-safe? The map-and-compass enthusiast argues that batteries die and electronics fail. The tech advocate points out that a map can’t call for a helicopter when you have a broken femur. They are both missing the point. The greatest failure point isn’t in your pack; it’s in your planning.
Both a map and a beacon are tools. They are critical, and you should carry both (and know how to use them). A paper map provides micro-level navigational context and works without power. A satellite device provides macro-level communication and a direct line to rescue services. They are redundant systems that cover different failure modes. However, relying on either as your *ultimate* safety net is a rookie mistake. What happens if your pack is swept away in a river crossing? Your map and beacon are gone. What if you are incapacitated and cannot activate your beacon or read your map?
The true ultimate safety net has no batteries, weighs nothing, and can’t get lost. It is the detailed, written trip plan you leave with a reliable, responsible person back home. This document should include your exact route, planned campsites, bailout points, expected return time, and a « panic time »—a specific time at which, if you have not made contact, they are to initiate a search and rescue operation by calling the appropriate authorities (e.g., county sheriff, park rangers). This human element is the final, most robust layer of the safety system.
The ultimate safety net is the detailed trip plan you leave with a trusted contact. It works even if all your electronics die and your map blows away. It’s the human element that provides the final layer of security.
– Wilderness Medicine Training Center, Wilderness First Aid Program Guidelines
Your gear is for managing the situation on the ground. Your trip plan is for when you can no longer manage the situation at all. It is the one system that works even when you are completely incapacitated.
The equipment sizing error that restricts movement in an emergency
In the controlled environment of your living room, every piece of your first aid kit seems perfectly functional. But in a real emergency, with a struggling patient and awkward positioning, you’ll discover a subtle but critical failure point: incorrect equipment sizing. This isn’t about your clothing; it’s about your medical gear. A one-size-fits-all approach is a dangerous fallacy, and an improperly sized tool can be just as useless as no tool at all.
Consider a simple but vital piece of equipment: gloves. Most standard kits include size « Large » gloves. If you have small hands, they will be baggy and clumsy, robbing you of the dexterity needed for delicate tasks like handling a needle or placing a small bandage. If you have extra-large hands, you might waste precious seconds trying to force them on, or worse, rip them in the process, exposing yourself to bloodborne pathogens. You must carry gloves that are your correct size and at least one pair a size larger, in case you need to fit them over a smaller pair or your hands are swollen.
This principle extends to other critical items. A standard-sized SAM splint may be too short to effectively immobilize a long-bone fracture on a tall individual, failing to secure the joints above and below the break. A blood pressure cuff that is too small for a muscular or swollen arm will give a falsely high reading, leading to incorrect assessment and treatment decisions. A nasal pharyngeal airway (NPA) that is too long can enter the esophagus instead of the trachea, while one that is too short is ineffective. Your kit must be personalized not just for your activities, but for your own body and the bodies of those you travel with. It requires a conscious audit: are my tools appropriately sized for the people they might be used on?
Thinking that a « standard » size will suffice is a gamble. In an emergency, you need equipment that fits the patient and the situation, not a generic placeholder that only looks good on a checklist.
Key Takeaways
- Commercial kits are fundamentally flawed, prioritizing minor wound care over tools for life-threatening emergencies like massive bleeding.
- A first-aid kit must be treated as a prioritized system, not a random collection of items. The M.A.R.C.H. protocol (Massive Hemorrhage first) should dictate its layout.
- External factors, especially temperature, degrade medications far faster than printed expiration dates, requiring a ruthless replacement schedule for critical drugs like EpiPens.
How can solo female campers build a system for safety and empowerment?
For solo female adventurers, personal safety is an added layer of planning that goes beyond medical preparedness. Feeling safe and empowered in the wilderness isn’t about being paranoid; it’s about having a smart, proactive, and layered security system. The goal is not to eliminate all risk, but to deter potential threats and enhance your situational awareness so you can act from a position of strength, not fear. This system is psychological, audible, and visual, designed to make you a « hard target » and give you the confidence to fully embrace your solitude.
First, recognize that the biggest asset you have is situational awareness. This means arriving at your campsite with enough daylight to survey the area, noting other people, access points, and establishing a baseline of normal sounds. Any deviation from this baseline—a twig snapping that doesn’t sound like an animal, a light where there shouldn’t be one—should immediately raise your alert level. The psychological deterrents are your first line of defense. They are subtle signals that suggest you are not alone or are well-prepared. This can be as simple as leaving a large, muddy pair of men’s hiking boots outside your tent or setting up a second, empty camp chair by the fire. It creates ambiguity and makes a potential intruder think twice.
Your next layers are audible and visual. A high-decibel personal alarm (130+ dB) is a powerful tool. It can be attached to your tent zipper or kept within reach. Its purpose is twofold: to disorient an aggressor and to draw attention from a great distance. Paired with this is a powerful tactical flashlight with a strobe mode. A blast of 300+ lumens can cause temporary blindness and disorientation, giving you crucial seconds to react. Finally, when it comes to physical defense, the most important rule is this: only carry tools you are professionally trained to use. An untrained weapon is a liability that can easily be used against you. Your mind and your layered system are your most effective weapons.
This layered approach creates a web of security that empowers you to handle situations confidently.
- Layer 1 – Psychological Deterrent: Leave large, muddy men’s hiking boots outside tent; set up a second empty camp chair.
- Layer 2 – Audio Awareness: High-decibel personal alarm (130+ dB) attached to tent zipper or person.
- Layer 3 – Visual Defense: Tactical flashlight with a disorienting strobe mode (minimum 300 lumens).
- Layer 4 – Physical Defense: Only carry tools you are professionally trained to use; untrained tools are liabilities.
- Foundation – Situational Awareness: Establish a baseline of normal sounds/sights in your environment to instantly recognize anomalies.
Stop buying off-the-shelf peace of mind. True preparedness comes from critical thinking, prioritizing lethal threats, and building a system of interventions you are trained to execute under pressure. Your life is worth more than a pre-packaged box of lies. Audit your kit tonight, identify its failure points using these principles, and take the first step toward building a tool that can actually save a life.