Mastering DIY trail meals can slash your food budget by over 60% while dramatically improving flavor and nutrition.
- Success lies in food science—understanding how to prevent bacterial growth and lipid oxidation—not just following basic recipes.
- True economy includes fuel efficiency, which starts at home by choosing ingredients like couscous that rehydrate with minimal stove time.
Recommendation: Focus on mastering the core techniques for safety (meat), texture (vegetables), and storage before you even think about complex recipes.
The sticker shock is a familiar feeling for any long-distance hiker. Staring at a wall of pre-packaged, freeze-dried meals, you do the math and realize your food budget is quickly eclipsing your gear budget. The promise of convenience comes at a high price, often paired with a bland, overly salty, and texturally monotonous experience. You deserve better. The common answer, « just make your own, » is a starting point, but it barely scratches the surface of what’s possible.
This isn’t just about saving money, though you will—significantly. It’s about taking back control of your nutrition, flavor, and trail experience. It’s about transforming your backcountry meals from a caloric necessity into a genuine moment of pleasure. But if the key to gourmet, economical trail food was just « drying stuff, » everyone would be doing it perfectly. The reality is that creating truly great dehydrated meals is a craft, a blend of culinary art and practical science.
What if the real secret wasn’t in the recipes, but in the techniques? What if understanding the *why* behind food preservation could prevent every common pitfall—from risky jerky and crunchy stews to fuel-wasting dinners and flavors that fade on the trail? This guide moves beyond the basics. We will dissect the core scientific principles that allow a chef to consistently produce exceptional results, empowering you to build a trail pantry that is not only cheap and delicious but also safe, lightweight, and perfectly tailored to your adventures.
We’ll explore the critical details that elevate your homemade meals from amateur to expert. This structured approach will cover everything from the non-negotiable rules of meat safety to the subtle art of preserving flavor and the cold-hard science of fuel efficiency.
Summary: A Chef’s Approach to DIY Dehydrated Trekking Meals
- Why Drying Cooked Ground Beef Is Safer Than Raw Jerky for Meals?
- How to Prevent « Crunchy Peas » in Your Camp Stew?
- The Storage Mistake That Makes DIY Meals Taste Like Old Oil
- Rice vs Couscous: Which Saves More Fuel During Rehydration?
- When to Add Spices: Before Drying or in the Bag?
- How to Calculate Exact Fuel Needs per Day to Avoid Carrying Extra Weight?
- The Food Storage Error That Gets You Fined and Attracts Bears
- Canister vs Liquid Fuel: Which Stove Won’t Fail at -5°C?
Why Drying Cooked Ground Beef Is Safer Than Raw Jerky for Meals?
For a chef, food safety is not a suggestion; it’s a foundational law. While traditional jerky-making has its place, incorporating it into rehydrated meals introduces unnecessary risks. The core issue is the potential survival of dangerous pathogens like E. coli. Home dehydrators often don’t get hot enough to reliably kill bacteria in raw meat, creating a potential hazard miles from help. This is where the concept of a « pathogen kill-step » becomes your most important culinary technique.
The solution is simple and non-negotiable: always cook ground meat before you dehydrate it. Sautéing ground beef, turkey, or chicken until it is fully cooked ensures you hit a safe internal temperature from the start. According to USDA food safety guidelines, ground meat must be cooked to 160°F (71°C) to ensure bacteria are destroyed. This initial cooking is your primary defense.
Case Study: The Limits of Dehydration for Killing Bacteria
You don’t have to take our word for it. Research from the University of Georgia, published in the Journal of Food Protection, provided a stark warning. The study demonstrated that pathogenic E. coli O157:H7 could survive the typical home-drying process, enduring up to 10 hours of dehydration at temperatures as high as 145°F. The definitive conclusion was that pre-cooking ground meat to 160°F before drying provides the most effective destruction of bacteria, fundamentally minimizing the risk of foodborne illness. Dehydrating cooked meat is not about flavor; it’s about making your meal unequivocally safe.
After cooking, rinse the meat with hot water to remove excess fat—fat doesn’t dehydrate and will go rancid quickly. Then, crumble it onto your dehydrator trays. The result is a safe, lightweight protein that rehydrates beautifully in your trail-side stews and pasta sauces, without the lingering worry of what might be lurking within.
How to Prevent « Crunchy Peas » in Your Camp Stew?
There are few things more disappointing on the trail than taking your first spoonful of a hot, savory stew, only to be met with the jarring crunch of a rock-hard pea or carrot. This common failure isn’t due to poor rehydration on the trail; the mistake was made in your kitchen before the food ever hit the dehydrator. The problem lies in a misunderstanding of vegetable biology, specifically their cellular integrity.
Raw vegetables have tough, rigid cell walls that lock in moisture. The process of drying makes these walls even tougher. Simply adding hot water on the trail isn’t enough to penetrate these fortified barriers, leaving you with those dreaded « crunchy bits. » The secret to perfectly tender rehydrated vegetables is to strategically weaken those cell walls *before* you dry them. This is achieved through a simple, yet crucial, culinary process: blanching.
Action Plan: Achieving Perfect Vegetable Rehydration
- Prepare the Cells: Blanch vegetables in boiling water or steam them before dehydrating. This critical step inactivates enzymes that cause off-flavors and, more importantly, begins to break down rigid cell walls, making them receptive to water later.
- Halt the Cooking: Cool vegetables immediately in an ice water bath after blanching. This « shocks » them, stopping the cooking process so they don’t turn to mush but remain primed for dehydration.
- Targeted Timing: For notoriously stubborn items like peas and corn, ensure the proper blanching time. For peas, 2-3 minutes is the sweet spot to weaken cell walls without fully cooking them.
- Prioritize Hydration: When on the trail, rehydrate your vegetables separately in hot water for 5-10 minutes *before* adding them to the main pot with fats or acidic ingredients like tomato sauce, which can hinder water absorption.
- Create a Flavor Base: For a fool-proof strategy, consider powdering a small portion of your dried vegetable mix. This creates an instant, flavorful base for your stew that guarantees a rich taste even if a few larger pieces remain slightly firm.
By treating your vegetables with this culinary foresight, you’re not just drying them; you’re preparing them for a perfect revival. You’re ensuring that every spoonful of your trail meal is a comforting, satisfying experience, free from any unwelcome crunch.
The Storage Mistake That Makes DIY Meals Taste Like Old Oil
You’ve done everything right: you’ve safely prepared your meat and perfectly blanched your vegetables. You pack your meals and hit the trail, only to find that your lovingly prepared chili tastes faintly of old, stale cooking oil. This heartbreaking flavor is the signature of lipid oxidation—the scientific term for fats going rancid. It’s the single biggest threat to the shelf life and taste of your homemade meals, and it’s caused by three mortal enemies of dehydrated food: oxygen, light, and heat.
The small amount of residual fat in your ground meat or the natural oils in grains and nuts are highly susceptible to this process. Exposure to air and UV light accelerates the chemical reaction that turns delicious fats into foul-tasting compounds. Storing your trail meals in a clear plastic bag on a sunny kitchen counter is a recipe for disaster. Proper storage is an active strategy, not an afterthought.
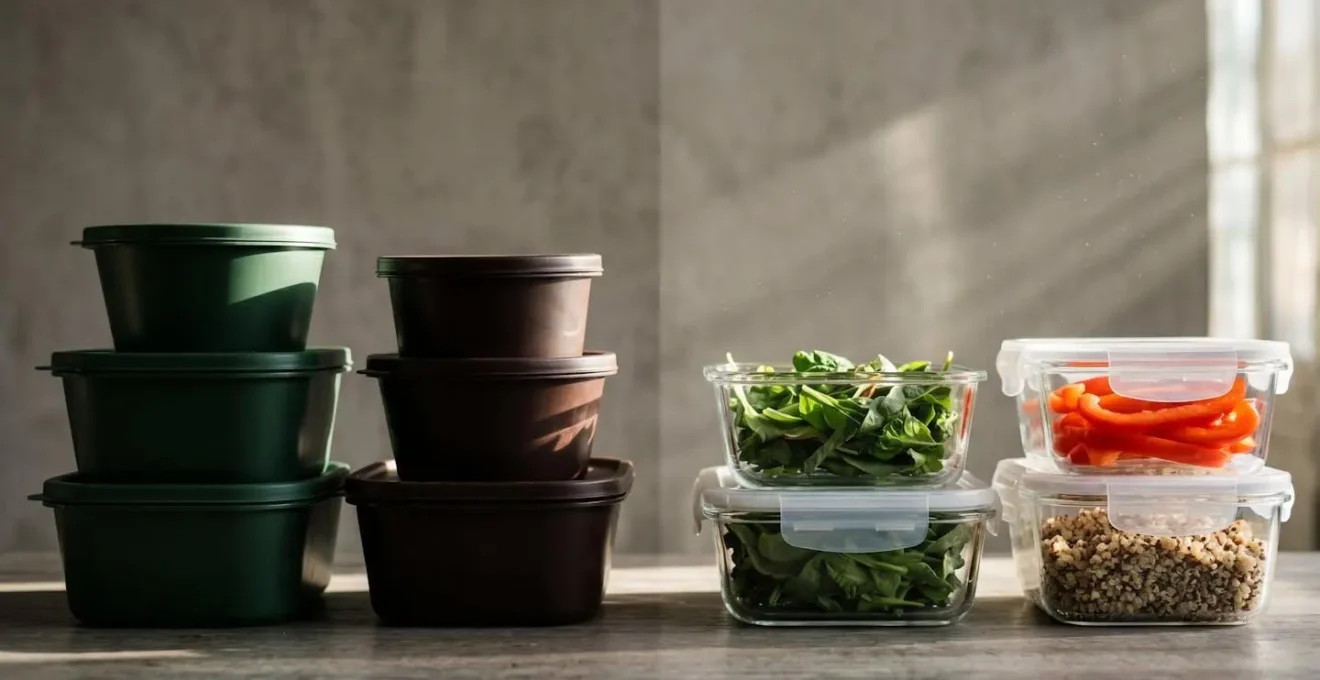
As the image illustrates, your primary defense is blocking light and oxygen. The gold standard is vacuum-sealing your meals in opaque Mylar bags with an oxygen absorber packet inside. This removes nearly all oxygen and completely blocks light. If you don’t have a vacuum sealer, you can get 90% of the way there by packing meals in zip-top freezer bags, squeezing out as much air as possible, and then storing those bags inside a dark, airtight container or a thick stuff sack, away from any light source.
Finally, you must control temperature. Heat is an accelerant for chemical reactions, including oxidation. Store your finished meals in the coolest, darkest place in your home, like a basement or a low cupboard. Research on food preservation shows that shelf life doubles for every 18°F (10°C) decrease in storage temperature. Properly stored, your meals can last from several months up to a year, retaining their intended flavor. Poorly stored, they can turn in a matter of weeks.
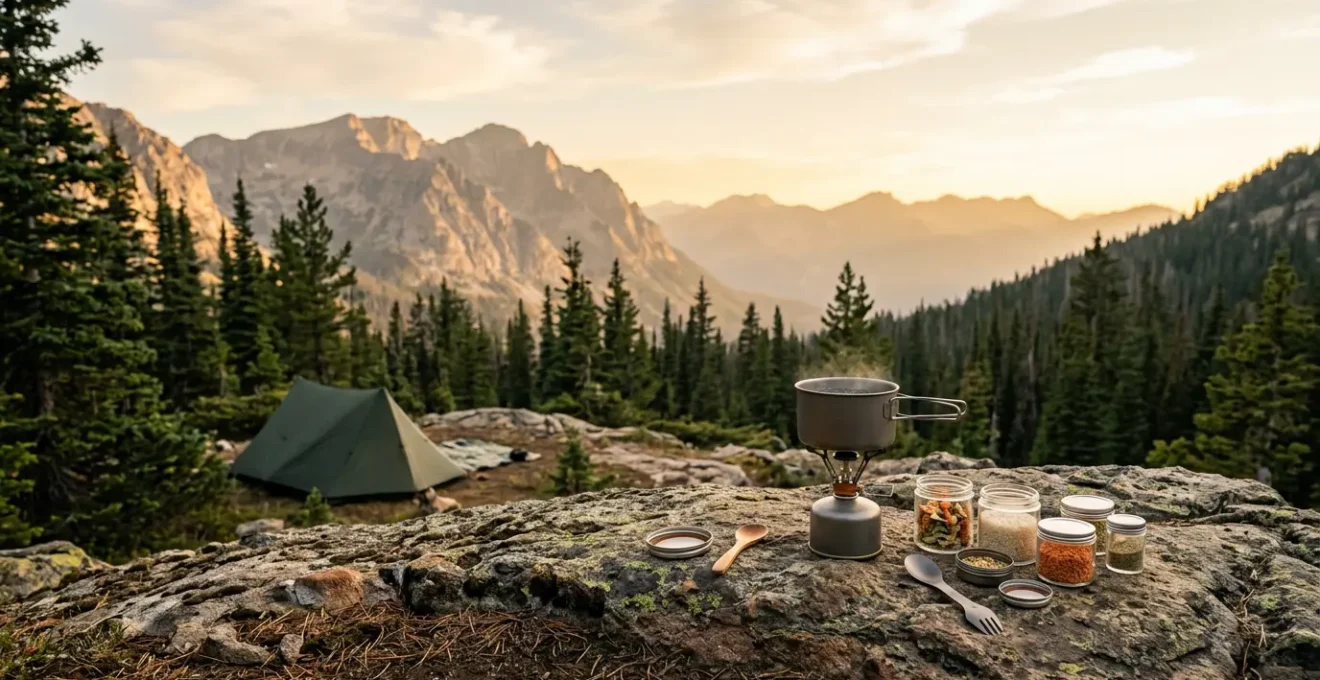
Rice vs Couscous: Which Saves More Fuel During Rehydration?
A truly economical mindset extends beyond the cost of ingredients; it encompasses every resource used, especially precious canister fuel. When we look at trail cooking through the lens of culinary thermodynamics, we see that the most significant fuel savings happen in your own kitchen when you choose your starches. The debate between rice and couscous isn’t about taste—it’s about burn time.
Instant rice seems like a good option, but it still requires several minutes of active simmering to become palatable. That’s several minutes of your stove burning at full blast. Couscous, on the other hand, is a master of fuel efficiency. It’s essentially a tiny, pre-cooked pasta. It doesn’t need to be *cooked* on the trail; it just needs to be *rehydrated*. You simply bring your water to a boil, pour it over the couscous, cover, and let it sit for 5-7 minutes off the heat. Your stove is only on for the time it takes to boil water—typically 2-3 minutes.
This « soak time » versus « boil time » distinction is where you achieve massive fuel savings. Over a ten-day trek, saving 3-4 minutes of burn time per meal can mean the difference between carrying one large fuel canister or two smaller ones. Considering that a 100g isobutane canister provides approximately 1.5-2 days of fuel for solo backpackers, every gram of fuel you don’t have to burn (or carry) is a victory in efficiency and weight reduction.
Other excellent fuel-saving starches that work on the same « soaking » principle include angel hair pasta (broken into small pieces) and quick-cooking ramen noodles. By making this strategic choice at home, you are front-loading your efficiency, ensuring you carry less weight and use less fuel on the trail. It’s the ultimate expression of a chef’s clever, economical approach.
When to Add Spices: Before Drying or in the Bag?
The final frontier of DIY trail cuisine is flavor, and spices are your primary tool. However, a common mistake is to treat all spices equally. A chef understands that flavor compounds behave differently under heat and over time. The key is to understand flavor volatility—the tendency of aromatic oils to evaporate when exposed to heat and air. Applying this knowledge dictates a two-stage spicing strategy for maximum impact.
Some flavors are robust and benefit from being added before dehydration. These are typically ground spices whose flavors are stable and can infuse deeply into meat or vegetables during the drying process. Other flavors, particularly those from leafy herbs, are incredibly delicate. Their volatile aromatic compounds, which create that fresh, vibrant scent and taste, will be completely lost in the warm, circulating air of a dehydrator. Adding fresh cilantro or basil to a mix before drying is a guaranteed way to end up with flavorless green specks.
Here is your strategic guide to spice timing:
- Infuse Before Drying: Add salt, soy sauce, paprika, garlic powder, and onion powder directly to meats or sauces before you dehydrate them. These foundational flavors will penetrate the food, creating a deep, savory base that will be present in every bite.
- Avoid Volatile Herbs Before Drying: Never add delicate herbs like basil, cilantro, oregano, or mint before drying. Their aromatic compounds are too fragile and will simply float away, leaving you with none of the flavor.
- Preserve in the Bag: Add all your fresh or dried herbs (basil, thyme, oregano) to the final storage bag *after* everything has been dehydrated and cooled. This protects their delicate oils until the moment of cooking.
- Control the Pungency: Spices like black pepper, cayenne, and chili flakes should also be added to the bag post-dehydration. Their pungency can intensify in unpredictable ways during the drying process. Adding them at the end gives you full control over the heat level of your final dish.
- Create Flavor Packets: The ultimate chef’s move is to create individual, tiny zip-top spice packets for each meal. This prevents flavor cross-contamination (your Italian pasta won’t taste like your Thai curry) and allows for last-minute customization on the trail.
By following this two-part strategy, you ensure a complex, layered flavor profile. You get the deep, infused base notes from the pre-drying spices and the bright, aromatic top notes from the post-drying additions, resulting in a meal that tastes truly gourmet.
Key Takeaways
- Food Safety First: Always pre-cook ground meats to 160°F before dehydrating to eliminate pathogen risks.
- Texture is Technique: Blanch vegetables before drying to break down cell walls, ensuring they rehydrate to a perfect tenderness, not a crunchy disappointment.
- Storage is King: Protect your meals from oxygen, light, and heat by using opaque, airtight containers (like Mylar bags) to prevent fats from going rancid.
How to Calculate Exact Fuel Needs per Day to Avoid Carrying Extra Weight?
« Better to have it and not need it » is a dangerous mantra in the world of ultralight backpacking, especially when it comes to fuel canisters. Carrying an entire extra canister « just in case » is a significant weight penalty. A strategic chef doesn’t guess; they calculate. Determining your exact fuel needs is a simple process of testing and basic math that eliminates anxiety and unnecessary pack weight.
The first step is to establish your baseline consumption. Do this at home. Using your specific backpacking stove and pot, measure exactly how many grams of fuel it takes to bring 500ml (about 2 cups) of water to a rolling boil. Simply weigh a full canister, boil your water, and weigh it again. The difference is your « grams per boil. »
This number will vary significantly based on your gear. Field testing data shows that typical canister stoves consume 7-8 grams of fuel per 500ml boil, while integrated systems like Jetboil use 5-6 grams. Once you know your personal « grams per boil, » the rest is easy. The formula is:
(Grams per Boil) x (Boils per Day) x (Number of Days) = Total Fuel Needed
For example: If your stove uses 8g per boil, and you plan for a hot breakfast and a hot dinner (2 boils per day) on a 5-day trip, your calculation is 8g x 2 x 5 = 80g. A standard 110g canister would be perfect, with a small buffer. This precision gives you the confidence to leave the extra canister behind, saving you nearly half a pound of weight.
The Food Storage Error That Gets You Fined and Attracts Bears
In the backcountry, a simple mistake with your food doesn’t just mean a lost meal; it can endanger you, the wildlife, and your wallet. The most critical food storage error is underestimating the sensory capabilities of a bear and failing to use proper, mandated storage. Many national parks and wilderness areas have strict regulations, and ignorance is not a defense. In fact, violators can face fines up to $5,000 for individuals, not to mention the seizure of your gear.
The mistake is thinking that simply hiding your food is enough. A bear’s sense of smell is legendary—estimated to be over 2,000 times more sensitive than a human’s. They are not looking for your food; they are following an invisible highway of scent molecules. This is why the rule in bear country is that everything with a scent must be stored in a bear-proof container. This doesn’t just mean your dehydrated chili; it includes:
- All packaged food, including bars and snacks.
- All toiletries, such as toothpaste, soap, and deodorant.
- Your cooking pot and utensils, which retain food odors.
- Any trash or food wrappers.
The only approved methods in most regulated areas are using a certified bear-resistant canister or, where permitted, a proper bear hang done correctly (which is much harder than it looks). Storing food in your tent is the most dangerous mistake of all, as it invites a curious, powerful animal into your sleeping space. The fine is a powerful deterrent, but the primary reason for strict adherence is safety—yours and the bear’s. A bear that gets a « food reward » from a camper is a bear that is more likely to have dangerous encounters with future humans, often leading to the bear’s destruction. Don’t be the person responsible for that outcome.
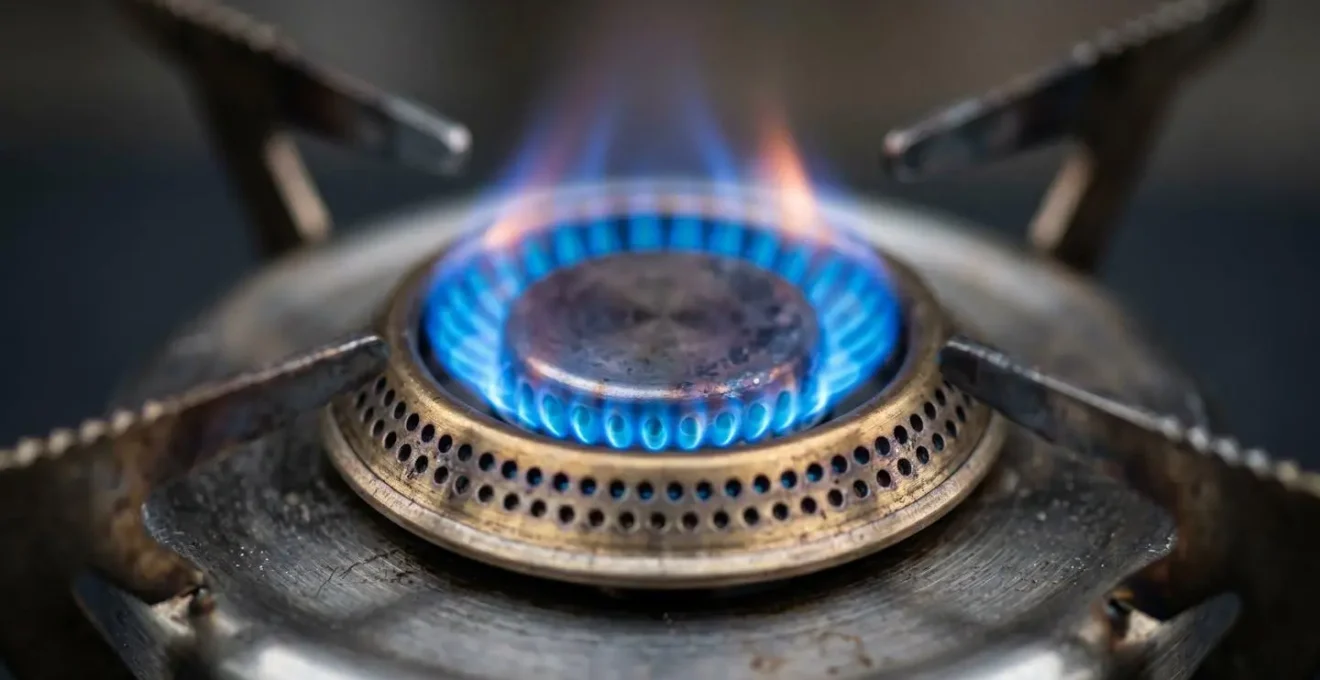
Canister vs Liquid Fuel: Which Stove Won’t Fail at -5°C?
Your stove is the heart of your trail kitchen, but its performance can be drastically affected by a single variable: temperature. As the mercury drops, the convenient isobutane canister stove that worked perfectly in the summer can begin to sputter and fail. For a winter or shoulder-season trekker, choosing the right fuel type isn’t a matter of preference; it’s a matter of whether you’ll be able to melt snow for water or enjoy a hot meal at all. The stove that won’t fail at -5°C (23°F) is the one that uses the right fuel science.
The problem with standard canister stoves is pressure. The stove doesn’t burn liquid fuel; it burns the vapor that forms at the top of the canister. This vaporization process requires heat. As the outside temperature drops, and as the canister itself gets colder from depressurization (the same principle that makes a spray-paint can feel cold), the fuel stops vaporizing effectively. A critical look at fuel chemistry reveals the failure points: butane stops vaporizing at 31°F (0°C), while isobutane continues down to 11°F (-12°C). This is why your stove’s output plummets as you approach the freezing point.
Liquid fuel stoves (or « white gas » stoves) don’t have this problem. They operate on a different principle: you manually pump the fuel bottle to create pressure, which forces liquid fuel up to the burner where it is then vaporized in a preheated tube. Because the pressure is created manually, it is entirely independent of the ambient temperature. This makes liquid fuel stoves the undisputed king of cold-weather performance, functioning reliably in deep-freeze conditions where canister stoves give up completely.
If you are committed to a canister system in near-freezing temperatures, you aren’t without options, but they are workarounds for a fundamental physics problem:
- Keep the canister warm inside your sleeping bag or jacket.
- Use a stove system with a pressure regulator, which helps maintain consistent output as the canister cools.
- Look for inverted canister stoves (like the MSR Windpro II) that allow a liquid feed, essentially mimicking the function of a white gas stove.
- Choose fuel blends with a higher percentage of propane, which vaporizes at a much lower temperature.
Start by mastering one technique from this guide—like pre-treating your vegetables or calculating your fuel—and build your expertise from there. Your wallet, your taste buds, and your pack weight will thank you.