Successfully navigating Class III rapids as a beginner isn’t about luck; it’s about mastering a system of energy conservation and risk management before you even touch the water.
- A reliable Eskimo roll isn’t just a trick; it’s your primary energy-saving tool, preventing exhausting and dangerous swims.
- Your gear’s performance under pressure, from a properly-fitted PFD to your kayak’s hull design, dictates your ability to escape, not just endure, hazards.
Recommendation: Shift your focus from simply ‘surviving’ the rapid to systematically deconstructing it, identifying threats from a distance, and executing a pre-planned route.
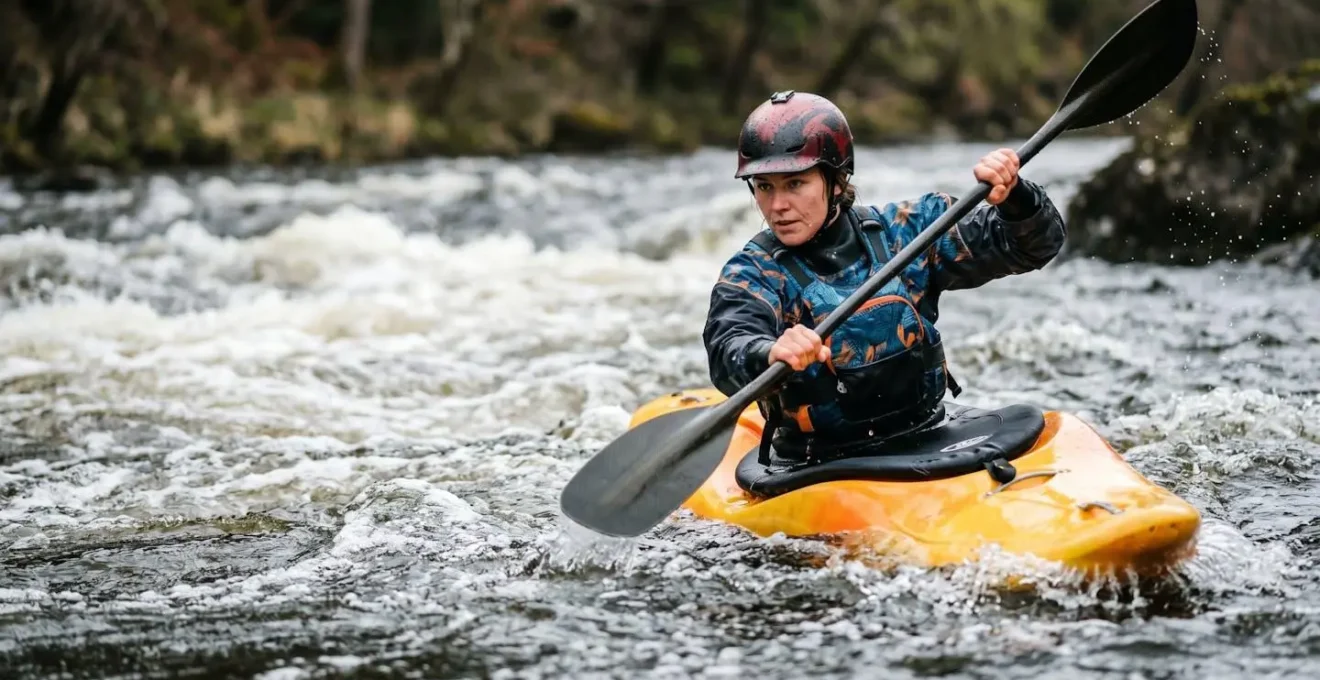
The roar of a Class III rapid is a siren call for any paddler ready to level up. It’s the threshold where the river stops being a simple conveyor belt and becomes a dynamic, three-dimensional puzzle of currents, waves, and obstacles. For ambitious beginners, the allure is irresistible, but the step up from Class II is a leap in consequence, not just difficulty. Many online guides will give you a basic checklist: wear a helmet, get a PFD, paddle with friends. This advice is not wrong, but it is dangerously incomplete. It’s like telling a new driver to wear a seatbelt but not explaining how to merge onto a highway.
The common approach focuses on what to have, not what to do or, more importantly, what to understand. This leaves paddlers unprepared for the physics of moving water and the rapid-fire decision-making required. The true key to survival and progression in whitewater isn’t brute force or courage. It’s about adopting a systematic approach to risk management and energy economy. It’s about understanding that your most critical safety tool is not the gear on your body, but the decision-making framework in your head. A wet-exit and swim in a Class III rapid isn’t just an inconvenience; it’s a massive energy expenditure in cold, powerful water that can quickly lead to a much worse situation.
This guide will deconstruct the challenge. We won’t just tell you to « learn a roll »; we’ll explain why it’s a non-negotiable part of your energy management system. We won’t just say « read the river »; we’ll show you the specific visual cues that signal danger or a safe path. From critical gear checks that prevent catastrophic failure to the mental models for scouting a line, you’ll learn to replace hope with a plan. It’s time to stop thinking like a passenger and start thinking like a pilot.
This article breaks down the essential systems and knowledge you need to build a solid foundation for tackling Class III rapids. The following sections will guide you through the non-negotiable skills, gear intelligence, and on-water strategies that separate prepared paddlers from cautionary tales.
Summary: A Systematic Approach to Class III Whitewater
- Why Mastering the « Eskimo Roll » Is a Non-Negotiable Safety Skill
- How to Read River Currents to Avoid Capsizing Rocks
- The Equipment Sizing Error That Restricts Movement in an Emergency
- Hard Shell vs Inflatable Kayak: Which Handles Rocks Better?
- When to Scout a Rapid: The Visual Check That Saves Lives
- The Safety Oversight During River Play That Scares Parents Most
- Why 0.1 Micron Filters Fail to Stop Norovirus
- Filter or Purifier: Which System Protects Against Viruses in Exotic Streams?
Why Mastering the « Eskimo Roll » Is a Non-Negotiable Safety Skill
Let’s be blunt: if you plan to paddle Class III whitewater, a reliable roll isn’t a « nice-to-have » skill; it’s a core competency. While many beginners focus on staying upright, the reality is that capsizing is inevitable. The difference between a minor event and a major incident is what happens next. Safety guidelines are clear that paddling in Class III water or harder requires a reliable Eskimo roll. The reason is simple and comes down to one crucial concept: energy economy. A successful roll expends almost zero energy. You’re back upright in seconds, paddle in hand, ready for the next move.
The alternative—a wet exit—is the start of a dangerous and exhausting cascade. You pull your spray skirt, push out of your boat, and are now swimming in cold, powerful, and aerated water. Your immediate priorities become managing your own breathing, getting into a defensive swimming position (on your back, feet up and pointed downstream), and trying not to lose your boat and paddle. This process can drain your energy reserves in minutes, leaving you hypothermic, exhausted, and unable to effectively self-rescue or even assist your partners. The roll is not a trick; it is the fundamental tool for conserving the energy you will desperately need if things truly go wrong.
Developing a « combat roll »—one that works in turbulent, unpredictable water—is a process. It starts in a pool and progresses to moving water. The goal is to build muscle memory so that the roll becomes an automatic reaction, not a panicked thought process. This progression ensures you are prepared for the reality of a rapid, not just the controlled environment of a calm lake.
- Base Level: Master a calm water wet-exit and learn the defensive swimming position. You must be comfortable being upside down.
- Middle Level: Practice assisted rescues like the T-rescue with a partner. This builds confidence and teamwork.
- Advanced Level: Develop a reliable roll in a pool or calm lake where you can focus on technique without environmental pressure.
- Combat Level: Practice your roll in progressively more challenging conditions—moving current, small waves, and aerated water—to simulate real-world scenarios.
Think of the roll as the primary component of your self-rescue system. It’s the difference between a quick reset and a full-blown emergency. In Class III water, you cannot afford the energy cost of not having one.
How to Read River Currents to Avoid Capsizing Rocks
To a beginner, a rapid looks like chaos. To an experienced paddler, it’s a roadmap of features, each telling a story about the water’s path and the hidden obstacles beneath. Learning to « read the water » is about deconstructing that chaos into a set of predictable visual cues. Your primary goal is to identify the safest and most efficient path, which is almost always where the deepest water flows. This path is marked by a « downstream V. »
Look for smooth, dark water forming a V-shape with the point aimed downstream. This is your green light. The water is being funneled between two obstacles, and the main current is flowing cleanly through the center. Conversely, an « upstream V, » where the V points toward you, is a universal sign of a rock or other solid obstacle just under the surface. The water is forced to split around this object, creating the V-shape. An upstream V is your red light: a place to avoid.
The texture of the water provides even more clues. Understanding these patterns is critical for staying out of trouble and positioning your kayak correctly to navigate the flow. The image below highlights the distinct differences between these water features.
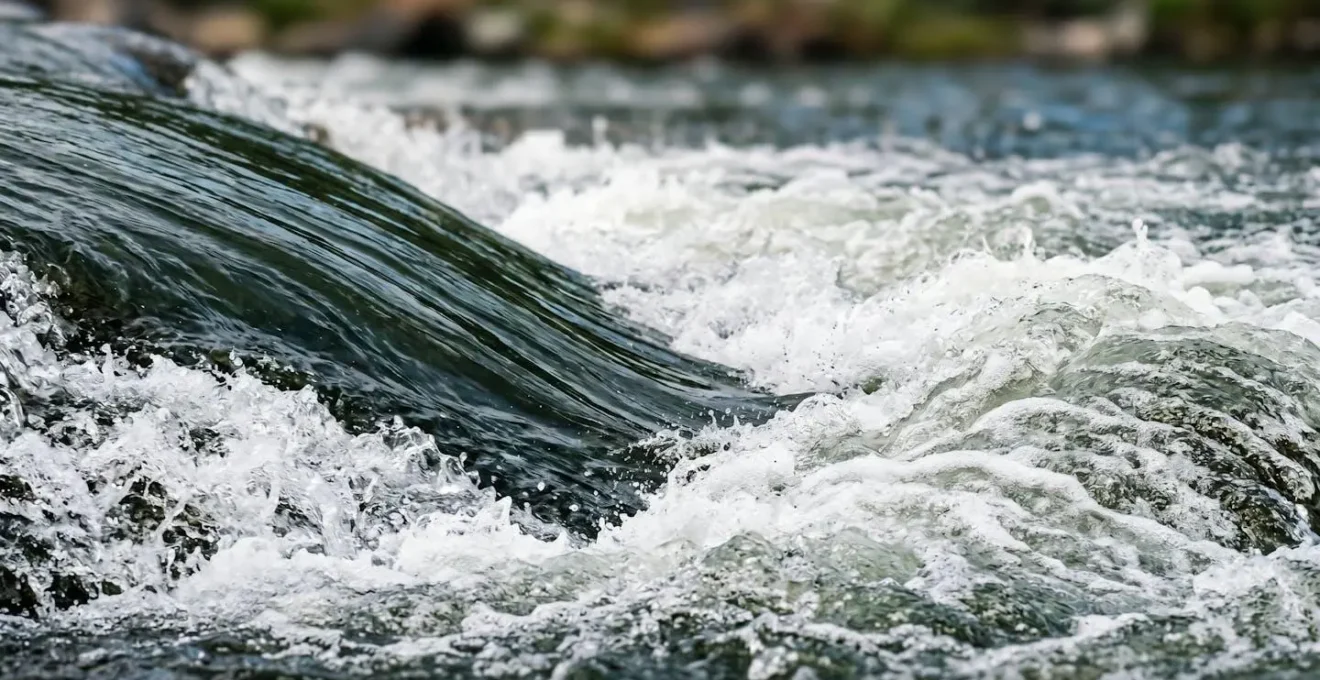
As you can see, the river’s surface is a complex map. Besides the V’s, look for: – Pillows or Cushions: A mound of water piling up on the upstream side of a large rock or obstacle. The higher the pillow, the bigger the object it’s hiding. – Eddy Lines: The distinct, often turbulent boundary between the downstream current and an « eddy »—an area of calmer water flowing upstream behind an obstacle. Crossing this line requires an active paddle stroke and edge control to avoid being flipped. – Holes: Formed when water pours over a submerged object, creating a recirculating feature that can trap a boat or swimmer. They are often identified by a « frown » shape on the water’s surface and frothy, turbulent water.
Reading water is a skill built through observation. Before you run a rapid, take a moment from the bank or an eddy to watch the flow. Identify the downstream V’s that mark your route and the upstream V’s, pillows, and holes that constitute the hazards. This systematic deconstruction turns a guessing game into a calculated run.
The Equipment Sizing Error That Restricts Movement in an Emergency
Your Personal Flotation Device (PFD) is the single most important piece of safety gear you own. Yet, a shocking number of paddlers get it wrong in one critical way: sizing. The statistics on PFD use are sobering; 87% of drowning victims in recreational boating fatalities were not wearing a life jacket, according to the U.S. Coast Guard. But simply wearing a PFD is not enough. If it doesn’t fit correctly, it can become a hazard in itself.
The most common and dangerous sizing error is choosing a PFD that is too large. In the calm of a showroom, it might feel comfortable. In the violent turbulence of a rapid, it’s a different story. A PFD that is too big will ride up over your head the moment you hit the water. This immediately creates two life-threatening problems: it obstructs your vision, preventing you from seeing hazards or rescue opportunities, and it can cover your mouth and nose, impeding your ability to breathe. Furthermore, a PFD that has ridden up is no longer providing proper flotation to your core, making it much harder to maintain a safe swimming position.
Your PFD should fit like a glove—snug, but not restrictive. It should allow for a full range of motion for paddling but should not move on your torso. The only way to be certain of a proper fit is to test it. Don’t just trust the label; perform a simple fit test every single time you put on your PFD. This check takes ten seconds and could save your life.
Your PFD Fit Test Checklist
- Strap In: Put on the PFD and tighten all straps, starting from the waist and working your way up to the shoulders. They should be snug but not uncomfortable.
- The Lift Test: Have a partner grab the PFD by the shoulders and lift upward firmly. Your body should lift, not the PFD alone.
- The Head Check: If the PFD moves up past your nose or ears when lifted, it is too large. It will fail you in the water. Do not use it.
- In-Water Simulation: In a safe, controlled water environment, bring your knees to your chest. A well-fitting PFD will stay put and not ride up around your face.
- The Critical Rule: Remember that an ill-fitting PFD will ride up over a swimmer’s head in turbulent water, obstructing both vision and breathing. There is no compromise on fit.
Choosing and fitting your PFD is not the place to cut corners. It’s a deliberate act of preparation that ensures your most critical piece of safety equipment will perform its job when you need it most, freeing up your mental capacity to focus on self-rescue.
Hard Shell vs Inflatable Kayak: Which Handles Rocks Better?
The debate between hardshell and inflatable kayaks often centers on portability and storage. But when you’re facing Class III rapids, the crucial question is: how does it interact with a rock? This is where the physics of pinning becomes a life-or-death consideration. A « pin » occurs when your boat becomes wedged against an obstacle (like a rock) by the force of the current, making it impossible to move. The design and material of your hull dramatically affect this risk.
A modern hardshell whitewater kayak, typically made of roto-molded polyethylene, is engineered specifically for this environment. Its rounded chines and rigid, slick surface are designed to glance off, slide over, and skip away from rock impacts. When pushed against a rock by the current, its rigidity allows the force of the water to push it up and away. Furthermore, its rigid structure enables a critical maneuvering technique called « edging » or « carving, » allowing a paddler to use the hull to make precise turns in complex currents, effectively using the water’s power to avoid obstacles in the first place.
High-quality inflatable kayaks are remarkably durable, but they interact with rocks very differently. Their softer, higher-friction material tends to stick or « grip » on impact rather than slide. More dangerously, the soft tubes can deform and wrap around a rock. If this happens, water can begin to pour over the deck, and the force of the river can quickly and completely pin the boat and its occupant. The inherent flex of an inflatable also makes precise edging impossible, removing a key tool from the paddler’s arsenal for technical maneuvers.
For navigating the technical, rock-filled environment of Class III rapids, understanding these differences is crucial. The following table breaks down the performance characteristics based on an analysis of their behavior in whitewater.
| Characteristic | Hardshell (Roto-molded Polyethylene) | Inflatable Kayak |
|---|---|---|
| Impact Behavior | Designed to slide, skip, and glance off rocks | Higher friction coefficient causes sticking and gripping on impact |
| Pinning Risk | Rounded rigid chines pushed up and away by water pressure | Soft tubes can deform and wrap around rocks; water flows over deck increasing pin risk |
| Edge Control | Rigid hull enables precise tilting on edge for carving turns in complex currents | Inherent flex makes precise edging impossible; removes critical maneuvering tool |
| Maneuverability Class III+ | Excellent control in technical whitewater | Generally less maneuverable; better suited for Class I-II |
| Puncture Vulnerability | Impact-resistant but can crack with extreme force | Risk of puncture from sharp rocks remains higher despite robust construction |
While inflatables are a fantastic option for many types of paddling, for beginners stepping into the high-consequence world of Class III whitewater, the superior maneuverability and impact-shedding characteristics of a hardshell kayak provide a significant and undeniable safety advantage.
When to Scout a Rapid: The Visual Check That Saves Lives
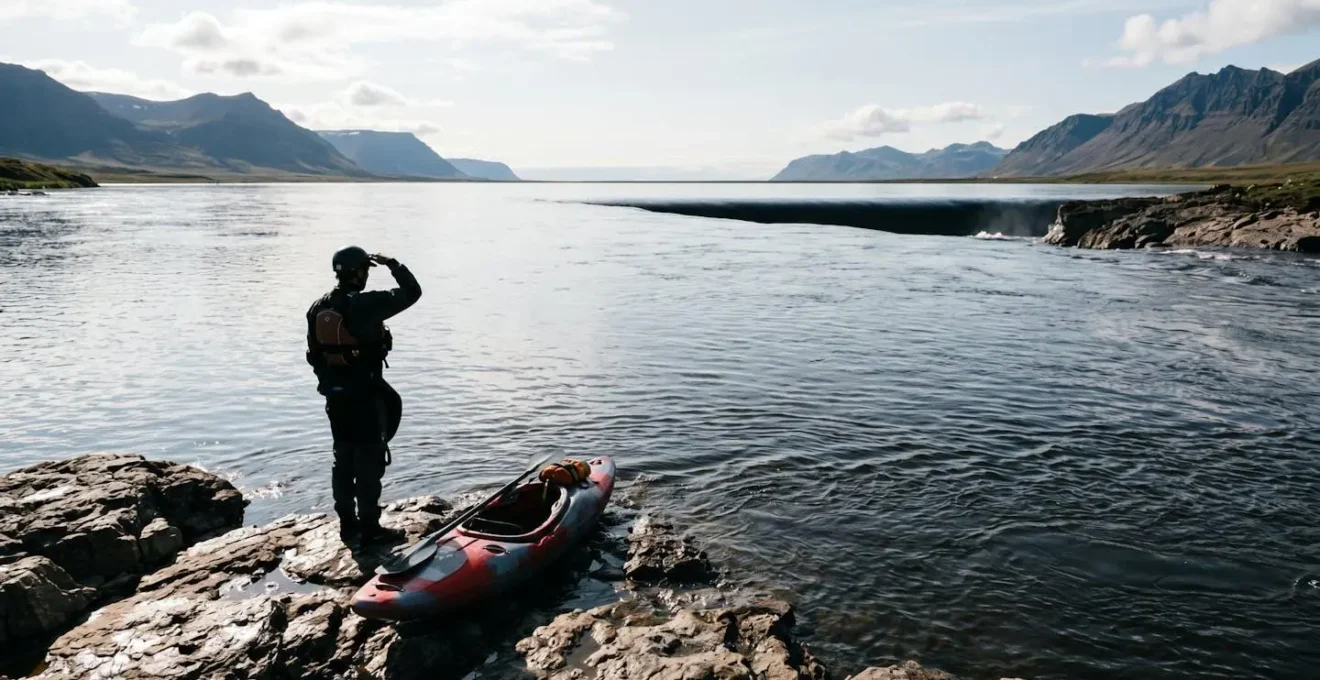
« When in doubt, scout it out » is common whitewater wisdom. But how do you know when to be in doubt? The most important signal the river can give you is one of silence and subtraction: a perfectly flat horizon line. When the river in front of you disappears and all you see is a flat, sharp line from bank to bank, you must stop immediately. This is the universal sign of a significant drop, ledge, or waterfall that is completely invisible from your upstream, on-water perspective. Ignoring a horizon line is one of the most dangerous mistakes a paddler can make.
Once you’ve made the wise decision to pull over and scout, the job is only half done. A casual glance is not enough. You need a systematic approach to deconstruct the rapid and formulate a plan. This is not just about finding a path; it’s about building in contingencies. The P.L.A.N. method, highlighted by publications like Backpacker magazine for whitewater skills, provides a simple but effective framework for a thorough scout.
Getting out of your boat to scout is not a sign of weakness; it’s a sign of a smart, experienced paddler at work. The view from the riverbank gives you the perspective and time needed to make a safe decision, which sometimes is the decision to walk around the rapid (portage).
Applying a structured method like P.L.A.N. transforms scouting from a vague look into a life-saving analysis. It forces you to think through not just your ideal line, but what you will do when things don’t go according to plan.
- P – Primary Line: Identify and memorize your intended route through the rapid. Pick out key landmarks to guide you from start to finish.
- L – Liabilities: Locate and mark all the hazards. This includes « holes » that can trap you, « strainers » (downed trees) that water flows through but a boat won’t, « undercut » rocks with hidden cavities, and potential pinning spots.
- A – Alternatives: What is your Plan B? And your Plan C? Identify safe eddies where you can stop to rest, regroup, or exit the main current if you get knocked off your primary line.
- N – ‘No-Go’ Indicators: Define your personal red lines. This could be a river-wide strainer with no clear path, a hole that looks too powerful, or simply a rapid that feels beyond your current skill level. Deciding your ‘no-go’ conditions on the shore prevents bad decisions in the heat of the moment.
A good scout is a mental rehearsal for a successful run. By taking the time to P.L.A.N., you are loading a program into your brain that can run on autopilot, freeing up your cognitive capacity to react to the unexpected.
The Safety Oversight During River Play That Scares Parents Most
After navigating a challenging rapid, the calm pool below feels like a reward. It’s a place to relax, celebrate, and engage in some river play. However, this moment of relief can hide one of whitewater’s most insidious and misunderstood dangers: foot entrapment. This hazard often occurs in seemingly slow, shallow water, making it a particularly terrifying oversight for beginners and even intermediates who let their guard down.
Foot entrapment happens when a person swimming or wading in a current stands up. If their foot slips and becomes wedged between rocks on the riverbed, the force of the current against their body will do the rest. Even a current that appears slow can exert thousands of pounds of pressure, pushing the person’s body downstream and forcing their head underwater. Because of the angle of their trapped leg, it’s often impossible to sit back up against this immense force. This is why the number one rule of swimming in a rapid is to never, ever try to stand up until you are in completely still water.
The correct procedure is to float on your back with your feet up and pointed downstream. This « defensive swim » position allows your PFD to do its job, keeps your head above water, and uses your feet (and the thick soles of your river shoes) to fend off rocks. The danger is so severe because it violates our intuition. Our instinct when we fall is to stand up. In whitewater, that instinct can be fatal. This risk is amplified because of how the riverbed is structured; it’s a jumble of rocks with countless gaps perfect for trapping a foot.
This danger is a variation of being caught in a « strainer. » As whitewater safety experts point out, strainers can pin a person with unimaginable force, and when your body is held by a trapped foot, you become the strainer. It’s an invisible threat that turns a fun moment into a tragedy. Educating every member of a paddling group about this specific danger—and enforcing the « never stand in current » rule—is a non-negotiable aspect of river safety, especially during casual play in what appears to be a « safe » area.
Why 0.1 Micron Filters Fail to Stop Norovirus
Out on the river, staying hydrated is critical. But the crystal-clear water of a mountain stream can hide an invisible threat: microscopic pathogens. Most backcountry travelers are aware of dangers like Giardia and E. coli and carry a water filter to protect themselves. However, a standard backpacking filter, even a good one with a 0.1 or 0.2-micron pore size, provides a false sense of security against one of the most common and debilitating culprits of gastrointestinal illness: viruses, particularly Norovirus.
The problem is a simple matter of scale. A filter works like a physical barrier, straining out contaminants that are too large to pass through its pores. But the size difference between bacteria/protozoa and viruses is immense. Understanding this is key to choosing the right water treatment system and avoiding a trip-ending illness.
Case Study: The Mosquito Net Analogy
According to an analysis from whitewater safety and hydrology experts at Boreal River Rescue, a 0.2-micron filter can be compared to a mosquito net. It is highly effective at stopping large threats like protozoa (Giardia is about 8-12 microns) and bacteria (E. coli is about 2 microns). These are the « mosquitos » – easily blocked. However, viruses like Norovirus (0.025-0.03 microns) and Hepatitis A are exponentially smaller. They are like gnats flying effortlessly through the holes in the mosquito net. The size differential is roughly 100-fold, meaning a mechanical filter alone offers zero protection against them. The risk is highest on popular, high-traffic rivers where many people camp upstream, as these viruses are spread primarily through human waste. Pristine, remote streams carry a lower risk, but it’s never zero.
This isn’t a failure of the filter; it’s a misunderstanding of its purpose. A filter is designed to remove bacteria and protozoa, and it does that job well. But it cannot and does not claim to remove viruses. To achieve protection from viruses, you need a water purifier. Purifiers use a different method, such as UV light or chemical treatment (like chlorine dioxide), to neutralize viruses, making the water safe to drink.
For a kayaker on a multi-day trip, especially on a popular river or in an exotic location, relying solely on a standard filter is a significant gamble. One sick person upstream can contaminate the water source for everyone downstream. Recognizing the limitations of your gear is the first step toward building a truly resilient safety system.
Key Takeaways
- Systematic risk assessment (like the P.L.A.N. method) is more valuable than raw courage.
- Your gear’s proper fit and function (e.g., PFD, kayak hull) are active safety tools, not passive accessories.
- The most dangerous threats are often invisible, from foot entrapment in shallow current to viruses in clear water.
Filter or Purifier: Which System Protects Against Viruses in Exotic Streams?
Now that you understand that a standard filter leaves you vulnerable to viruses, the next logical question is: what’s the right system for you? The choice between a filter, a purifier, or a combination of both depends entirely on your context. It’s a decision based on location, trip duration, group size, and your personal tolerance for risk. Making this choice at home, before your trip, is a critical part of cognitive load management—it removes a complex decision from your plate when you’re tired and dehydrated on the riverbank.
A filter is excellent for backcountry trips in North America and Europe where the primary threats are bacteria and protozoa. A purifier (using UV light or chemicals) is essential when viral contamination is a concern, such as in developing nations or on high-traffic rivers. However, purifiers have their own drawbacks. UV purifiers require batteries and are less effective in murky water, while chemical treatments can leave an aftertaste and require a waiting period.
For maximum safety and reliability, especially on expeditions or in questionable water sources, the recommended approach is a two-stage system. This involves using a filter first to remove sediment, bacteria, and protozoa (which also improves the water’s taste and clarity), followed by a purifier (UV or chemical) to neutralize any potential viruses. This follows the classic preparedness mantra: « two is one, and one is none. » It provides redundancy in case one component fails and offers comprehensive protection against all waterborne pathogens.
This decision matrix, adapted from river hydrology safety guides, can help you choose the appropriate system for your specific adventure. Choosing correctly is a fundamental part of a holistic approach to safety.
| Factor | Filter Only | Purifier (UV or Chemical) | Two-Stage System (Recommended) |
|---|---|---|---|
| Location | North America/Europe backcountry | Developing nations, high-traffic rivers | Any exotic or remote location |
| Pathogen Protection | Protozoa + Bacteria only | Protozoa + Bacteria + Viruses | Complete: sediment removal + virus neutralization |
| Trip Duration | Day trips acceptable | Multi-day with questionable sources | Extended expeditions requiring reliability |
| Group Size | 1-2 paddlers | 1-2 paddlers (UV pen sufficient) | Groups (gravity purifier efficient for volume) |
| End-of-Day Usability | Moderate effort | Chemical drops: minimal cognitive load when exhausted | Primary filter improves taste; secondary purification for safety |
| Redundancy | Single point of failure | Single point of failure | ‘Two is One, One is None’ – backup if primary fails |
Ultimately, your water treatment system is as critical as your PFD or helmet. It protects you from an internal, invisible threat that can incapacitate you just as effectively as an external, obvious one. Don’t let a preventable illness be the reason your adventure comes to an end.
Building the skills and knowledge to tackle Class III whitewater is a journey of systematic preparation. It’s about replacing uncertainty with process, and fear with respect for the river’s power. By mastering these core systems—from your roll to your gear choices to your risk-assessment strategies—you transform yourself from a passenger hoping for the best into a confident paddler capable of making smart decisions under pressure. Your journey into more challenging whitewater starts not on the river, but with the commitment to this preparation. Evaluate your current skills and gear against these principles and start building your system today.