Stop treating your climbing camp like a weekend getaway. The common frustration of gear chaos, trashed skin, and poor recovery stems from a flawed approach. The solution is to reframe your site as a high-performance basecamp, implementing optimized systems for gear logistics and athletic recovery protocols. This mindset shift is what separates climbers who fade on day two from those who send on day five.
You know the feeling. Day two of a climbing trip. Your skin is raw, your muscles are screaming, and the rope looks like a giant’s bowl of spaghetti exploded in your tent. You came here to climb, but you’re spending half your energy just managing your existence. The standard advice is always the same: « pack light, » « get more sleep, » « stay hydrated. » It’s not wrong, but it’s tragically incomplete. It treats you like a camper, not an athlete operating in the field.
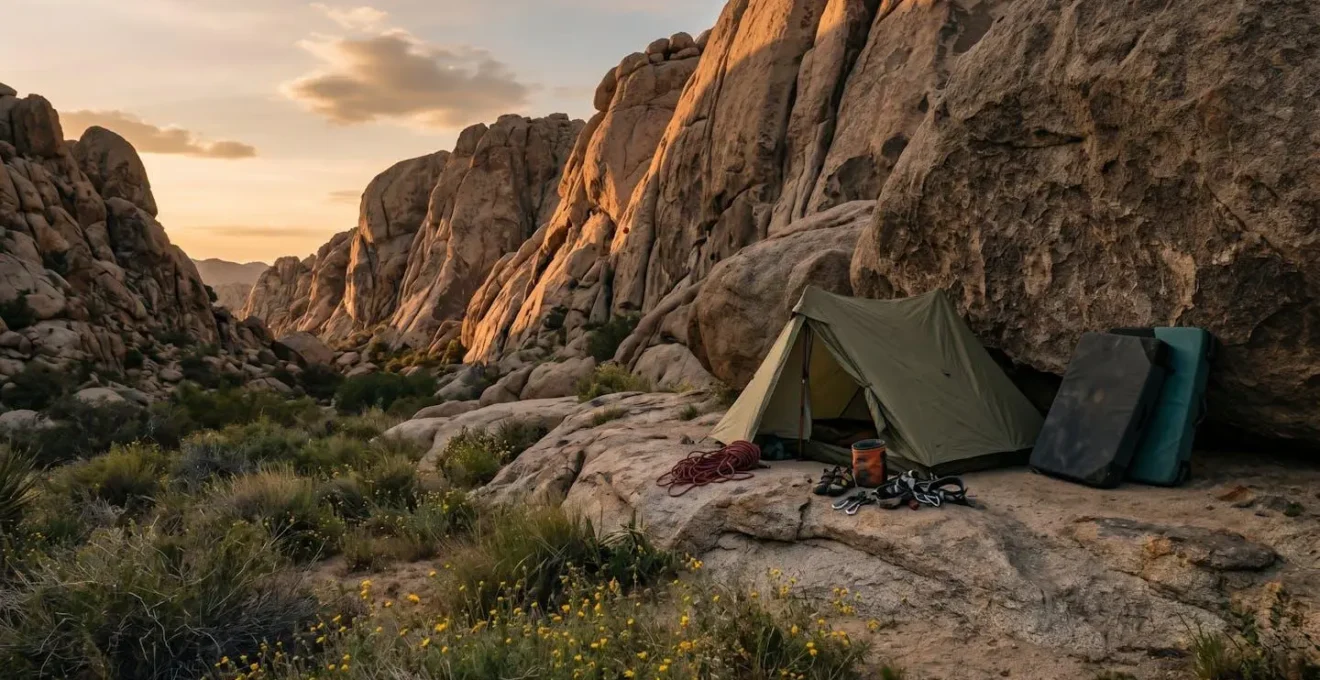
But what if the key to unlocking your multi-day potential wasn’t just about how you climb, but about how you live between climbs? The real secret is to stop camping and start building a Basecamp System. This isn’t just about comfort; it’s a strategic framework for performance. Your camp becomes an extension of your training, a dedicated space where gear logistics are streamlined and recovery protocols are executed with precision. Every element, from how you care for your skin to the structural integrity of your tent, directly impacts your ability to perform on the rock.
This guide breaks down that system. We’ll move beyond the generic tips and dive into the technical details that make a difference. We’ll cover the crucial role of skin care, tactical gear management in tight spaces, non-verbal communication for safety, and advanced recovery techniques you can use at the crag. Finally, we’ll explore why your choice of shelter is one of the most important gear decisions you’ll make for ensuring you can climb at your limit, day after day.
In this article, we’ll explore the essential components for transforming your campsite into a high-performance basecamp. The following sections break down the specific strategies and systems that will allow you to manage your gear efficiently and recover effectively, ensuring you’re always ready for the next day’s send.
Summary: Mastering Your Climber’s Camp for Gear and Recovery
- Why skin care is crucial for multi-day climbing trips?
- How to organize 50m of rope in a small tent?
- The belay communication error caused by wind noise
- Bouldering vs Sport climbing: Which requires less camping logistics?
- How to soothe muscle inflammation without ice packs?
- Why crossing poles 3 times increases load bearing by 200%?
- How to use the pliers to repair a bent tent pole safely?
- Geodesic Domes: Why They Survive Winds That Flatten Tunnel Tents?
Why skin care is crucial for multi-day climbing trips?
For a climber on a multi-day trip, your skin isn’t just skin; it’s your primary interface with the rock. It’s high-performance equipment, and failure means your trip is over, no matter how strong your muscles are. Ignoring skin care is like a race car driver ignoring their tires. Flappers, splits, and overly thin skin are the most common limiting factors that force climbers to take unscheduled rest days or abandon their objectives altogether. A dedicated skin care protocol isn’t about vanity; it’s about maximizing your time on the wall.
The process starts the moment you stop climbing. Wash your hands to remove chalk, which is incredibly drying. Afterwards, immediately apply a climbing-specific salve or balm. These products are designed not just to moisturize but to aid tissue repair. The goal is to restore moisture and elasticity to the skin, helping it recover overnight. Throughout the day, use an emery board or skin file to smooth down any calluses or rough patches that could catch on the rock and become a flapper. This preventative maintenance is far more effective than trying to patch up a major tear.
The cumulative effect of this diligence is significant. It’s not just about comfort; it’s a performance tool that, according to some climbing resources, can result in an extension of 1-2 days on your climbing trip. That’s one or two more days of potential sends, all because you treated your skin like the critical gear it is. This is the first pillar of an effective Basecamp System: maintaining your body’s own equipment.
How to organize 50m of rope in a small tent?
A 50-meter rope in a two-person tent can feel like a python in a phone booth. Left unmanaged, it becomes a tangled mess that trips you in the night, snags on other gear, and costs you precious time and mental energy in the morning. Proper rope management inside your tent is a core component of efficient gear logistics. The goal is a compact, kink-free, and readily deployable rope for the next day. The undisputed champion for this task is the butterfly coil.
Unlike a standard mountaineer’s coil, which creates a large, round bundle, the butterfly coil creates a flatter, more rectangular package that is ideal for tight spaces. It hangs neatly from a gear loop inside the tent or lays flat against a wall, consuming minimal floor space. More importantly, this method prevents the twists and kinks that plague poorly coiled ropes, ensuring a smooth first belay and pull.
Mastering this technique is a non-negotiable skill for the serious climbing camper. The process involves creating loops of equal length over your hand or neck and then securing them into a tight, manageable bundle. It’s a system that pays dividends in both organization and rope longevity.
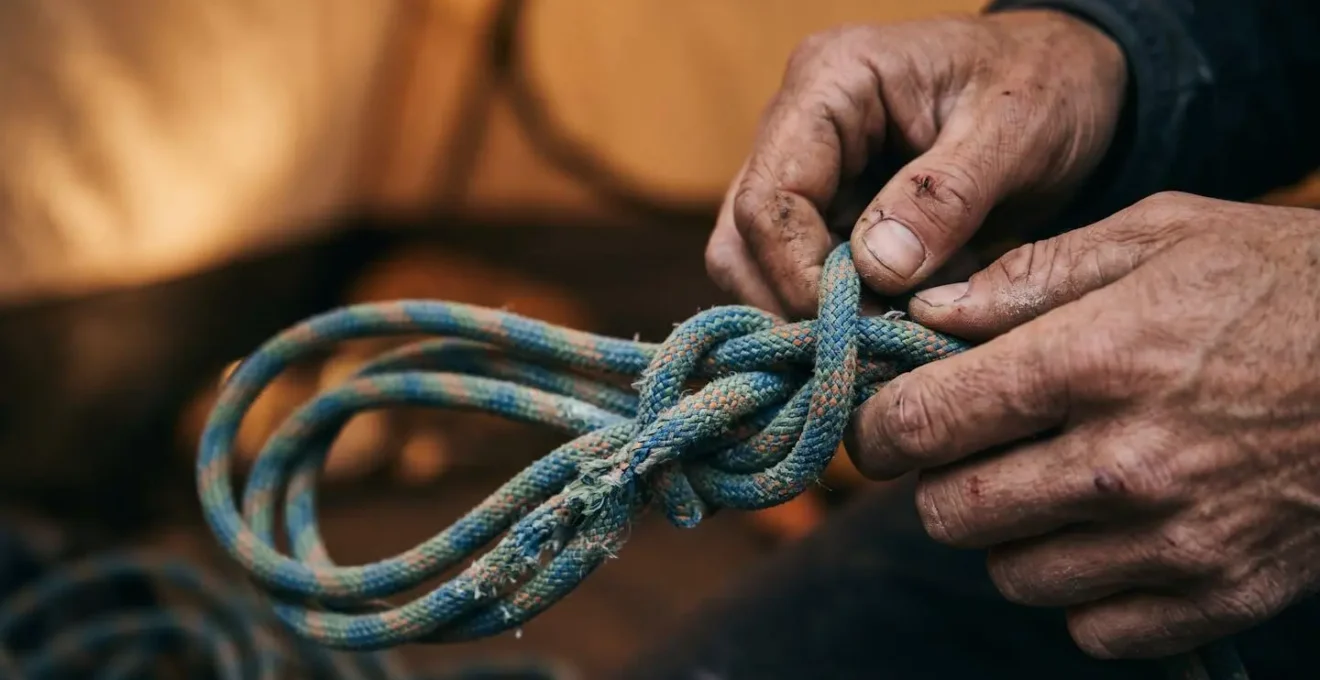
As you can see, the technique results in multiple loops that distribute stress evenly across the rope. This not only makes it compact but also helps the rope’s core and sheath settle naturally, reducing wear over time. This is what an efficient basecamp system looks like in practice: a simple technique that saves space, time, and equipment life.
The belay communication error caused by wind noise
On a multi-pitch route, wind is more than an inconvenience; it’s a saboteur of communication. A shouted command of « Off belay! » can be twisted by a gust of wind into something unrecognizable, or worse, completely swallowed. This ambiguity is one of the most dangerous situations in climbing, potentially leading a belayer to take a leader off belay prematurely. Relying on voice alone in windy, exposed conditions is a critical error. A robust, pre-agreed-upon non-verbal communication protocol is an essential safety system.
The most effective solution is a standardized rope tug system. This method removes all auditory ambiguity, relying on clear, tactile signals. Before leaving the ground, the team must agree on the exact meaning of each tug sequence. Consistency is key; the tugs must be deliberate and distinct, not just casual pulls on the rope. This is a language spoken with your hands, and fluency is mandatory.
A common and effective system includes:
- Three sharp tugs: « Off belay. » The leader is secure and no longer needs the belay.
- Three more sharp tugs: « On belay. » The belayer has now set up their belay for the second.
- One hard tug: « Up rope » or « Take. » A clear signal for the belayer to take in all available slack.
- A gentle but continuous pull: « Slack. » A request for more rope to be paid out.
Case Study: The Adaptive Climbing Tug System
The critical need for silent communication is highlighted by systems developed for deaf or hard-of-hearing climbers. As detailed in the Adaptive Climbing Manual, Trenton Marsh and Bucky Buckhold pioneered a system using a thin static line attached to the climber’s harness. This dedicated line minimizes the friction and drag of the main climbing rope, allowing for much clearer tactile signals. While most teams use the climbing rope itself, this case study proves the principle: a pre-arranged, tactile system is a reliable and vital tool for ensuring clear communication in adverse conditions or for climbers with hearing impairments.
Bouldering vs Sport climbing: Which requires less camping logistics?
When planning a multi-day trip, the choice between bouldering and sport climbing has massive implications for your gear logistics and overall camp style. At first glance, bouldering seems simpler—no ropes, no harnesses, no complex belay systems. However, this simplicity is deceptive when it comes to camping. The logistical footprint of each discipline is surprisingly different.
Bouldering requires the least amount of equipment of all the climbing styles. Well, besides free-soloing, but not by much!
– Method Climbing, The Difference Between Bouldering and Sport Climbing Gear
While the quote is true for the act of climbing itself, the camping logistics tell another story. The core of a boulderer’s safety system is the crash pad—or more accurately, multiple crash pads. These large, bulky items are impossible to carry long distances, making boulderers almost entirely dependent on car camping. This leads to a more stationary, communal camp culture. Sport climbing gear, while more complex, is also more compact. A rope, harness, and a rack of quickdraws can be packed into a single backpack, allowing for hike-in campsites far from the road. This makes the sport climber more mobile and self-sufficient.
This table breaks down the key logistical differences between the two disciplines, providing a clearer picture of what each requires from a basecamp perspective.
| Aspect | Bouldering | Sport Climbing |
|---|---|---|
| Gear Volume | High (multiple large crash pads) | Moderate (rope, harness, quickdraws) |
| Gear Complexity | Low (minimal technical knowledge) | High (belay systems, rope management) |
| Essential Equipment | Crash pads, shoes, chalk | Harness, rope, belay device, quickdraws |
| Camp Culture | Social, communal (shared cooking, larger groups) | Smaller, self-sufficient (typically 2-person teams) |
| Vehicle Dependency | High (crash pads require car camping) | Low (compact gear allows hike-in campsites) |
| Physical Demand | High-intensity, short-duration (explosive power) | Endurance-focused, sustained effort |
How to soothe muscle inflammation without ice packs?
After a hard day on the rock, your forearms feel like solid granite. The default advice is « ice them, » but lugging a cooler full of ice into the backcountry is impractical and often impossible. An effective basecamp system requires a field-expedient recovery protocol to manage muscle inflammation. One of the most effective and accessible methods is DIY contrast water therapy, a technique that requires nothing more than two water bottles and a heat source.
The principle is simple: alternating between hot and cold temperatures creates a pumping action in your blood vessels. The heat causes vasodilation (widening of the vessels), bringing fresh, oxygenated blood to the muscles. The cold causes vasoconstriction (narrowing), which helps flush out metabolic waste products that contribute to soreness and inflammation. This active process is far more effective than simply applying ice, which can sometimes overly restrict blood flow and slow down the healing process.
This technique is a perfect example of using what you have to create a professional-level recovery tool. It’s a cornerstone of the athlete’s mindset: you don’t just passively rest; you actively recover.
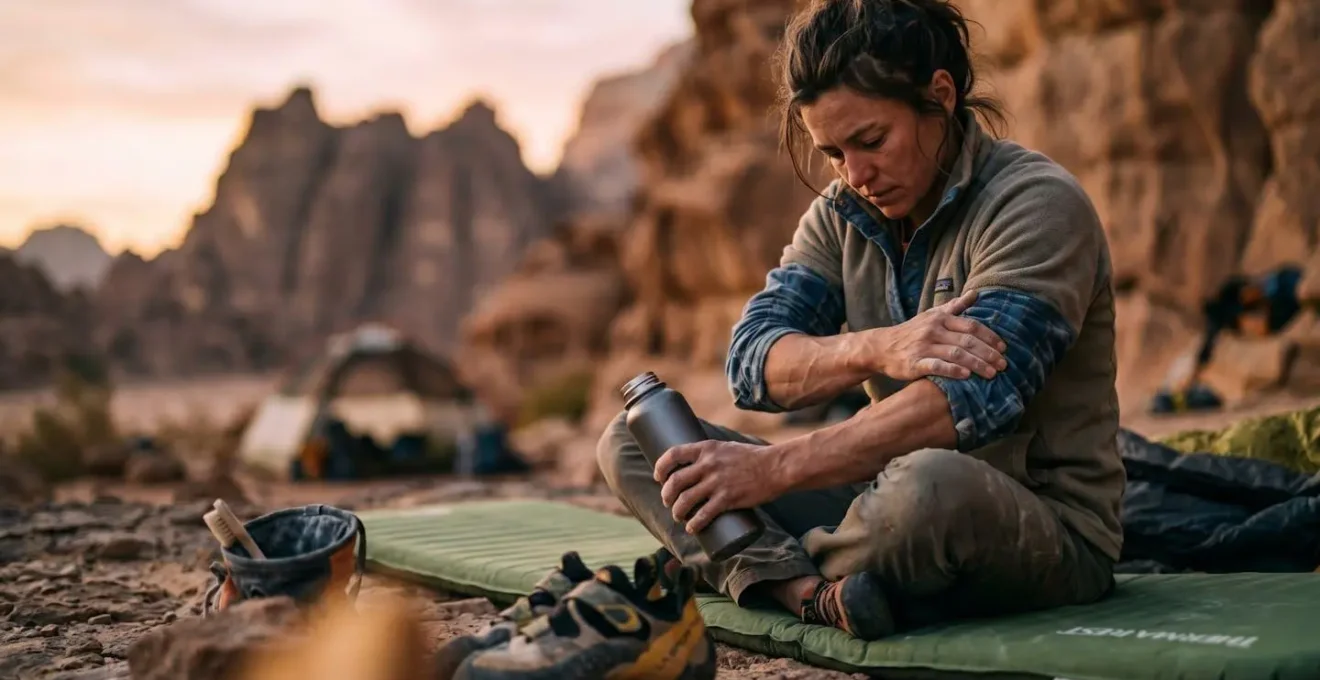
To perform this technique, you can use the water bottles not just as temperature sources, but also as self-massage tools. Rolling the firm bottles over your forearms helps to break up muscle adhesions and further enhance blood flow. The steps are simple:
- Fill one water bottle with hot (not scalding) water from your camp stove.
- Fill a second bottle with the coldest water available, ideally from a stream or cooler.
- Alternate applying the bottles to your forearms and other sore muscles: 2 minutes of heat followed by 2 minutes of cold.
- Repeat this cycle 3-4 times.
- Always finish with the cold bottle to minimize any residual swelling.
- For an added boost, applying an arnica-based lotion after the treatment can further help reduce inflammation and bruising.
Why crossing poles 3 times increases load bearing by 200%?
When you’re at an exposed basecamp, your tent is more than a shelter; it’s a lifeline. Its ability to withstand wind and snow loads directly impacts your ability to rest, recover, and ultimately, perform. The difference between a tent that stands firm and one that collapses often comes down to a simple geometric principle: the number of times the poles cross. This is where the structural integrity of a geodesic design demonstrates its superiority.
A simple dome tent may have poles that cross once or twice at the apex. A true geodesic dome, however, features a web of poles that cross multiple times, creating a network of interconnected triangles. In structural engineering, the triangle is the strongest and most stable shape. When a force (like wind or snow) is applied to a geodesic structure, the load is distributed across this entire network rather than being concentrated on a single point or pole. This distribution is the key to its incredible strength.
Case Study: The Four-Season Mountaineering Tent
Four-season tents, the standard for high-altitude mountaineering, are the ultimate expression of this principle. They are engineered with strong, flexible poles and a geodesic shape specifically to handle heavy snow loads and deflect high winds. By minimizing mesh and using robust fabrics, they create a sanctuary of warmth and security in the harshest environments. For a climber, this translates to a safe haven for recovery, making these tents a critical piece of equipment when temperatures plummet at exposed basecamps.
Each additional intersection point exponentially increases the structure’s ability to resist deformation. While the exact numbers depend on specific design and materials, structural analysis demonstrates the power of this concept. The move from a simple two-pole cross to a more complex geodesic design with three or more crossings can lead to a massive leap in stability. Some analyses show that this shift in design can result in as much as a 200% increase in load-bearing capacity. This isn’t just an abstract number; it’s the difference between a quiet night’s sleep and a tent collapsing on you in a storm.
How to use the pliers to repair a bent tent pole safely?
A bent tent pole can be a trip-ending disaster, turning your secure shelter into a useless pile of fabric. This is a common failure point, especially in high winds or during a clumsy setup. Having the tools and knowledge for a field repair is a critical part of your gear logistics protocol. A multi-tool with a good set of pliers is indispensable, but using them correctly is key. Applying brute force will likely fracture the aluminum, making the problem far worse.
The secret to a safe repair is using gentle, controlled pressure and working in small increments. Instead of trying to bend the pole back in one go, you should make a series of small, gradual adjustments. Grip the pole on either side of the bend and apply slow, steady force. Check the alignment frequently. Your goal is to get it straight enough to slide back into the pole sleeve or connect with the next section. It doesn’t have to be perfect, just functional.
A proper repair is often a two-part process: straightening and then splinting. The straightened section will always be a weak point. The best-case scenario is to slide an official pole repair sleeve (that metal tube that came with your tent) over the damaged area. If you’ve lost it, an improvised splint made from a tent stake and climbing tape can work wonders. This combination of careful bending and reinforcement will get you through the trip and back to civilization where a permanent replacement can be found.
Action Plan: Field Tent Pole Repair
- Pre-trip Inspection: Before you leave, inspect all pole sections, especially the ferrules (the inserts) and the shock cord tension. A problem found at home is an easy fix, not a crisis.
- Gentle Straightening: Use pliers with controlled pressure. Work slowly along the bend in small increments to avoid fracturing the aluminum. Check your progress often.
- Apply a Splint: Slide an official pole repair sleeve over the weakened area for the strongest fix. This is the primary purpose of that little tube in your repair kit.
- Improvise if Needed: If the sleeve is lost, create a splint using a tent stake or even a sturdy twig. Place it alongside the bent section.
- Secure the Splint: Wrap the splinted area tightly with climbing tape or duct tape. Overlap the layers generously to create a rigid and secure reinforcement. Test the pole’s flex gently before re-tensioning the tent.
Key Takeaways
- Your camp is a performance tool. Reframe it from a place of rest to a strategic basecamp for optimizing gear, recovery, and safety.
- Active recovery protocols, like contrast water therapy, are more effective for multi-day performance than simply passive rest.
- The structural integrity of your gear, from the weave of your rope to the geometry of your tent, is a non-negotiable part of your safety and success.
Geodesic Domes: Why They Survive Winds That Flatten Tunnel Tents?
In the battle against wind, not all tent designs are created equal. While tunnel tents can be lightweight and spacious, their slab-sided profile acts like a sail, catching the wind and transferring immense stress to the poles and guylines. A geodesic dome, by contrast, is an aerodynamic marvel. Its inherent structural integrity is the reason it remains standing in gusts that can shred lesser designs. This isn’t just about survival; it’s about performance.
The strength of a geodesic tent comes from its triangulated pole structure and its low, rounded profile. When wind hits the dome, it flows over and around the curved surface rather than pushing against a flat wall. The force that is captured is distributed evenly across the entire web of interlocking poles. This prevents any single point from becoming overloaded. The result is a shelter that is not only stronger but also significantly quieter. A flapping tent is a major source of noise pollution that can severely disrupt sleep, a critical component of athletic recovery.
Case Study: Geodesic Tents and Sleep Performance
In exposed environments like alpine meadows or desert canyons, the difference is night and day. Four-season geodesic tents are the standard because their shape sheds high winds effectively. The direct benefit for climbers, as noted in gear analyses, is a drastic reduction in tent flapping noise. This leads to deeper, more restorative sleep. Better sleep means better recovery, which translates directly to higher climbing performance on subsequent days. The choice of tent, therefore, becomes a strategic decision for optimizing recovery.
However, even the best tent is useless if not anchored correctly. A bombproof anchoring system, often using climbing gear itself, is the final piece of the puzzle. Techniques like building rock anchors with nuts or cams, creating « deadman » anchors by burying a pack in snow, and strategically guylining the tent to natural features all contribute to creating an immovable fortress. This is the essence of a pro-level Basecamp System: using superior design and expert technique in harmony.
Stop leaving your performance to chance. Start by auditing your current gear and practices, identify the weakest link in your system, and begin implementing these more robust protocols on your next trip. Feel the difference that a true Basecamp System makes on the rock.