Stove failure at -5°C isn’t a simple canister versus liquid fuel debate; it’s a failure to master the physics of fuel vaporization and system maintenance.
- Canister stoves fail due to a predictable drop in vapor pressure as the more volatile propane burns off, a process known as fractional distillation.
- Liquid fuel stoves, while inherently more cold-resistant, typically fail due to maintenance neglect and clogged fuel jets, not a fundamental design flaw.
Recommendation: Master your chosen *system*—understand its fuel properties, practice field maintenance, and learn precise fuel calculation—before you trust your life to it on a cold-weather trek.
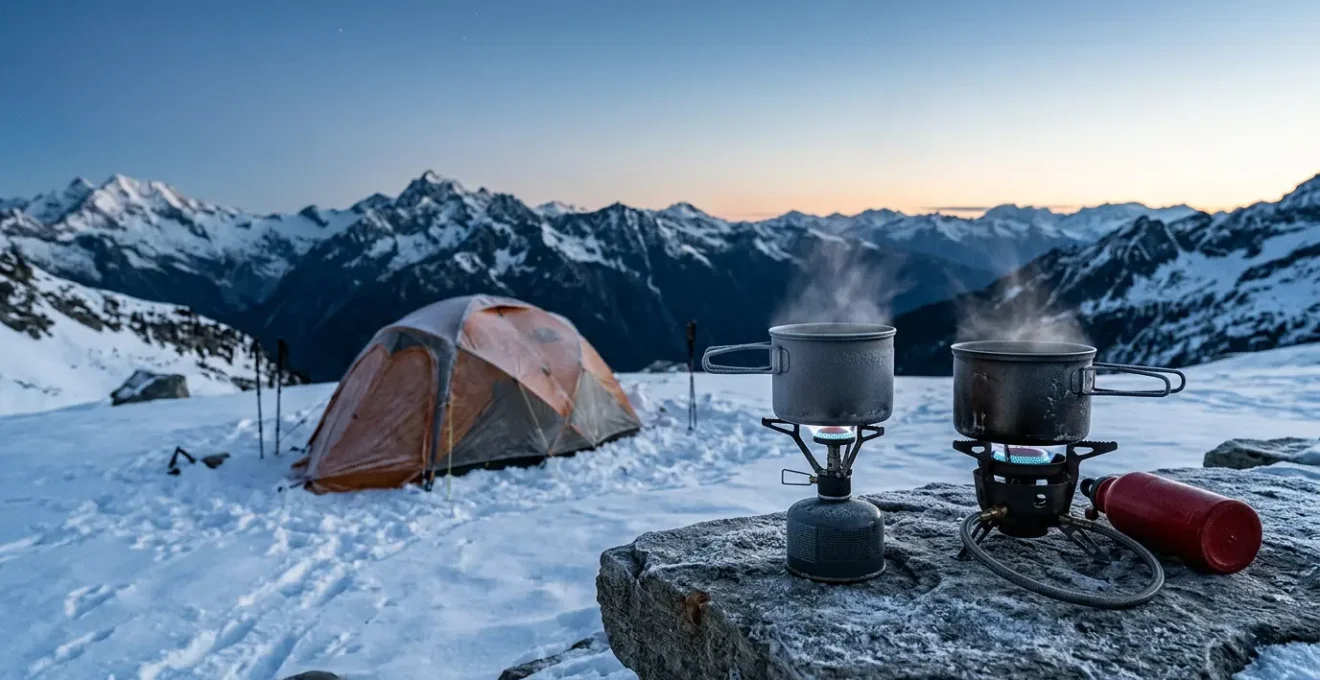
The silence of a sputtering stove in the freezing dark is a sound every winter trekker dreads. It’s more than an inconvenience; it’s a critical failure that can jeopardize an entire expedition. You’re cold, you’re tired, and the hot meal you’ve been banking on is now a distant dream. The common wisdom offers a simple, yet incomplete, solution: « canister stoves for summer, liquid fuel for winter. » Others will tell you to just « keep your canister warm in your sleeping bag. » While not entirely wrong, this advice barely scratches the surface of the problem and ignores the underlying physics that govern stove performance in sub-zero conditions.
This is where most discussions end. But for those of us who operate where performance is not optional, the true battle isn’t about picking a side in the canister versus liquid fuel debate. It’s about knowledge versus physics. The real key to a reliable flame at -5°C isn’t just the hardware you carry, but the deep understanding of how that hardware functions. It’s about mastering vapor pressure, fuel blend thermodynamics, and the disciplined maintenance that turns a simple tool into a lifeline. A stove is a system, and you are the most critical component.
This guide moves beyond the simplistic debate. We will dissect the science behind why canisters struggle, provide a framework for calculating your exact fuel needs, reveal the critical maintenance mistake that permanently disables liquid fuel stoves, and analyze the life-or-death issue of carbon monoxide risk. This is the field-tested knowledge required to ensure your stove performs, every single time.
To navigate this technical breakdown, here is a clear roadmap of the critical systems and knowledge areas we will cover. Each section builds upon the last, equipping you with the expertise to make informed decisions and master your equipment in the field.
Summary: A Technical Breakdown of Cold-Weather Stove Systems
- Why Isobutane Mixtures Struggle to Vaporize Below Freezing
- How to Calculate Exact Fuel Needs per Day to Avoid Carrying Extra Weight
- The Cleaning Mistake That Clogs Liquid Fuel Jets Permanently
- Gas vs. Alcohol: Which Poses a Lower Carbon Monoxide Risk in Vestibules?
- When to Use a Remote Canister Stove: Stability for Large Pots
- How to Cook Efficiently When Water Boils at a Lower Temperature
- Rice vs. Couscous: Which Saves More Fuel During Rehydration?
- DIY Dehydrated Meals: How to Cut Food Costs by 60% for Long Treks
Why Isobutane Mixtures Struggle to Vaporize Below Freezing
The primary reason your canister stove sputters and dies in the cold is a direct consequence of physics, specifically vapor pressure. For a stove to work, liquid fuel inside the canister must convert to gas (vaporize). This gas is what burns. Each fuel component—typically propane, isobutane, and sometimes n-butane—has a different boiling point. Propane vaporizes down to -42°C, making it excellent for cold. However, isobutane, the main component in quality winter fuels, stops vaporizing effectively around -12°C. N-butane is even worse, failing near freezing.
As you use the stove in the cold, a process called fractional distillation occurs. The stove burns the gas with the highest vapor pressure first—the propane. This leaves behind a higher concentration of isobutane. As the canister cools further from the vaporization process (endothermic reaction), its internal pressure drops dramatically. Eventually, the pressure is too low to force fuel out, even if there’s plenty of liquid isobutane left. Your stove fails. According to the Appalachian Mountain Club, even high-quality isobutane only continues vaporizing down to 11°F (-12°C), a temperature easily reached by a depressurizing canister in -5°C air.
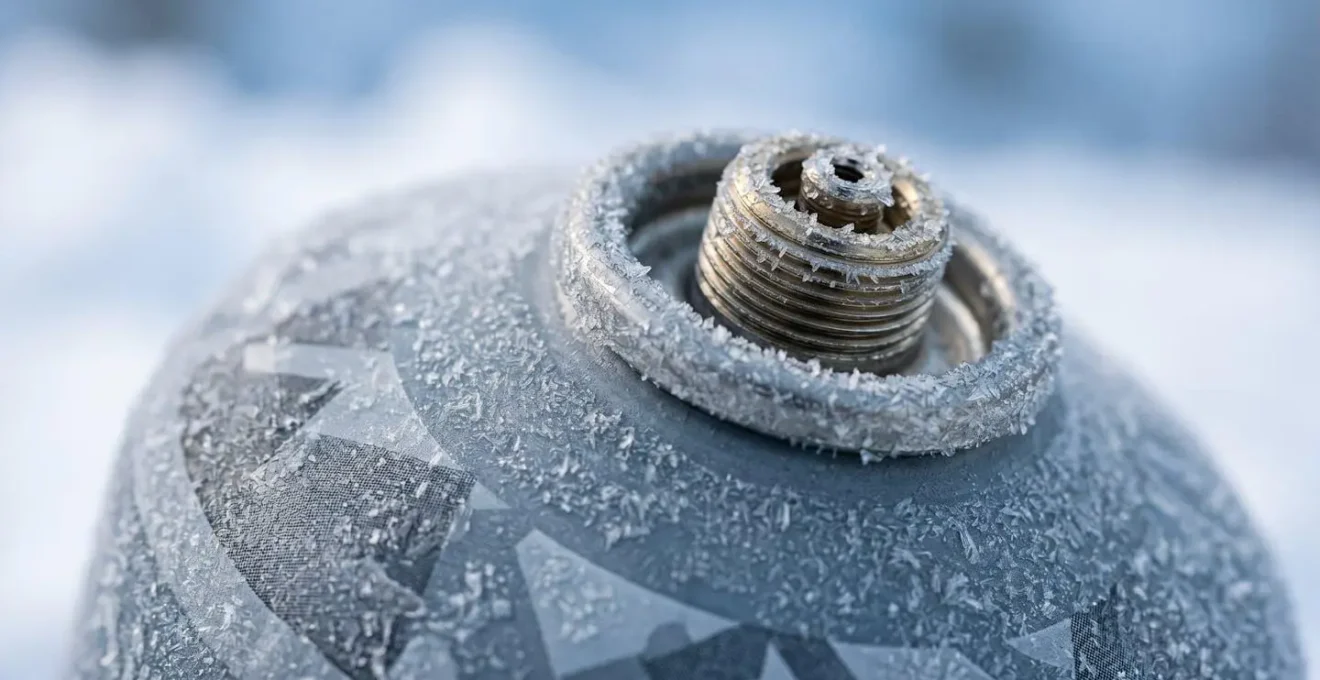
As the image above illustrates, the cold creates a hostile environment for fuel vaporization. Furthermore, not all canisters are created equal. Fuel blend ratios vary significantly between brands; for instance, MSR IsoPro is typically 80% isobutane/20% propane, while Snow Peak GigaPower is often 85% isobutane/15% propane. This difference in propane content dictates initial cold-weather performance. Understanding this isn’t just trivia; it’s a core component of system integrity.
How to Calculate Exact Fuel Needs per Day to Avoid Carrying Extra Weight
In expedition planning, weight is everything. Carrying too much fuel is a burden; carrying too little is a critical failure. A simple « grams per day » estimate is dangerously inaccurate because it ignores the variables that have the greatest impact: temperature, altitude, wind, and water source. A precise calculation is not an academic exercise—it’s a fundamental safety protocol. You must move from guessing to a multi-variable calculation.
The foundation of your calculation is a baseline: how much fuel does your specific stove use to boil one liter of water in ideal conditions? Test this at home. Weigh a new canister, boil exactly one liter of water, and weigh it again. This is your grams-per-liter baseline. From there, you apply factors. For temperatures around -5°C, multiply your baseline by a factor of 1.5. For altitudes above 2,500 meters (approx. 8,000 feet), add another 10-20% to account for the lower boiling point and longer cook times. Wind is the biggest killer; without a fully effective windscreen, you can easily double your fuel consumption. Finally, add a 25% safety buffer for the unexpected.
A crucial factor often overlooked is your water source. If you plan to melt snow, your fuel budget must increase dramatically. It’s a two-stage process: bringing snow to 0°C, then melting it, then bringing the resulting water to a boil. This additional stove time burns a significant amount of extra fuel, a fact confirmed by MSR’s fuel consumption research. Failing to account for this « snow penalty » is one of the most common reasons winter trekkers run out of fuel.
The Cleaning Mistake That Clogs Liquid Fuel Jets Permanently
With liquid fuel stoves, reliability is synonymous with maintenance. Unlike canister stoves, which are closed systems, a liquid fuel stove is an engine you must know how to service in the field. The most common point of failure is the jet—a tiny brass orifice where vaporized fuel exits. A partial clog leads to poor performance; a full clog means no flame. The single biggest mistake I see is operators attempting to clean a hot jet with an abrasive tool. Poking a steel needle or reamer into a hot, softened brass jet will deform or score the orifice, permanently ruining its spray pattern and efficiency.
Another critical error is using the wrong fuel. While many multi-fuel stoves can burn a variety of liquids in an emergency, their long-term health depends on clean, pure fuel like white gas (Coleman fuel). As the MSR Technical Team warns, even supposedly high-quality automotive fuels can cause serious issues.
premium unleaded fuels have many additives that will clog a stove much faster
– MSR Technical Team, MSR Stove Maintenance Guide
This buildup from additives is often a stubborn, baked-on carbon that standard cleaning methods can’t remove. Your stove isn’t broken; it has been fed the wrong diet. Proper maintenance is a non-negotiable field discipline. It follows a strict, methodical procedure that protects the delicate components of the system.
Your Field Protocol for Jet Maintenance
- Wait for the System to Cool: Always allow at least 5 minutes for the stove to cool completely. This prevents thermal shock damage to the jet and fuel line components.
- Use the Built-in Cleaner First: Before disassembly, close the control valve and disconnect the fuel line. Shake the stove vigorously to activate the built-in shaker needle, listening for the pin clearing the jet.
- Disassemble with Correct Tools: If the shaker fails, use the manufacturer-provided tool to remove the jet. Never use pliers or an incorrectly sized wrench, as this will round the soft brass.
- Clean the Fuel Line Cable: With the jet removed, clean the internal fuel line cable with a designated lubricant (like pump cup oil) and a cloth. Cycle it back and forth to clear any sediment.
- Soak, Don’t Scrape: For stubborn carbon deposits on the jet itself, soak it in white gas. Never use abrasive tools, wires, or pins to physically scrape the orifice.
Gas vs. Alcohol: Which Poses a Lower Carbon monoxide Risk in Vestibules?
Cooking inside a tent vestibule is a calculated risk, dictated by storm conditions. The invisible killer in this scenario is carbon monoxide (CO), a colorless, odorless gas produced by the incomplete combustion of any hydrocarbon fuel. The debate isn’t whether stoves produce CO—they all do—but which systems and conditions produce the most. While alcohol stoves are often perceived as « cleaner, » all flames consume oxygen and can produce deadly levels of CO in an enclosed, poorly ventilated space.
The primary factor influencing CO production is flame efficiency. A clean, blue flame indicates efficient combustion and lower CO output. A yellow, sooty flame signals inefficient combustion and dangerously high CO production. This can be caused by a partially clogged jet on a liquid fuel stove, a cold and depressurized canister stove, or insufficient oxygen. The danger of canister stoves is that as they cool and pressure drops, the fuel-air mixture becomes overly rich, leading to a yellow flame and surging CO levels. A research team led by Dr. Jeff Thurman for Backpacker Magazine tested several popular canister stoves inside a closed tent, finding that even modern designs produced significant carbon monoxide in poorly ventilated conditions. This highlights that stove design and condition are critical variables.
While direct comparative data for modern stoves is complex, historical studies provide a stark warning. For context on how dangerous any stove can be, a controlled study published in PubMed found that kerosene stoves produced a mean carboxyhemoglobin level of 21.5% in subjects after just 120 minutes of exposure—a level associated with severe poisoning. While white gas and isobutane burn cleaner than kerosene, this demonstrates the potent risk of any flame in an enclosed space. The only safe procedure is to ensure constant, active ventilation. Keep the vestibule door cracked open, creating a cross-breeze, no matter how cold it is. Your life depends on it.
When to Use a Remote Canister Stove: Stability for Large Pots
The standard canister stove, where the burner sits directly on the fuel canister, is a marvel of lightweight efficiency. However, it has two major weaknesses in winter conditions: instability and susceptibility to cold. A remote canister stove, which connects the burner to the canister via a flexible hose, directly addresses both. This design creates a low, wide, and exceptionally stable platform, making it the superior choice for use with larger pots needed for melting snow or cooking for a group.
More importantly, the remote design offers a critical performance advantage at temperatures around -5°C and below: the ability to invert the canister. When inverted, the stove draws liquid fuel directly from the canister, bypassing the need for vaporization. The fuel is then vaporized in a preheat tube that runs through the flame. This liquid-feed mode allows the stove to run at full power even when the canister is far too cold to produce adequate gas pressure. It is the single most effective technique for overcoming the physical limitations of isobutane in the cold.
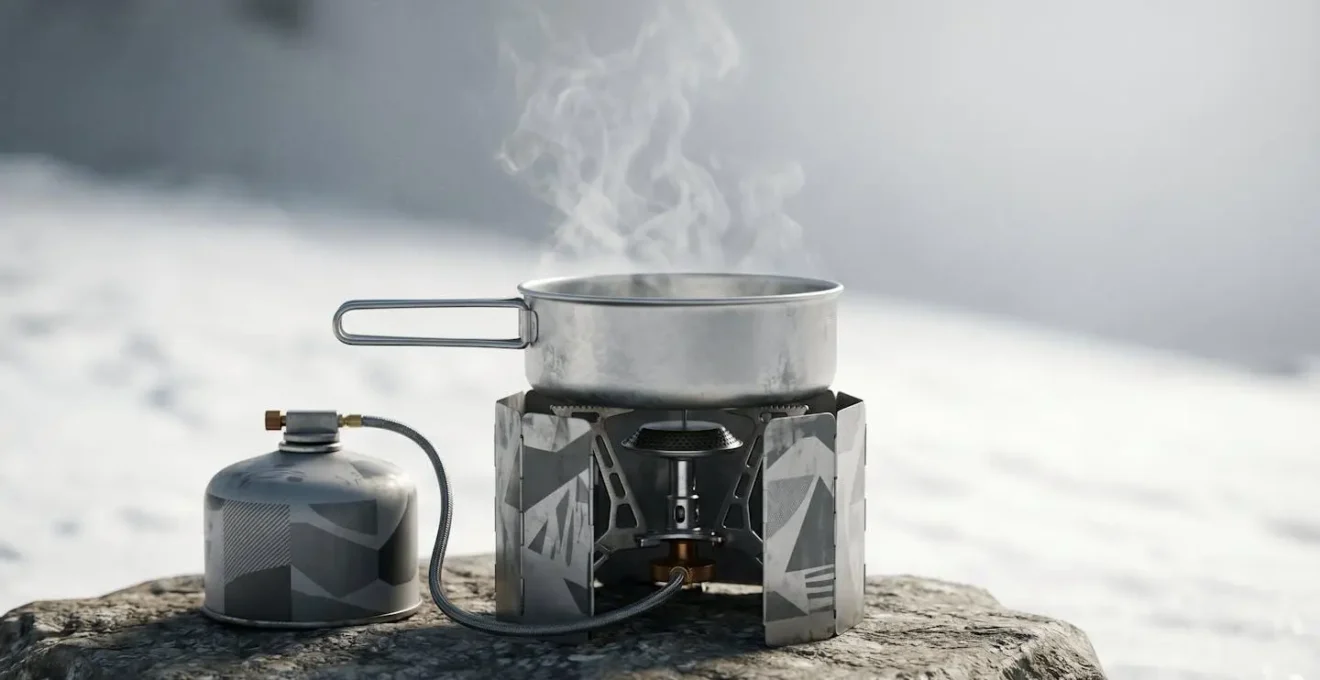
This system, as shown above, provides a powerful and stable platform that excels in demanding winter environments. The decision to carry the extra weight of a remote stove is a strategic one, based on the specific demands of your trip. You should opt for a remote canister system if:
- You are regularly cooking for more than two people.
- Melting snow is your primary water source, requiring large pot capacity and long burn times.
- Temperatures will consistently be below 0°C (32°F), making the liquid-feed option essential.
- Your trip duration in winter conditions exceeds three days, where fuel efficiency from a regulated system becomes paramount.
How to Cook Efficiently When Water Boils at a Lower Temperature
As you gain altitude, atmospheric pressure decreases. This causes water to boil at a lower temperature—roughly 1°C for every 300 meters (1,000 feet) of elevation gain. At 3,000 meters, water boils around 90°C, not 100°C. While this means water boils « faster, » it also means food takes significantly longer to cook because the cooking temperature is lower. This extended cook time can devastate your carefully planned fuel budget. Mastering high-altitude cooking is about retaining heat and minimizing burn time.
Several field-tested techniques are essential for conserving fuel in this environment. The most effective is the « boil-and-soak » method. Instead of simmering your food for 15-20 minutes, bring the water to a rolling boil, add your food, stir, and immediately kill the flame. Secure the lid and place the entire pot inside an insulated pot cozy or wrap it in a spare piece of clothing or your sleeping bag. The retained heat will continue to cook the food, using zero additional fuel. This method works exceptionally well for pasta, rice, and dehydrated meals.
Other small adjustments yield significant savings:
- Lid Weight Technique: Placing a clean, flat rock or even a snow-filled water bottle on your pot lid slightly increases the internal pressure, which can raise the boiling point by a crucial degree or two, shortening cook times.
- Precise Water Measurement: Only heat the exact amount of water you need. Boiling an extra cup of water you don’t use is a pure waste of fuel.
- Effective Windscreen Use: Wind is the single greatest enemy of fuel efficiency at any altitude. A properly deployed windscreen can cut fuel consumption by up to 50% by shielding the flame and reflecting heat back to the pot.
- Cold-Soaking: For foods like lentils or dense grains, pre-soak them in a sealed container with cold water during the day as you hike. This cuts the required evening cook time in half.
Rice vs. Couscous: Which Saves More Fuel During Rehydration?
Your choice of food is as much a part of your fuel strategy as your choice of stove. The amount of time and heat required to rehydrate a meal directly translates to grams of fuel burned. When every gram counts, selecting foods with high caloric density and low rehydration times is a strategic imperative. The difference between a 5-minute meal and a 15-minute meal is significant over the course of a multi-day trek. Couscous and instant rice are both staples, but they have very different fuel profiles.
Couscous is one of the most fuel-efficient carbohydrates available. It requires only bringing water to a boil, adding the couscous, and then letting it sit covered off the flame for about 5 minutes. Its total burner time is minimal. Instant rice, while still fast, typically requires a 10-minute simmer, doubling the fuel consumption compared to couscous. This principle extends to all food choices. Ramen noodles and instant potatoes rehydrate extremely quickly, while denser foods like quinoa or lentils demand much longer burn times, making them less suitable for fast-and-light winter trips where fuel is at a premium.
The following table, based on general industry findings, provides a clear comparison of common backpacking foods and their relative fuel cost. Use this data to build a food plan that is optimized not just for calories, but for minimal fuel expenditure.
| Food Type | Cook Time (minutes) | Estimated Fuel Cost (grams per 100g dry food) | Calorie Density |
|---|---|---|---|
| Couscous | 5 | 3-4g | High |
| Instant Rice | 10 | 6-8g | High |
| Ramen Noodles | 3-4 | 2-3g | Medium |
| Instant Potatoes | 5 | 3-4g | Medium |
| Angel Hair Pasta | 6-7 | 4-5g | High |
| Quinoa | 12-15 | 8-10g | High |
| Lentils (pre-soaked) | 8-10 | 6-7g | High |
Key Takeaways
- Stove failure is physics, not magic. Canister performance is dictated by vapor pressure and fractional distillation, while liquid fuel reliability is a direct result of user maintenance.
- Your stove is a system. Its performance depends on the hardware, the fuel properties, the environmental conditions, your food choices, and your own knowledge.
- Precise fuel calculation is not optional. Moving from guesswork to a multi-variable formula that accounts for temperature, altitude, wind, and water source is a critical safety measure.
DIY Dehydrated Meals: How to Cut Food Costs by 60% for Long Treks
For long expeditions, commercial freeze-dried meals are prohibitively expensive. Dehydrating your own meals not only cuts food costs by over 60% but also gives you complete control over nutrition, flavor, and, most importantly, fuel efficiency. You can design your meals around the specific performance characteristics of your stove system, creating a truly integrated cooking strategy that saves weight, time, and fuel.
The core principle is to optimize for rehydration. For canister stove users focused on fast-and-light travel, this means designing « freezer bag » style meals. These meals contain pre-cooked and dehydrated ingredients that only require adding boiling water directly to a durable zip-top bag. This method uses the absolute minimum amount of fuel—just enough to boil water—and creates zero cleanup. If you use a more powerful liquid fuel stove, you can design more complex « one-pot-simmer » meals that leverage the stove’s robust heat output for more gourmet results.
A transformative technique for DIY meals is the grind-to-powder method. By using a food processor to grind ingredients like pasta, dried mushrooms, and vegetables into a coarse powder, you massively increase their surface area. This allows for near-instantaneous rehydration, turning a 10-minute pasta dish into a 2-minute meal. Finally, a key strategy for calorie density is to add fats like olive oil packets or powdered butter *after* the food is cooked. This boosts the caloric content of your meal without requiring any additional fuel to heat, making it the most efficient way to carry and consume energy.
Ultimately, the choice between a canister and a liquid fuel stove is secondary to your mastery of the system you choose. Both can be made to work reliably at -5°C, and both will fail if operated with ignorance of their physical principles. Test your gear, practice your maintenance, and do your calculations before the success of your expedition—and your safety—depends on it. Your knowledge is the most important piece of gear you will ever carry.