Contrary to common belief, surviving a cold night at high altitude isn’t about piling on more layers or buying the most expensive gear. The real key is understanding your body’s unique physiological responses to the thin, dry air. This guide shifts the focus from gear alone to the science of acclimatization, hydration, and thermal efficiency, empowering you to prevent altitude sickness and hypothermia by working with your body, not just against the elements.
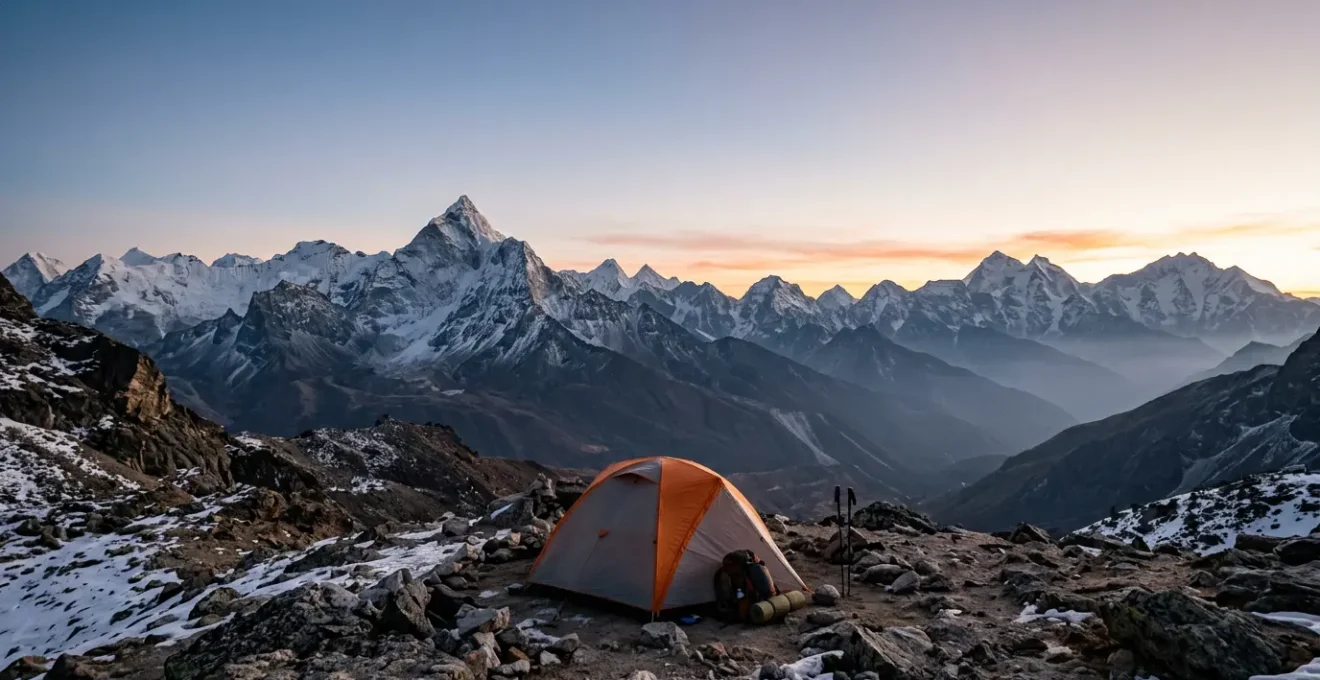
For the amateur alpinist, the thought of spending a night above 2000 meters (approx. 6,500 feet) is a mixture of excitement and apprehension. The promise of pristine sunrises is often shadowed by concerns about the biting cold and the insidious creep of altitude sickness. Many guides focus on gear lists and general advice like « stay hydrated » or « ascend slowly. » While these tips are not wrong, they often fail to address the fundamental question: what is actually happening to your body in this alien environment?
The truth is, managing the high-altitude environment is less about brute force and more about physiological intelligence. The most common mistakes, from waking up freezing in a top-rated sleeping bag to battling a splitting headache, are not failures of gear but misunderstandings of human physiology. The secret isn’t just knowing *what* to do, but understanding *why* you are doing it. It’s about recognizing that your body is a delicate engine that requires precise tuning to function efficiently when oxygen is scarce and the air is desperately dry.
This guide takes a different approach. As a mountain physician, my goal is to equip you with the knowledge to become an active manager of your own physiology. We will move beyond gear checklists to explore the science behind hydration, acclimatization, and heat management. By understanding the mechanisms of altitude’s effects, you can make smarter, safer decisions, transforming anxiety into confident preparedness for your high-altitude bivouac.
This article will guide you through the critical physiological and environmental challenges you’ll face when sleeping at altitude. Each section is designed to build your understanding, from how your body functions to how your gear interacts with the extreme conditions.
Table of Contents: A Physiological Guide to High-Altitude Bivouacs
- Why your body dehydrates 2x faster at high altitude?
- How to acclimatize for a sleep-over at a high peak?
- The layering mistake that causes hypothermia inside a sleeping bag
- Valley basecamp vs Ridge bivouac: Balancing comfort and sunrise views
- How to cook efficiently when water boils at a lower temperature?
- Why temperature ratings are survival limits, not comfort guarantees?
- Why Isobutane mixtures struggle to vaporize below freezing?
- Canister vs Liquid Fuel: Which Stove Won’t Fail at -5°C?
Why your body dehydrates 2x faster at high altitude?
One of the first and most significant physiological shifts at altitude is a dramatic increase in your rate of dehydration. This isn’t just because you are exerting yourself; it’s a direct consequence of the physics of the air you are breathing. High-altitude air is extremely dry and at a lower pressure. To protect your sensitive lung tissues, your body must warm and humidify every single breath you take. This process, known as respiratory water loss, pulls a significant amount of moisture directly from your body.
The effect is profound. Your breathing rate also increases to compensate for lower oxygen levels (hypoxia), further accelerating this moisture loss. In fact, research from the Wilderness Medical Society indicates that your body loses water through respiration up to twice as fast at high altitude compared to sea level. This is moisture you lose simply by breathing, even while resting in your tent. It’s a silent and constant drain on your hydration reserves.
Furthermore, this accelerated dehydration directly impacts your body’s ability to stay warm and acclimatize. Your blood volume decreases, making it thicker and forcing your heart to work harder to circulate oxygen. Proper hydration is therefore not just about quenching thirst; it is a critical medical necessity for preventing both hypothermia and Acute Mountain Sickness (AMS). As a baseline, aim to consume at least 4-5 liters of fluid per day, consistently sipping throughout the day rather than chugging large amounts at once. Monitor your urine output; it should be plentiful and pale yellow, a clear sign of adequate hydration.
How to acclimatize for a sleep-over at a high peak?
Acclimatization is the process by which your body gradually adjusts to the lower oxygen levels of high altitude. It is the single most important factor in preventing Acute Mountain Sickness (AMS), a condition whose early signs include headache, nausea, and fatigue. Attempting to sleep at a high peak without proper acclimatization is not just uncomfortable; it is dangerous. The process involves a series of complex physiological changes, the most important of which is stimulating your bone marrow to produce more red blood cells to increase the oxygen-carrying capacity of your blood.
This hematological adaptation is not instantaneous. A commonly cited rule of thumb for estimating full acclimatization time is a formula where the altitude in kilometers is multiplied by 11.4 days. While this represents a complete adaptation, practical acclimatization for a shorter trip follows a more manageable protocol. The golden rule is « climb high, sleep low. » This involves ascending to a new, higher altitude during the day to expose your body to the hypoxic stress, and then descending to a lower elevation to sleep. This allows your body to recover and adapt in a less stressful environment overnight.
For a weekend trip involving a bivouac, this means you should not drive from sea level and immediately attempt to sleep at 2500m. A better plan involves spending the first night at an intermediate altitude (e.g., 1500m), then hiking higher the next day before setting up your bivouac. A slow, gradual ascent is your best defense. Pay close attention to your body; a mild headache is a signal to stop ascending, rest, and hydrate. Pushing through symptoms of AMS can lead to more severe and life-threatening conditions like High-Altitude Pulmonary Edema (HAPE) or High-Altitude Cerebral Edema (HACE).
Your High-Altitude Acclimatization Checklist
- Ascend Gradually: Plan your itinerary to avoid large jumps in sleeping altitude; aim for no more than 300-500 meters per night above 2500m.
- Climb High, Sleep Low: During the day, hike to a point higher than your planned campsite, spend an hour there, then descend to sleep.
- Stay Hydrated: Drink 4-5 liters of water daily to support blood volume and circulation, which aids oxygen transport.
- Monitor Symptoms: Be honest about any symptoms (headache, nausea, fatigue). Treat a headache as early-stage AMS until proven otherwise. Rest or descend if symptoms appear.
- Avoid Depressants: Do not consume alcohol or sleeping pills, as they can suppress your respiratory drive during sleep, worsening hypoxia.
The layering mistake that causes hypothermia inside a sleeping bag
It seems counter-intuitive, but one of the fastest ways to get cold inside a sleeping bag is by wearing too many clothes. This common mistake stems from a misunderstanding of how a sleeping bag works. A sleeping bag does not generate heat; it is a passive system designed to trap the heat your body produces. Its effectiveness relies entirely on the thickness of its insulation, or « loft. » This fluffy layer of down or synthetic fill creates thousands of tiny air pockets that trap warm air.
When you wear bulky layers—like a thick down jacket—inside a properly sized sleeping bag, you compress this essential insulation. Your body weight and the restrictive space crush the loft, eliminating the air pockets. This creates « thermal bridges, » or dense spots where heat can escape directly to the cold outside air. You have effectively reduced the thermal efficiency of your multi-hundred-dollar sleeping bag to that of a thin blanket.
This is a critical concept of thermal inefficiency through compression. The insulation is rendered useless where it is squashed flat against your body.

As this detailed view shows, compressed fibers offer almost no insulating value. The correct approach is to allow the sleeping bag’s insulation to do its job. Wear a snug, breathable base layer (merino wool or synthetic) to wick away sweat, and perhaps a light fleece. If you are still cold, drape your puffy jacket *over* the sleeping bag as an extra quilt. This adds insulation without compromising the loft of your primary sleep system. Also, ensure you wear a warm hat, as a significant amount of body heat is lost through your head.
Valley basecamp vs Ridge bivouac: Balancing comfort and sunrise views
Choosing a campsite at altitude is a strategic decision that goes beyond finding a flat spot. Many hikers instinctively seek sheltered valley floors, assuming they will be warmer. However, mountain meteorology often works in surprising ways. During calm, clear nights, a phenomenon known as temperature inversion occurs. Cold, dense air sinks and pools in valleys and depressions, while the warmer, less dense air rises to the slopes and ridges above.
As a result, a campsite on a valley floor can be significantly colder than one located a hundred meters higher on a ridge or shoulder. As experts at Hyperlite Mountain Gear note, valley floors are often the coldest places to camp. Meteorological observations during these events confirm this, with ridges sometimes being 5-10°F (or 3-6°C) warmer than the valley bottom. This is due to katabatic winds, where air cooled by contact with high-elevation snow and rock flows downhill like a river, settling in the lowest points.
While a ridge bivouac offers better temperatures and spectacular sunrise views, it comes with a trade-off: exposure to wind. Wind dramatically accelerates heat loss (the wind chill effect) and can make for a noisy, restless night. The ideal campsite, therefore, is often a compromise. Look for a spot on a bench or shoulder, slightly elevated above the valley floor but still sheltered from the prevailing winds by a rock outcrop or a stand of trees. This strategic positioning allows you to avoid both the coldest air pocket and the full force of the wind, creating a more comfortable microclimate for your bivouac.
How to cook efficiently when water boils at a lower temperature?
Another practical challenge of high altitude is the impact of lower atmospheric pressure on cooking. You may notice your stove brings water to a boil faster than at sea level. This is not a sign of efficiency but a direct result of physics: with less air pressure pushing down on its surface, water requires less energy (a lower temperature) to boil. For instance, at 3000 meters (approx. 9,800 feet), water boils at around 90°C (194°F) instead of the familiar 100°C (212°F).
While the water is bubbling, it is not hot enough to cook food as effectively. This lower boiling point means that foods like pasta, rice, and dehydrated meals will take significantly longer to rehydrate and cook through. They may even remain crunchy and unpalatable no matter how long you boil them, all while you burn through your limited fuel supply. This can lead to undercooked, hard-to-digest meals, which is the last thing your body needs when dealing with the stresses of altitude.
To overcome this, you must adapt your cooking strategy. First, plan your meals around foods that cook quickly or require no cooking, such as instant noodles, couscous, or pre-cooked meals. Second, the most effective technique is to maximize heat retention. Once your water boils, add your food, bring it back to a brief boil, then turn off the stove. Immediately place the pot inside a « pot cozy »—an insulated sleeve you can make from an old foam sleeping pad and duct tape. Let the food sit and « soak cook » in the retained heat for 15-20 minutes. This method conserves a tremendous amount of fuel and ensures your meal is properly rehydrated. Using a pressure cooker is the ultimate solution, but it is often too heavy for lightweight backpacking.
Why temperature ratings are survival limits, not comfort guarantees?
One of the most dangerous misconceptions in mountain gear relates to the temperature rating on a sleeping bag. Many hikers see a « -5°C » rating and assume it guarantees a comfortable night’s sleep at that temperature. This is fundamentally incorrect. The standardized rating (EN/ISO 23537) is a laboratory-derived figure based on a « standard » mannequin and specific conditions that rarely reflect reality. It represents a limit for survival, not a promise of comfort.
The rating system has three main values:
- Comfort: The temperature at which a « standard woman » is expected to sleep comfortably. This is the most realistic number for most people to consider.
- Limit: The temperature at which a « standard man, » curled up, can sleep for eight hours without waking from the cold. This is on the edge of discomfort.
- Extreme: A pure survival rating. At this temperature, there is a significant risk of hypothermia, though you may survive for six hours. This rating should be ignored for all practical planning.
A sleeping bag is not an isolated piece of equipment; it is part of a complete sleep system. Its performance is entirely dependent on the insulation beneath you. You lose far more heat to the cold ground through conduction than you do to the air. A bag with a -10°C rating is useless if placed on a cheap, uninsulated foam pad in winter conditions.
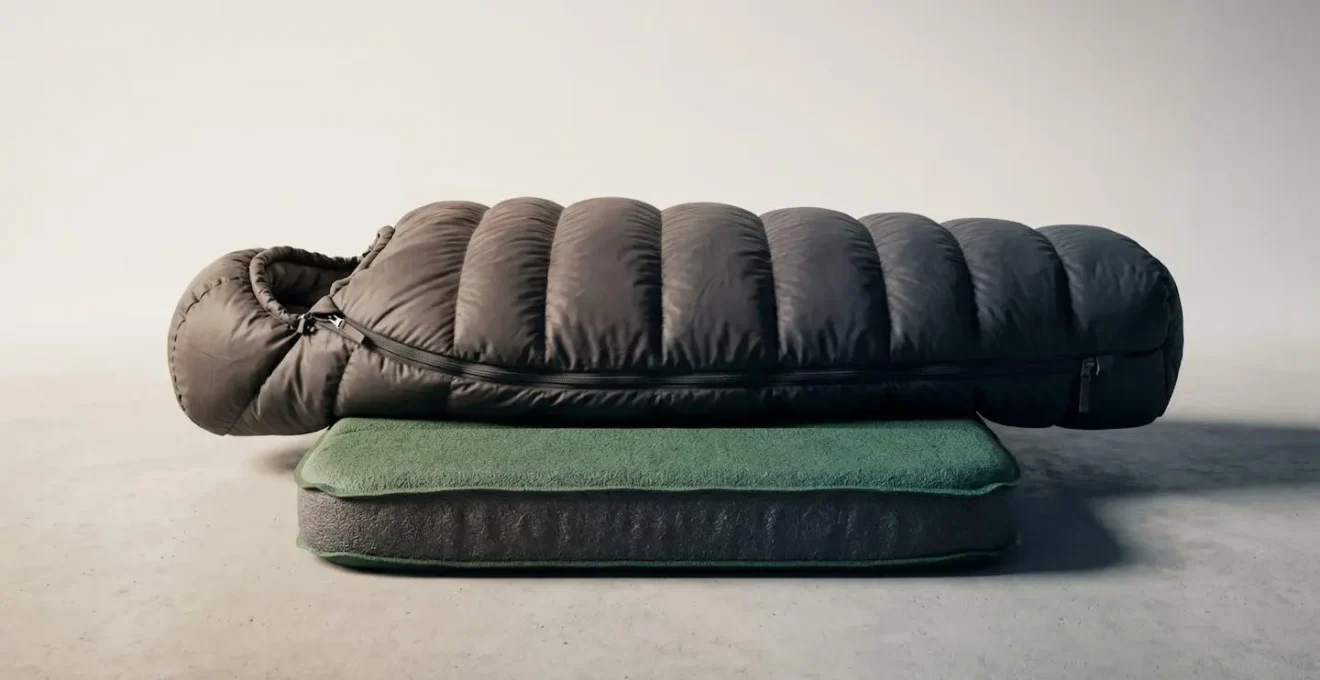
As this visualization shows, your sleeping pad is just as important as your bag. The pad’s insulating capacity is measured by its R-value; for cold conditions above 2000m, an R-value of 4 or higher is essential. Your personal metabolism, hydration level, and whether you’ve eaten a warm meal also dramatically affect how « warm » you sleep. As a mountain doctor, I advise you to choose a bag whose *comfort* rating is at least 5-10 degrees C lower than the coldest temperature you anticipate.
This value is only indicative and is not guaranteed (it would only be guaranteed if your body complied with all the standards, if you didn’t sweat and if you only slept in a lab…).
– Warmpeace Technical Documentation, How does a sleeping bag keep you warm?
Why Isobutane mixtures struggle to vaporize below freezing?
A canister stove is a marvel of convenience, but its performance can plummet in the cold for a simple reason: chemistry. These stoves work by burning a vaporized gas, not a liquid. Inside the canister is a blend of liquified petroleum gases, typically a mix of propane and isobutane (or n-butane). For the stove to work, this liquid must boil and turn into a gas (vaporize). The problem is that each gas has a different boiling point.
Propane has a very low boiling point of -42°C (-44°F). This means that even in very cold weather, it readily turns into a gas, pressurizing the canister and feeding the stove. Isobutane, however, has a much higher boiling point of -11.7°C (11°F). When you start your stove in cold weather, the component with the lower boiling point vaporizes first. An article on fuel chemistry shows that the propane component vaporizes first at -42°C, powering your stove beautifully at the beginning of your trip.
The issue, known as fractional distillation, occurs as you use the fuel. The more volatile propane burns off first, leaving a higher concentration of isobutane behind. As the canister empties and the ambient temperature drops towards freezing, two things happen. First, the overall pressure inside the canister drops. Second, the remaining isobutane struggles to vaporize as its temperature nears its boiling point. The stove will begin to sputter and may fail completely, even if the canister feels like it still contains liquid fuel. This leaves you without a way to melt snow for water or cook a warm meal—a dangerous situation.
Key takeaways
- Your body’s physiological response, not your gear, is the primary factor in high-altitude comfort and safety.
- Proper acclimatization (« climb high, sleep low ») and aggressive hydration (4-5 liters/day) are your most powerful tools against altitude sickness.
- Thermal efficiency is key: avoid compressing your sleeping bag’s loft with bulky layers and use a high R-value sleeping pad to prevent heat loss to the ground.
Canister vs Liquid Fuel: Which Stove Won’t Fail at -5°C?
Understanding the failure point of canister stoves naturally leads to the critical gear choice: which type of stove is reliable for a bivouac in freezing conditions? The answer lies in how the fuel is delivered to the burner. As we’ve seen, standard canister stoves fail when the liquid fuel inside can’t vaporize. This positions liquid fuel stoves as the far more reliable option for cold weather and high-altitude environments.
Canister Stoves are simple and lightweight. However, their performance is temperature-dependent. Some modern canister stoves attempt to solve the cold-weather problem with a pressure regulator or by inverting the canister (in a « liquid-feed » mode), which allows liquid fuel to flow to a heated generator tube at the burner where it then vaporizes. These systems are an improvement, but they can still be finicky and less efficient than a dedicated liquid fuel stove.
Liquid Fuel Stoves, on the other hand, are designed for four-season performance. They use a separate fuel bottle that you pressurize yourself with a pump. This manual pressurization forces the liquid fuel (like white gas) through a line to the burner, where it is pre-heated and vaporized before ignition. Because the pressure is created manually and is not dependent on the fuel’s boiling point, these stoves operate consistently in sub-zero temperatures. They are heavier, require more maintenance (priming and cleaning), but their unwavering reliability in the cold makes them the professional’s choice for winter and high-altitude expeditions.
| Stove Type | Pros | Cons |
|---|---|---|
| Standard Canister Stove | Lightweight, easy to use, clean burning. | Significant performance drop, potential failure as fuel is used. |
| Liquid Fuel Stove | Excellent, consistent performance in all temperatures, cheaper fuel. | Heavier, requires priming and maintenance, can be messy. |
Ultimately, a successful high-altitude bivouac is a testament to your preparation and understanding. By applying these physiological and technical principles, you shift from being a passive passenger to an active pilot of your own mountain journey. Plan your ascent, manage your body, and select your gear with this knowledge, and you will be rewarded with the profound beauty of the high peaks in safety and comfort.